Linux搭建常用服务器(文章持续更新!!涵盖常用的chrony、ssh、Telnet、httpd、nfs、DNS、selinux、firewall等)
本文目录
- 第一章 例行性工作
- 1.1 单一执行的例行性工作
- 示例1 at命令演示
- 1.2 循环执行的例行性工作
- 示例二:crontab演示
- **演示一:定时执行脚本**
- **演示二:服务器通过邮件定时报告状态**
- 第二章 chrony时间服务器
- 简介
- 2.1 配置服务端
- 2.2 配置客户端
- 第三章远程连接服务器
- 3.1 telnet服务器
- 3.2 ssh服务器
- 简介
- 配置ssh免密登录
- 第四章 WEB服务器
- **4.1 www简介**
- **4.2 服务器主机**
- **4.3 网址及HTTP简介**
- **URL**
- **http请求方法:**
- **HTTP协议请求的工作流程:**
- **4.4 www服务器的类型**
- 静态网站
- 动态网站
- 4.5 实验一:快速建站
- 4.6 实验二:区分用户和端口的网站
- 4.7 实验三:综合项目,搭建一个公司网站
- 4.8 实验四:配置DNS的正反向解析
- 4.9 实验五:使用LAMP架构搭建私有云存储
- 第五章防火墙iptables&firewall
- 5.1 SELinux
- **概念**
- **文件安全上下文查看**
- **字段解释:**
- **SELinux的启动、关闭与查看**
- 模式管理
- 第六章 综合实验:分布式网站部署
- 6.1 基础配置-准备工作
- 6.2 环境搭建
- 6.2.1 NFS端配置
- 6.2.2 远程共享配置
- 6.2.3 httpd设置
- 6.2.4 修改wordpress配置文件
- 6.2.5 数据库配置
- 6.3 配置DNS
第一章 例行性工作
1.1 单一执行的例行性工作
使用at命令来一次性执行例行性任务
一般情况下at是默认安装在系统中的
[root@server ~]# at -V at version 3.1.23 at命令的相关参数:
-l Is an alias for atq.#列出系统中所有用户的at命令 -d deletes jobs, identified by their job number.#删除指定编号的任务 -v Shows the time the job will be executed before reading the job.#使用时间格式累出at任务 Times displayed will be in the format "Thu Feb 20 14:50:001997". -c cats the jobs listed on the command line to standard output#列出任务的命令内容 -f file Reads the job from file rather than standard input.#从文件读取 示例1 at命令演示
[root@server ~]# at 22:07 warning: commands will be executed using /bin/sh at> ls /root >> at.txt at> job 1 at Mon Aug 21 22:07:00 2023 [root@server ~]# at -l 1 Mon Aug 21 22:07:00 2023 a root [root@server ~]# at -c 1 ... SSH_TTY=/dev/pts/0; export SSH_TTY cd /root || { echo 'Execution directory inaccessible' >&2 exit 1 } ${SHELL:-/bin/sh} << 'marcinDELIMITER5a2a43cb' ls /root > at.txt marcinDELIMITER5a2a43cb [root@server ~]# cat at.txt anaconda-ks.cfg at.txt [root@server ~]# cat at.txt hello again [root@server ~]# ls /etc/at.* /etc/at.allow /etc/at.deny 注意:at命令有黑/白名单,当两个名单重复则忽略黑名单,若两个文件不存在则只有root用户可用
1.2 循环执行的例行性工作
crontd服务
注意:
- crontab命令有黑/白名单,当两个名单重复则忽略黑名单
- crontab 执行的每一项工作都会被 记录到 /var/log/cron 这个日志文件中
- 当用户使用 crontab 新建工作之后,该项工作就会被记录到 /var/spool/cron/目录里面
参数:
-u 只有root才能执行该任务 -e 编辑crontab工作内容 -l 查询crontab任务内容 -r 删除cronatb任务 格式:
.---------------- minute (0 - 59) | .------------- hour (0 - 23) | | .---------- day of month (1 - 31) | | | .------- month (1 - 12) OR jan,feb,mar,apr ... | | | | .---- day of week (0 - 6) (Sunday=0 or 7) OR sun,mon,tue,wed,thu,fri,sat | | | | | * * * * * user-name command to be executed 特殊字符:
* : 任意时刻 - :表示范围 , :分割时段 */num :指定时间间隔频率 示例二:crontab演示
演示一:定时执行脚本
- 编写脚本:
#!/bin/bash while : do echo "this is my test sh"$(date) >> /root/cro.txt sleep 1 done - 设置周期计划任务
[root@server ~]# crontab -e(写入*/1 * * * * /bin/bash /root/test.sh) crontab: no changes made to crontab [root@server ~]# crontab -l */1 * * * * /bin/bash /root/test.sh - 查看文件

- 删除任务
[root@server ~]# crontab -r [root@server ~]# crontab -l no crontab for root - 终止进程
[root@server ~]# ps -aux | grep test root 2723 0.1 0.1 222516 3412 ? Ss 23:14 0:00 /bin/bash /root/test.sh [root@server ~]# kill -9 2723 演示二:服务器通过邮件定时报告状态
- 开启邮箱的pop3/SMTP服务并获取授权码
- 安装邮件服务
yum install s-nail.x86_64 -y - 配置邮件服务
在文件vim /etc/s-nail.rc中末尾添加 set from=2300000080@qq.com set smtp=smtp.qq.com set smtp-auth-user=2300000080@qq.com set smtp-auth-password=tg************fd<<这是授权码 set smtp-auth=login - 设置周期的邮件服务告知服务器的内存信息
#测试每分钟发一次 [root@server ~]# crontab -e MAILTO=23*********80@qq.com * * * * * free | mail -v -s "告警邮件" 230000000080@qq.com 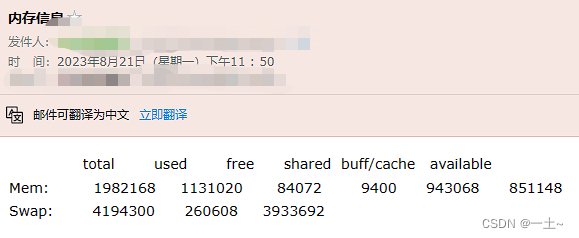
- 系统级别的定时任务需要编辑
/etc/crontab文件来实现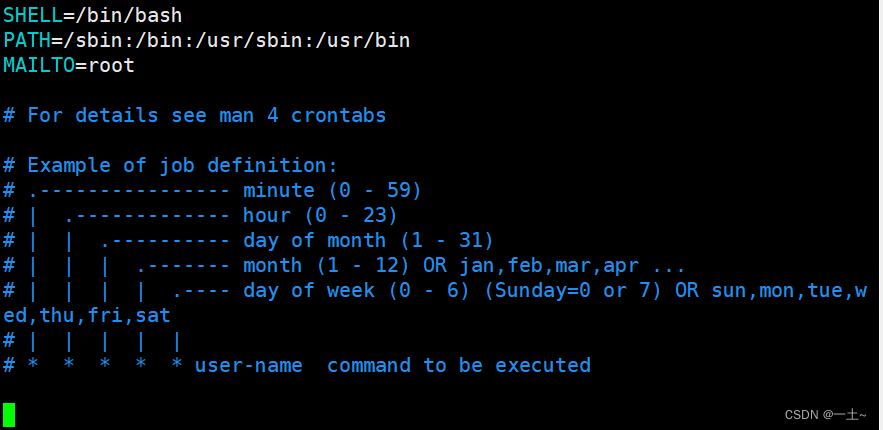
SHELL=/bin/bash#指定哪个shell解释器 PATH=/sbin:/bin:/usr/sbin:/usr/bin#系统执行命令的搜索路径 MAILTO=root#表示执行任务的信息通过邮件发送给谁 第二章 chrony时间服务器
简介
NTP
NTP:(Network Time Protocol,网络时间协议)是由RFC 1305定义的时间同步协议,用来在分布式时间服务器和客户端之间进行时间同步。
NTP基于UDP报文进行传输,使用的UDP端口号为123
NTP可以对网络内所有具有时钟的设备进行时钟同步,使网络内所有设备的时钟保持一致,从而使设备能够提供基于统一时间的多种应用,对于运行NTP的本地系统,既可以接受来自其他时钟源的同步,又可以作为时钟源同步其他的时钟,并且可以和其他设备互相同步。
NTP的其精度在局域网内可达0.1ms,在互联网上绝大多数的地方其精度可以达到1-50ms
Chronychrony是一个开源的自由软件,它能帮助你保持系统时钟与时钟服务器(NTP)同步,因此让你的时间保持精确。
chrony由两个程序组成,分别是chronyd和chronyc
- chronyd:是一个后台运行的守护进程,用于调整内核中运行的系统时钟和时钟服务器同步。它确定计算机增减时间的比率,并对此进行补偿。
- chronyc:提供了一个用户界面,用于监控性能并进行多样化的配置。它可以在chronyd实例控制的计算机上工作,也可以在一台不同的远程计算机上工作
注意:Chrony与NTP都是时间同步软件,两个软件不能够同时开启,会出现时间冲突,RHEL9中默认使用chrony作为时间服务器,不在支持NTP软件包
2.1 配置服务端
- 安装chrony
#安装chrony,一般默认就有 [root@server ~]# yum install chrony -y - 查看服务状态

- 配置文件解读
[root@server ~]# vim /etc/chrony.conf # 配置时间服务器,以server开头,理论上添加多少时间服务器都可以。 server ntp1.aliyun.com iburst # 根据实际时间计算出服务器增减时间的比率,然后记录到一个文件中,在系统重启后为系统做出最佳时间补偿调整 driftfile /var/lib/chrony/drift #如果系统时钟的偏移量大于1秒,则允许系统时钟在前三次更新中步进。 makestep 1.0 3 # 将启用一个内核模式,在该模式中,系统时间每1分钟会拷贝到实时时钟(RTC)。 rtcsync # 指定一台主机、子网,或者网络以允许或拒绝向自己同步时间 #allow 192.168.0.0/16 #deny 192.168/16 allow 192.168.0.0/16 允许该网段客户端来同步时间 # 当chrony服务器提供的时间不可用时,采用本地时间作为同步标准继续作为时间服务器让其他主机来同步时间 local stratum 10 # 指定包含NTP验证密钥的文件 keyfile /etc/chrony.keys # 指定存放日志文件的目录 logdir /var/log/chrony #选择日志文件要记录的信息 log measurements statistics tracking - 修改
/etc/chrony.conf文件,修改后使用systemctl restart chronyd命令重启服务
修改第三行和第25行 3 server ntp.aliyun.com iburst#指定服务器 25 allow 192.168.110.0/24#允许哪个客户端访问 - 验证一下是否可用
- 修改一个错误的时间
[root@server ~]# date -s "12:00:00 19970101" 1997年 01月 01日 星期三 12:00:00 CST - 使用
chronyc sources -v来查看与阿里云时间服务器的连接情况
[root@server ~]# chronyc sources -V MS Name/IP address Stratum Poll Reach LastRx Last sample =============================================================================== ^* 203.107.6.88 2 6 377 44 -1654us[-2677us] +/- 29ms - 使用
chronyc -a makestep强制进行时间跳跃到ntp服务器的时间并用timedatectl status查看同步状态
[root@server ~]# chronyc -a makestep 200 OK [root@server ~]# timedatectl set-ntp true [root@server ~]# timedatectl status Local time: 二 2023-08-22 00:28:57 CST Universal time: 一 2023-08-21 16:28:57 UTC RTC time: 一 2023-08-21 16:28:57 Time zone: Asia/Shanghai (CST, +0800) System clock synchronized: yes <<<<<表示已经同步 NTP service: active RTC in local TZ: no 此时服务器端配置完成
2.2 配置客户端
客户端同样安装软件
- 修改配置文件
/etc/chrony.conf
3 server 192.168.110.131 iburst - 查看状态
[root@node1 ~]# chronyc sources -V MS Name/IP address Stratum Poll Reach LastRx Last sample =============================================================================== ^* 192.168.110.131 3 6 7 1 +7272ns[-9350us] +/- 31ms [root@node1 ~]# timedatectl status Local time: 二 2023-08-22 00:50:52 CST Universal time: 一 2023-08-21 16:50:52 UTC RTC time: 一 2023-08-21 16:50:52 Time zone: Asia/Shanghai (CST, +0800) System clock synchronized: yes NTP service: active RTC in local TZ: no 配置成功,同步完成了
第三章远程连接服务器
3.1 telnet服务器
不安全的远程连接
#安装 yum install telnet-server.x86_64 -y #启动 systemctl start telnet.socket 使用Xshell进行telnet连接,并抓包查看明文传输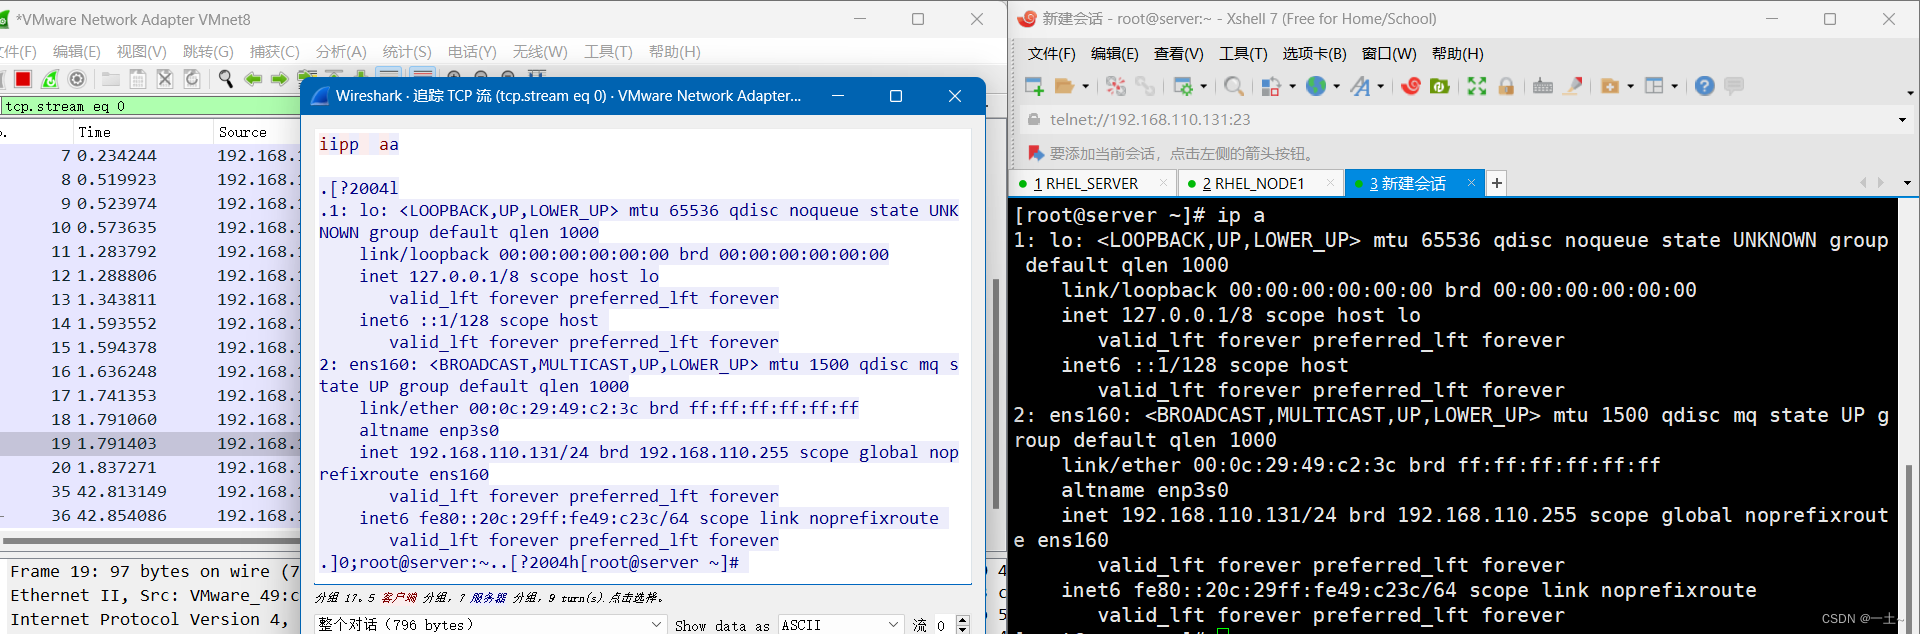
3.2 ssh服务器
简介
SSH工作过程:
- 服务端与客户端要经历如下五个阶段:
| 过程 | 说明 |
|---|---|
| 版本号协商阶段 | SSH目前包括SSH1和SSH2两个版本,双方通过版本协商确定使用的版本 |
| **密钥和算法协商阶段 ** | SSH支持多种加密算法,双方根据本端和对端支持的算法,协商出最终使用的算法 |
| 认证阶段 | SSH客户端向服务器端发起认证请求,服务器端对客户端进行认证 |
| 会话请求阶段 | 认证通过后,客户端向服务器端发送会话请求 |
| 交互会话阶段 | 会话请求通过后,服务器端和客户端进行信息的交互 |
版本协商阶段
服务器端打开端口22,等待客户端连接;
客户端向服务器端发起TCP初始连接请求,TCP连接建立后,服务器向客户端发送第一个报文,包括版本标志字符串,格式为
SSH-<主协议版本号>.<次协议版本号>.<软件版本号>,协议版本号由主版本号和次版本号组成,软件版本号主要是为调试使用。客户端收到报文后,解析该数据包,如果服务器的协议版本号比自己的低,且客户端能支持服务器端的低版本,就使用服务器端的低版本协议号,否则使用自己的协议版本号。
客户端回应服务器一个报文,包含了客户端决定使用的协议版本号。服务器比较客户端发来的版本号,决定是否能同客户端一起工作。如果协商成功,则进入密钥和算法协商阶段,否则服务器断开TCP连接
注意:上述报文都是采用明文方式传输
密钥和算法协商阶段
服务器端和客户端分别发送算法协商报文给对端,报文中包含自己支持的公钥算法列表、加密算法列表、MAC(Message Authentication Code,消息验证码)算法列表、压缩算法列表等等
服务器端和客户端根据对端和本端支持的算法列表得出最终使用的算法
服务器端和客户端利用DH交换(Diffie-Hellman Exchange)算法、主机密钥对等参数,生成会话密钥和会话ID。
由此,服务器端和客户端就取得了相同的会话密钥和会话ID。对于后续传输的数据,两端都会使用会话密钥进行加密和解密,保证了数据传送的安全。在认证阶段,两端会使用会话用于认证过程
会话密钥的生成:
- 客户端需要使用适当的客户端程序来请求连接服务器,服务器将服务器的公钥发送给客户端。(服务器的公钥产生过程:服务器每次启动sshd服务时,该服务会主动去找/etc/ssh/ssh_host*文件,若系统刚装完,由于没有这些公钥文件,因此sshd会主动去计算出这些需要的公钥文件,同时也会计算出服务器自己所需要的私钥文件)。
- 服务器生成会话ID,并将会话ID发给客户端。
- 若客户端第一次连接到此服务器,则会将服务器的公钥数据记录到客户端的用户主目录内的~/.ssh/known_hosts。若是已经记录过该服务器的公钥数据,则客户端会去比对此次接收到的与之前的记录是否有差异。客户端生成会话密钥,并用服务器的公钥加密后,发送给服务器。
- 服务器用自己的私钥将收到的数据解密,获得会话密钥。
- 服务器和客户端都知道了会话密钥,以后的传输都将被会话密钥加密
认证阶段(两种认证方法):
基于口令的认证(password认证):客户端向服务器发出password认证请求,将用户名和密码加密后发送给服务器,服务器将该信息解密后得到用户名和密码的明文,与设备上保存的用户名和密码进行比较,并返回认证成功或失败消息。
基于密钥的认证(publickey认证):
- 客户端产生一对公共密钥,将公钥保存到将要登录的服务器上的那个账号的家目录的 .ssh/authorized_keys 文件中**
- 认证阶段:客户端首先将公钥传给服务器端。服务器端收到公钥后会与本地该账号家目录下的authorized_keys中的公钥进行对比,如果不相同,则认证失败;否则服务端生成一段随机字符串,并先后用客户端公钥和会话密钥对其加密,发送给客户端。客户端收到后将解密后的随机字符串用会话密钥发送给服务器。如果发回的字符串与服务器端之前生成的一样,则认证通过,否则,认证失败。
注:服务器端对客户端进行认证,如果认证失败,则向客户端发送认证失败消息,其中包含可以再次认证的方法列表。客户端从认证方法列表中选取一种认证方法再次进行认证,该过程反复进行。直到认证成功或者认证次数达到上限,服务器关闭连接为止
ssh服务系统默认自带
安装:yum install openssh-server
配置ssh免密登录
- 服务端创建redhat用户,并设置密码
[root@server ~]# useradd redhat [root@server ~]# passwd redhat 更改用户 redhat 的密码 。 新的密码: 无效的密码: 密码少于 8 个字符 重新输入新的密码: passwd:所有的身份验证令牌已经成功更新。 - 客户端生成公私钥对,上传给服务器的redhat用户
[root@node1 ~]# ssh-keygen -t rsa #<<不输东西,一路回车 Generating public/private rsa key pair. Enter file in which to save the key (/root/.ssh/id_rsa): Created directory '/root/.ssh'. Enter passphrase (empty for no passphrase): Enter same passphrase again: Your identification has been saved in /root/.ssh/id_rsa Your public key has been saved in /root/.ssh/id_rsa.pub The key fingerprint is: SHA256:EJhw9eo6zukZmrZ7aT+U0IAg04KYwmpryCbs+f31G5o root@node1 The key‘s randomart image is: +---[RSA 3072]----+ |B+.o.+o | |Boo.+ o | |o. o. . | |.. . .o | |= . ...S | |o* .o | |= . .o. . . | | o.+*=. . + . | | .*OB+oo E o. | +----[SHA256]-----+ #将公钥上传给server的redhat用户 [root@node1 ~]# ssh-copy-id redhat@192.168.110.131 /usr/bin/ssh-copy-id: INFO: Source of key(s) to be installed: "/root/.ssh/id_rsa.pub" The authenticity of host '192.168.110.131 (192.168.110.131)' can’t be established. ED25519 key fingerprint is SHA256:iPPpVwQBFSX//xH3pUjZVklEVPozcl+iv4mX1Tb3gZs. This key is not known by any other names Are you sure you want to continue connecting (yes/no/[fingerprint])? yes <<这里输yes /usr/bin/ssh-copy-id: INFO: attempting to log in with the new key(s), to filter out any that are already installed /usr/bin/ssh-copy-id: INFO: 1 key(s) remain to be installed -- if you are prompted now it is to install the new keys redhat@192.168.110.131’s password: <<<这里密码不回显 Number of key(s) added: 1 Now try logging into the machine, with: "ssh 'redhat@192.168.110.131'" and check to make sure that only the key(s) you wanted were added. - 测试
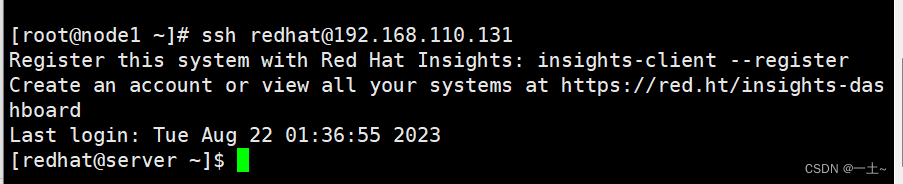
此时可通过redhat账户进行免密登录
第四章 WEB服务器
4.1 www简介
Web网络服务也叫WWW(World Wide Web 全球信息广播)万维网服务,一般是指能够让用户通过浏览器访问到互联网中文档等资源的服务
Web 网络服务是一种被动访问的服务程序,即只有接收到互联网中其他主机发出的请求后才会响应,最终用于提供服务程序的 Web 服务器会通过 HTTP(超文本传输协议)或HTTPS(安全超文本传输协议)把请求的内容传送给用户
4.2 服务器主机
网站是由域名、网页源程序和主机空间组成的,其中主机空间则是用于存放网页源代码并能够将网页内容展示给用户,虽然本小节与Apache服务没有直接关系,但如果您想要在互联网中搭建网站并被顺利访问,主机空间一定不能选错
虚拟主机:在一台服务器中分出一定的磁盘空间供用户放置网站、存放数据等,仅提供基础的网站访问、数据存放与传输流量功能,能够极大的降低用户费用,也几乎不需要管理员维护除网站数据以外的服务,适合小型网站
VPS(Virtual Private Server):在一台服务器中利用OpenVZ、Xen或KVM等虚拟化技术模拟出多个“主机”,每个主机都有独立的IP地址、操作系统,实现不同VPS之间磁盘空间、内存、CPU资源、进程与系统配置间的完全隔离,管理员可自由使用分配到的主机中的所有资源,所以需要有一定的维护系统的能力,适合小型网站
云服务器(ECS):是一种整合了计算、存储、网络,能够做到弹性伸缩的计算服务,其使用起来与VPS几乎一样,但差别是云服务器建立在一组集群服务器中,每个服务器都会保存一个主机的镜像(备份),大大的提升了安全稳定性,另外还具备了灵活性与扩展性,用户只需按使用量付费的即可,适合大中小型网站。
独立服务器:这台服务器仅提供给您使用,详细来讲又可以区分为租用方式与托管方式
- 租用方式:用户只需将硬件配置要求告知IDC服务商,服务器硬件设备由机房负责维护,运维管理员一般需要自行安装相应的软件并部署网站服务,租期可以为月、季、年,减轻了用户初期对硬件设备的投入,适合大中型网站。
- 托管方式:用户需要自行购置服务器后交给IDC服务供应商的机房进行管理(缴纳管理服务费用),用户对服务器硬件配置有完全的控制权,自主性强,但需要自行维护、修理服务器硬件设备,适合大中型网站。
4.3 网址及HTTP简介
- web服务器提供的这些数据大部分都是文件,那么我们需要在服务器端先将数据文件写好,并且放置在某个特殊的目录下面,这个目录就是我们整个网站的首页,在redhat中,这个目录默认在
/var/www/html。 - 浏览器是通过你在地址栏中输入你所需要的网址来取得这个目录的数据的
URL
- Uniform Resource Locator,统一资源定位符,对可以从互联网上得到的资源的位置和访问方法的一种简洁的表示,是互联网上标准资源的地址
- 网址格式:
<协议>://<主机或主机名>[:port]/<目录资源,路径>** - 协议::http、https、ftp等
- 主机地址或者主机名:主机地址就是服务器在因特网所在的IP地址。如果是主机名的话,那么就需要域名解析了
- 端口号(port):http为80,https为443 (IANA:互联网数字分配机构)
- 0-1023:永久地分配给固定的应用程序使用
- 1024-41951:注册端口,但要求不是特别严格,分配给程序注册为某应用使用
- 41952-60000:客户端程序随机使用的端口,动态端口,或私有端口
http请求方法:
- 在http通信中,每个http请求报文都包含一个方法,用以告诉web服务器端需要执行哪些具体的动作,这些动作包括:获取指定web页面、提交内容到服务器、删除服务器上资源文件等。
- 状态代码:由三位数字组成,第一个数字定义了响应的类别,且有五种可能取值
- 1xx:指示信息 —— 表示请求已接收,继续处理
- 2xx:成功 —— 表示请求已被成功接收、理解、接
- 3xx:重定向 —— 要完成请求必须进行更进一步的操作
- 4xx:客户端错误 —— 请求有语法错误或请求无法实现
0n - 5xx:服务器端错误 —— 服务器未能实现合法的请求 - 常见状态代码、状态描述的说明如下:
- 200 OK:客户端请求成功
- 400 Bad Request:客户端请求有语法错误,不能被服务器所理解
- 401 Unauthorized:请求未经授权,这个状态代码必须和 WWW-Authenticate 报头域一起使用
- 403 Forbidden:服务器收到请求,但是拒绝提供服务
- 404 Not Found:请求资源不存在,举个例子:输入了错误的URL
- 500 Internal Server Error:服务器发生不可预期的错误
- 503 Server Unavailable:服务器当前不能处理客户端的请求,一段时间后可能恢复正常
HTTP协议请求的工作流程:
终端客户在web浏览器地址栏输入访问地址:
http://www.ceshi.com:80/index.htmlweb浏览器请求DNS服务器把域名www.ceshi.com解析成web服务器的IP地址
web浏览器将端口号(默认是80)从访问地址(URL)中解析出来
web浏览器通过解析后的ip地址及端口号与web服务器之间建立一条TCP连接
建立TCP连接后,web浏览器向web服务器发送一条HTTP请求报文
web服务器响应并读取浏览器的请求信息,然后返回一条HTTP响应报文。
web服务器关闭HTTP连接,关闭TCP连接,web浏览器显示访问的网站内容到屏幕上
4.4 www服务器的类型
静态网站
- 仅提供用户浏览的单向静态网页,单纯是由服务器单向提供数据给客户端,Server不需要与client端有互动,可以浏览网站,但是无法数据上传。
动态网站
该站可以让服务器与用户互动,常见的例如留言板,博客。这种类型的网站需要通过“网页程序语言”来实现与用户互动的行为。常见的例如:PHP网页程序语言,配合数据库系统来进行数据的读、写。当你在向服务器请求数据时,其实是通过服务器端同一个网页程序在负责将数据读出或写入数据库,变动的是数据库的内容,网页程序并没有任何改变。
另外一种交互式的动态网页主要是在客户端实现。服务端将可执行的程序代码(JavaScript)传送给客户端,客户端的浏览器如果提供JavaScript的功能,那么该程序就可以在客户端的计算机上面工作了;另外一种可在客户端执行的就是flash动画格式,在这种动画格式内还可以进行程序设计
搭建动态网站的需求:LAMP(Linux+Apache+MySQL+PHP)
- Apache主要提供www的服务器平台
- MySQL:传统的文件读取是很麻烦的,如果只要读取该文件当中的一小部分,系统还是会将整个文件读出来,若多个用户同时读取同一个文件时,那就会造成效率与系统上的问题,所以才会有数据库系统的推出。数据库其实是一种特殊格式的文件,这种文件要通过特殊接口(数据库软件)来进行读写。由于这个特殊接口已经针对数据的查询、写入做过优化设计,因此很适合多人同时写入与查询工作。
- PHP:PHP可以被用来建立动态网页,PHP程序代码可以直接在HTML网页当中嵌入,就像编辑HTML网页一样简单。PHP是一种“程序语言”,这种程序语言可以直接在网页当中编写,不需要经过编译即可执行。
4.5 实验一:快速建站
httpd的配置目录
/etc/httpd # 主配置文件所在目录 /etc/httpd/conf/httpd.conf # 主配置文件 /var/www/html/ # 存储默认网页的目录 /var/log/httpd/ # 存储网站访问日志及错误日志的目录 httpd的主配置文件
34 ServerRoot "/etc/httpd"#服务目录 47 Listen 80#监听端口 61 Include conf.modules.d/*.conf#额外的配置文件 71 User apache#运行服务的用户 72 Group apache#运行服务的组 91 ServerAdmin root@localhost#管理员邮箱 100 ServerName www.example.com:80#域名和端口号 107 第一步:下载httpd,启动服务器
[root@leqingserver ~]# yum install httpd -y [root@leqingserver ~]# systemctl start httpd 第二步:写一个网页,重启服务并访问
[root@leqingserver ~]# echo "welcome to myblog" > /var/www/html/index.html [root@leqingserver ~]# systemctl restart httpd 第三步:输入服务器IP访问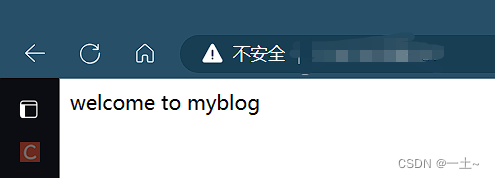
把网页放在默认的目录是不安全的,接下来尝试更改一下配置文件来让网页换一个目录存放
1.创建一个目录,并给这个目录里面放一个网页文件
[root@leqingserver ~]# mkdir /web1 [root@leqingserver ~]# ls /web1/ index.html 2.修改主配置文件,重启服务并测试
DocumentRoot "/web1" AllowOverride None Require all granted [root@leqingserver ~]# systemctl restart httpd 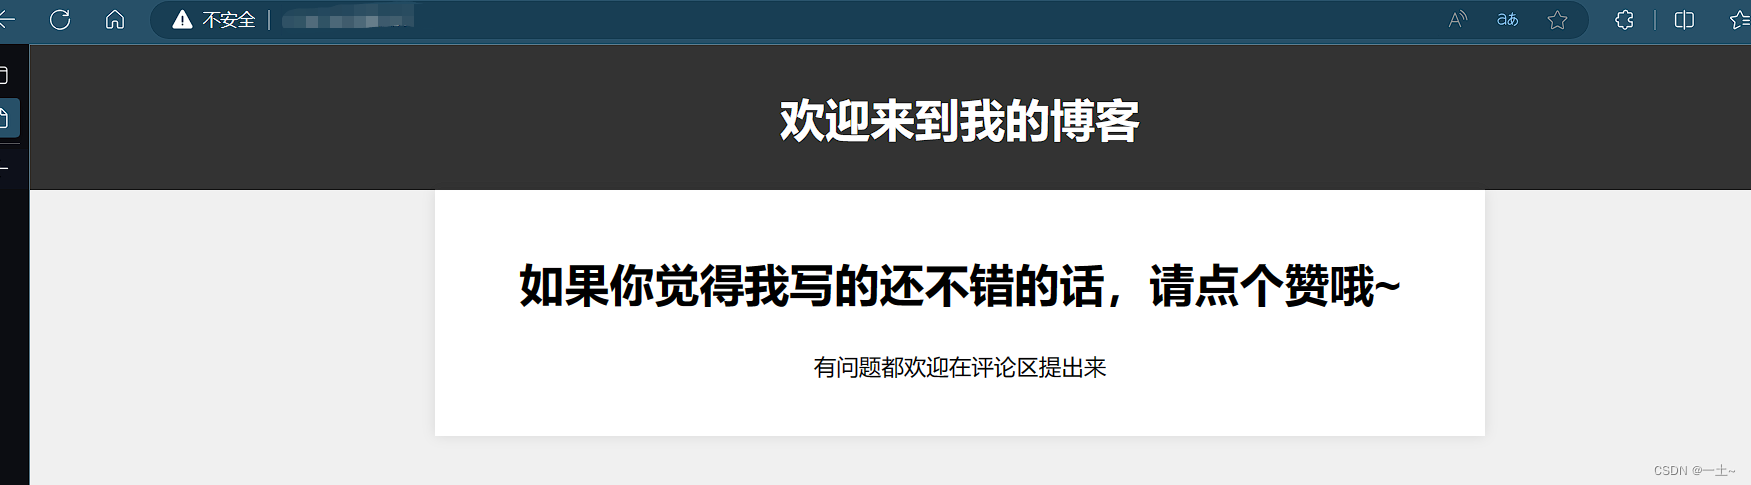
4.6 实验二:区分用户和端口的网站
- 编辑用户配置文件
[root@leqingserver ~]# vim /etc/httpd/conf.d/userdir.conf 17 #UserDir disabled#将这行注释掉开启用户主页功能 24 UserDir public_html#去掉这行的注释,启动用户的默认目录 - 新建账户设置权限
[root@leqingserver ~]# useradd andy [root@leqingserver ~]# passwd andy Changing password for user andy. New password: BAD PASSWORD: The password is shorter than 8 characters Retype new password: #123456 passwd: all authentication tokens updated successfully. [root@leqingserver ~]# useradd jenny [root@leqingserver ~]# passwd jenny Changing password for user jenny. New password: #654321 BAD PASSWORD: The password is shorter than 8 characters Retype new password: passwd: all authentication tokens updated successfully. - 切换账户设置目录和权限
[root@leqingserver ~]# su andy [andy@leqingserver root]$ cd /home/andy/ [andy@leqingserver ~]$ mkdir public_html [andy@leqingserver ~]$ cd public_html/ [andy@leqingserver public_html]$ echo "andy" > index.html [andy@leqingserver public_html]$ ls index.html [andy@leqingserver public_html]$ cd ~ [andy@leqingserver ~]$ chmod -Rf 755 /home/andy/ [andy@leqingserver ~]$ ll total 0 drwxr-xr-x. 2 andy andy 24 Aug 24 17:06 public_html [andy@leqingserver ~]$ su jenny Password: [jenny@leqingserver andy]$ cd /home/jenny/ [jenny@leqingserver ~]$ mkdir public_html [jenny@leqingserver ~]$ cd public_html/ [jenny@leqingserver public_html]$ echo "jenny" > index.html [jenny@leqingserver public_html]$ ls index.html [jenny@leqingserver public_html]$ cd ~ [jenny@leqingserver ~]$ chmod -Rf 755 /home/jenny/ [jenny@leqingserver ~]$ ll total 0 drwxr-xr-x. 2 jenny jenny 24 Aug 24 17:08 public_html - 重启httpd并测试


5.给这两个账户加上访问密码
[root@leqingserver ~]# htpasswd -c /etc/httpd/passwd andy New password: Re-type new password: Adding password for user andy [root@leqingserver ~]# htpasswd /etc/httpd/passwd jenny New password: Re-type new password: Adding password for user jenny [root@leqingserver ~]# vim /etc/httpd/conf.d/userdir.conf authuserfile "/etc/httpd/passwd" authname "My privately" authtype basic require user andy authuserfile "/etc/httpd/passwd" authname "My privately" authtype basic require user jenny 测试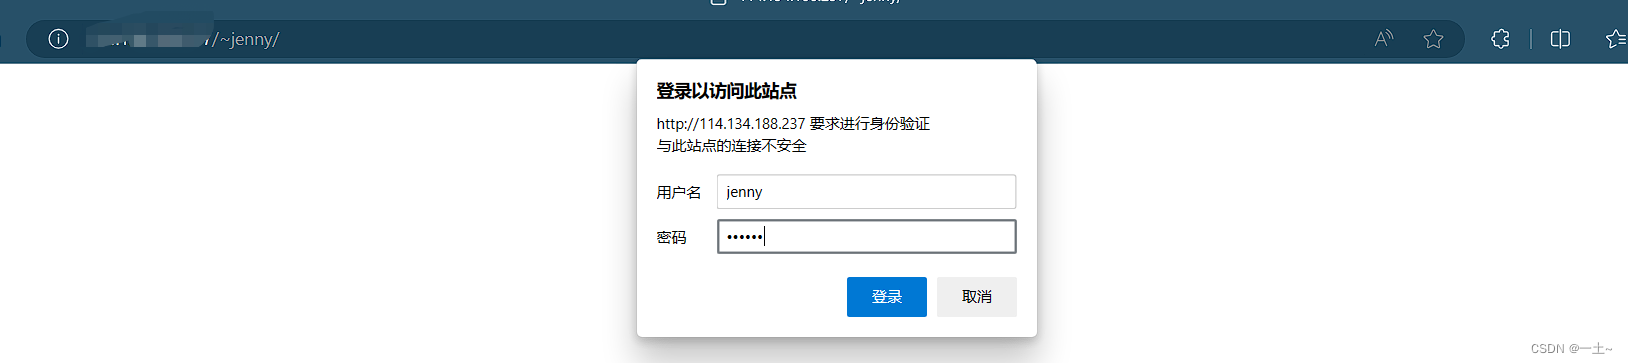

4.7 实验三:综合项目,搭建一个公司网站
这里出现的域名均为虚构域名,无法在公网访问使用虚拟机进行测试
- 安装软件和配置域名解析
#安装软件 yum install httpd mod_ssl -y #本地域名映射 vim /etc/hosts 192.168.110.131 www.open.com - 创建主站目录
mkdir -p /www/open echo 'welcome to open.com' > /www/open/index.html ls /www/open/ index.html - 编辑主配置文件
[root@server ~]# vim /etc/httpd/conf/httpd.conf documentroot /www/open servername 'www.open.com' allowoverride none require all granted [root@server ~]# systemctl restart httpd 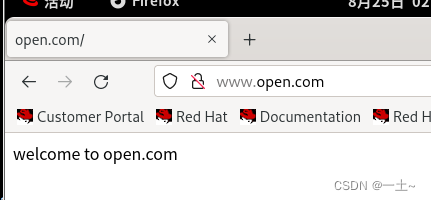
- 创建并编辑子站-教学资料的配置
[root@server ~]# mkdir -p /www/open/data [root@server ~]# echo 'data' > /www/open/data/index.html #编辑配置文件 documentroot /www/open/data alias /data /www/open/data servername 'www.open.com' allowoverride none require all granted 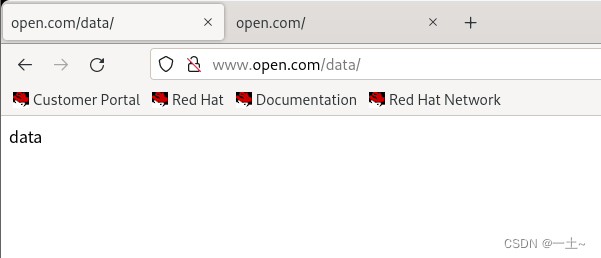
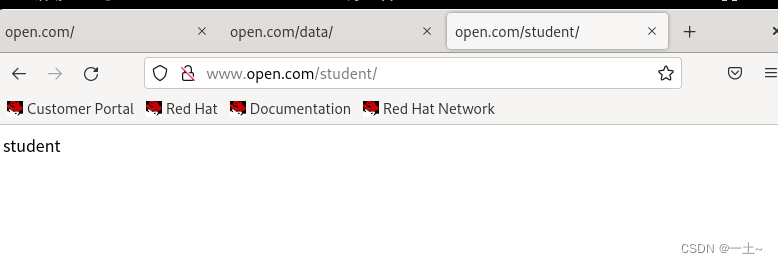
- 创建子站学生信息,只允许学生密码访问
#创建目录和学生用户 [root@server ~]# mkdir -p /www/open/student [root@server ~]# echo 'student' >/www/open/student/index.html [root@server ~]# ls /www/open/student/ index.html [root@server ~]# useradd song [root@server ~]# passwd song 更改用户 song 的密码 。 新的密码: 无效的密码: 密码少于 8 个字符 重新输入新的密码: passwd:所有的身份验证令牌已经成功更新。 [root@server ~]# useradd tian [root@server ~]# passwd tian 更改用户 tian 的密码 。 新的密码: 无效的密码: 密码少于 8 个字符 重新输入新的密码: passwd:所有的身份验证令牌已经成功更新。 设置网页的密码验证:
[root@server ~]# htpasswd -c /etc/httpd/passwd song New password: Re-type new password: Adding password for user song [root@server ~]# htpasswd /etc/httpd/passwd tian New password: Re-type new password: Adding password for user tian [root@server ~]# vim /etc/httpd/conf/httpd.conf authuserfile /etc/httpd/passwd authname 'student' authtype basic require user song tian 重启验证: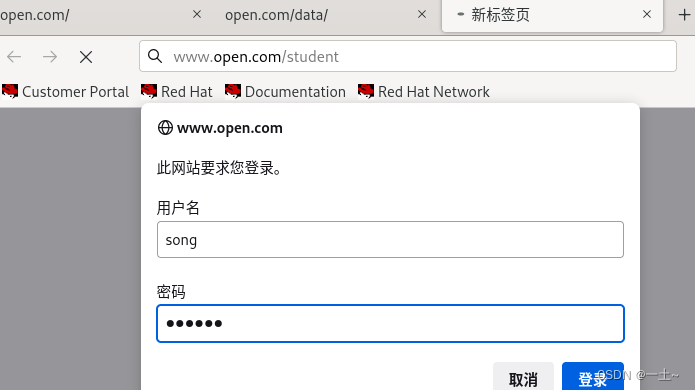
- 创建加密的学生缴费子站
[root@server ~]# mkdir -p /www/open/money [root@server ~]# echo 'money' > /www/open/money/index.html #创建私钥 [root@server ~]# openssl genrsa -aes128 2048 > /etc/pki/tls/private/money.key Enter PEM pass phrase: Verifying - Enter PEM pass phrase: #创建证书 [root@server ~]# openssl req -utf8 -new -key /etc/pki/tls/private/money.key -x509 -days 365 -out /etc/pki/tls/certs/money.crt Enter pass phrase for /etc/pki/tls/private/money.key: You are about to be asked to enter information that will be incorporated into your certificate request. What you are about to enter is what is called a Distinguished Name or a DN. There are quite a few fields but you can leave some blank For some fields there will be a default value, If you enter '.', the field will be left blank. ----- Country Name (2 letter code) [XX]:86#国家 State or Province Name (full name) []:shanxi#省份 Locality Name (eg, city) [Default City]:xianggang#城市 Organization Name (eg, company) [Default Company Ltd]:open#公司 Organizational Unit Name (eg, section) []:money#部门 Common Name (eg, your name or your server's hostname) []:server#主机名 Email Address []:123@qq.com#管理员邮箱 编写主配置文件vim /etc/httpd/conf/httpd.conf
sslengine on SSLCertificatefile /etc/pki/tls/certs/money.crt sslcertificatekeyfile /etc/pki/tls/private/money.key documentroot /www/open alias /money /www/open/money servername 'www.open.com' allowoverride none require all granted [root@server ~]# systemctl restart httpd 🔐 Enter TLS private key passphrase for www.open.com:443 (RSA) : ****** 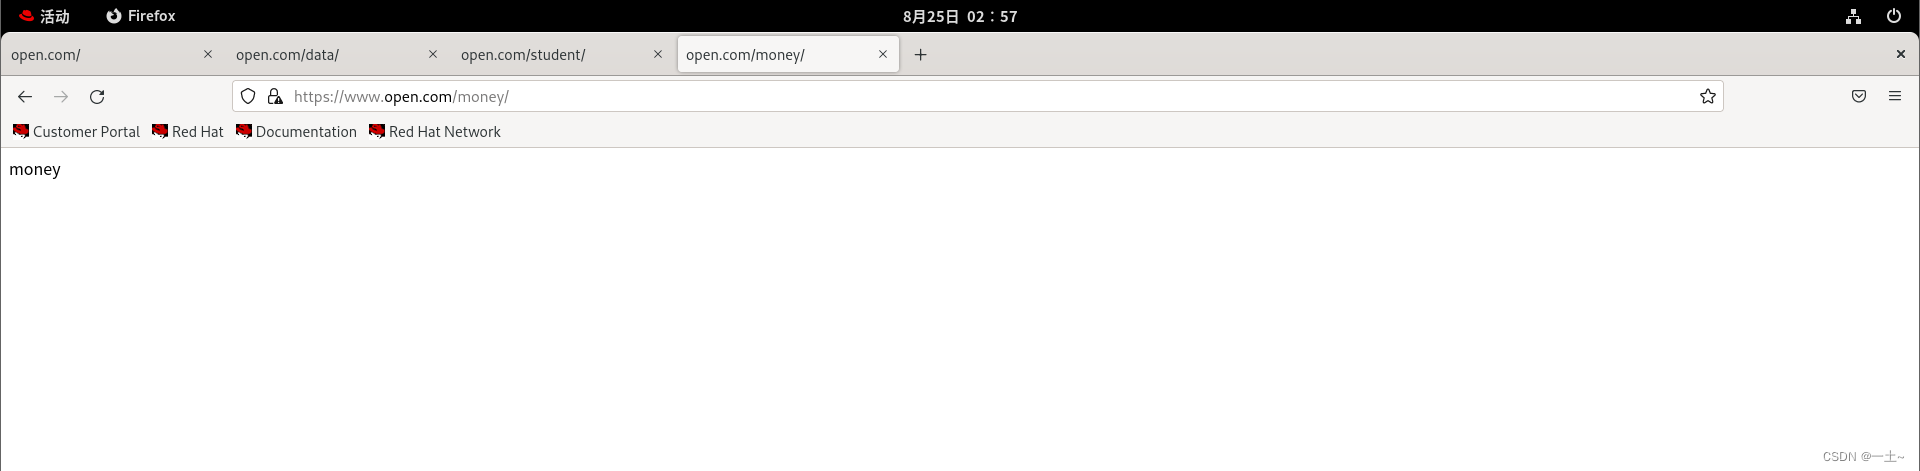
4.8 实验四:配置DNS的正反向解析
- server端安装bind
[root@server ~]\# yum install bind -y 配置服务器正向解析
配置DNS主配置文件
vim /etc/named.conf[root@server ~]\# vim /etc/named.conf 11 listen-on port 53 { 192.168.110.131; };#监听的ip和端口号 19 allow-query { any; };#允许访问的地址编辑区域配置文件的正向解析模块
vim /etc/named.rfc1912.zones[root@server ~]# vim /etc/named.rfc1912.zones zone "zyc.com" IN { type master; file "zyc.com.zone"; allow-update { none; }; };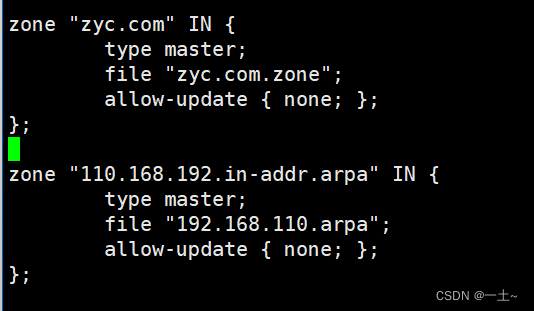
编辑数据配置文件
#将模板复制一份 [root@server ~]\# cp -a /var/named/named.localhost /var/named/zyc.com.zone [root@server ~]\# vim /var/named/zyc.com.zone $TTL 1D zyc.com. IN SOA www.zyc.com. zyc.qq.com ( 0 ; serial 1D ; refresh 1H ; retry 1W ; expire 3H ) ; minimum zyc.com. IN NS www.zyc.com. www.zyc.com. IN A 192.168.110.131 ftp.zyc.com. IN A 192.168.110.131 www6.zyc.com. IN CNAME www.zyc.com.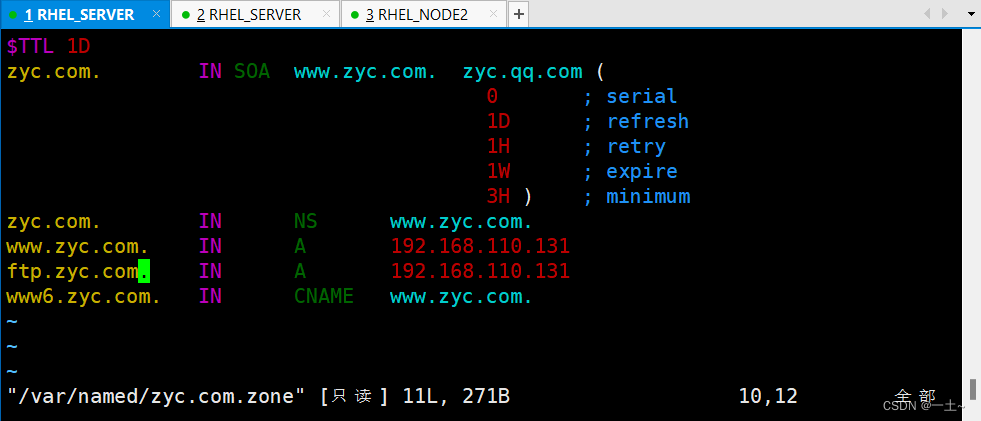
重启服务器
[root@server ~]# systemctl restart named
配置客户端的DNS地址为server的地址,并测试解析结果
编辑网卡配置文件并重启网卡
[root@node2 ~]# vim /etc/NetworkManager/system-connections/ens160.nmconnection [ipv4] address1=192.168.110.133/24,192.168.110.2 dns=192.168.110.131; #这里修改为server的地址 method=manual [root@node2 ~]# nmcli connection reload #重新加载配置文件 [root@node2 ~]# nmcli connection up ens160 #重新激活网卡 连接已成功激活(D-Bus 活动路径:/org/freedesktop/NetworkManager/ActiveConnection/3)测试结果
[root@node2 ~]# nslookup www.zyc.com Server: 192.168.110.131 Address: 192.168.110.131#53 Name: www.zyc.com Address: 192.168.110.131 [root@node2 ~]# nslookup ftp.zyc.com Server: 192.168.110.131 Address: 192.168.110.131#53 Name: ftp.zyc.com Address: 192.168.110.131 [root@node2 ~]# nslookup www6.zyc.com Server: 192.168.110.131 Address: 192.168.110.131#53 www6.zyc.com canonical name = www.zyc.com. Name: www.zyc.com Address: 192.168.110.131
配置服务器反向解析
编辑区域配置文件的反向解析模块
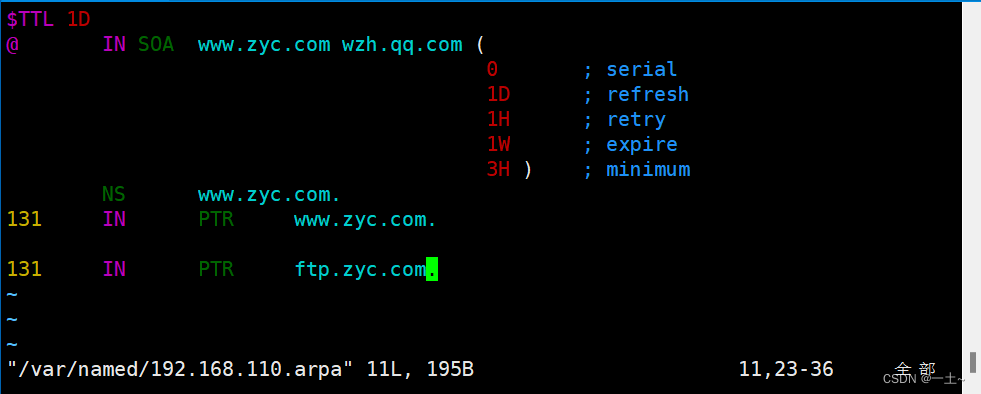
[root@server ~]# vim /etc/named.rfc1912.zones zone "110.168.192.in-addr.arpa" IN { type master; file "192.168.110.arpa"; allow-update { none; }; };编辑反向解析的数据配置文件
[root@server ~]\# cp -a /var/named/named.loopback /var/named/192.168.110.arpa [root@server ~]\# vim /var/named/192.168.110.arpa $TTL 1D @ IN SOA www.zyc.com wzh.qq.com ( 0 ; serial 1D ; refresh 1H ; retry 1W ; expire 3H ) ; minimum NS www.zyc.com. 131 IN PTR www.zyc.com. 131 IN PTR ftp.zyc.com.
重启服务并测试
[root@server ~]# systemctl restart named #重启服务[root@node2 ~]# nslookup #测试正反向解析 > www.zyc.com Server: 192.168.110.131 Address: 192.168.110.131#53 Name: www.zyc.com Address: 192.168.110.131 > 192.168.110.131 131.110.168.192.in-addr.arpa name = ftp.zyc.com. 131.110.168.192.in-addr.arpa name = www.zyc.com.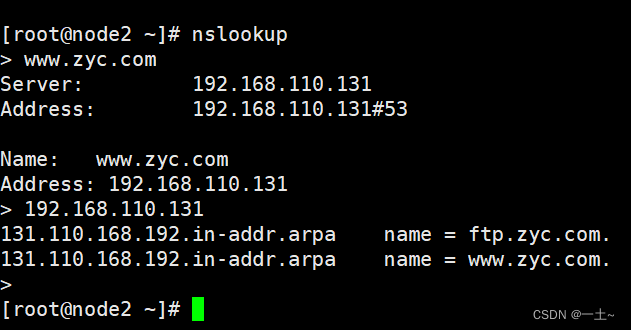
4.9 实验五:使用LAMP架构搭建私有云存储
LAMP简介:
- L:Linux操作系统
- A:Apache网站服务器
- M:MySQL数据库服务器
- P:PHP(或perl,Python)网页编程语言
LAMP架构是目前成熟的企业网站应用模式之一,指的是协同工作的一整台系统和相关软件,能够提供动态web站点服务及其应用开发环境
1. 搭建LAMP环境
yum install httpd mariadb-server php* -y 2. 上传nextcloud-16版本软件包到服务器,并解压缩
#使用xftp或者其他传输工具进行上传 [root@leqingserver ~]\# cd / [root@leqingserver /]\# ls bin dev home lib64 mnt opt root sbin sys usr boot etc lib media nextcloud-16.0.1.zip proc run srv tmp var [root@leqingserver /]\# unzip /nextcloud-16.0.1.zip #解压缩 3. 设置nextcloud的目录权限
[root@leqingserver /]\# chmod -Rf 777 /nextcloud 4. 设置nextcloud的数据库
[root@leqingserver /]# systemctl start mariadb [root@leqingserver /]# mysql Welcome to the MariaDB monitor. Commands end with ; or \g. Your MariaDB connection id is 8 Server version: 10.3.28-MariaDB MariaDB Server Copyright (c) 2000, 2018, Oracle, MariaDB Corporation Ab and others. Type 'help;' or '\h' for help. Type '\c' to clear the current input statement. MariaDB [(none)]> create database nextcloud; Query OK, 1 row affected (0.003 sec) #创建一个数据库 MariaDB [(none)]> create user 'nextcloud'@'localhost' identified by '********'; Query OK, 0 rows affected (0.003 sec) #创建一个用户和密码,此处*号代替密码 MariaDB [(none)]> grant all on nextcloud.* to 'nextcloud'@'localhost'; Query OK, 0 rows affected (0.004 sec) #设置权限 MariaDB [(none)]> exit #退出 Bye [root@leqingserver /]# systemctl restart mariadb #重启服务 5. 配置httpd服务
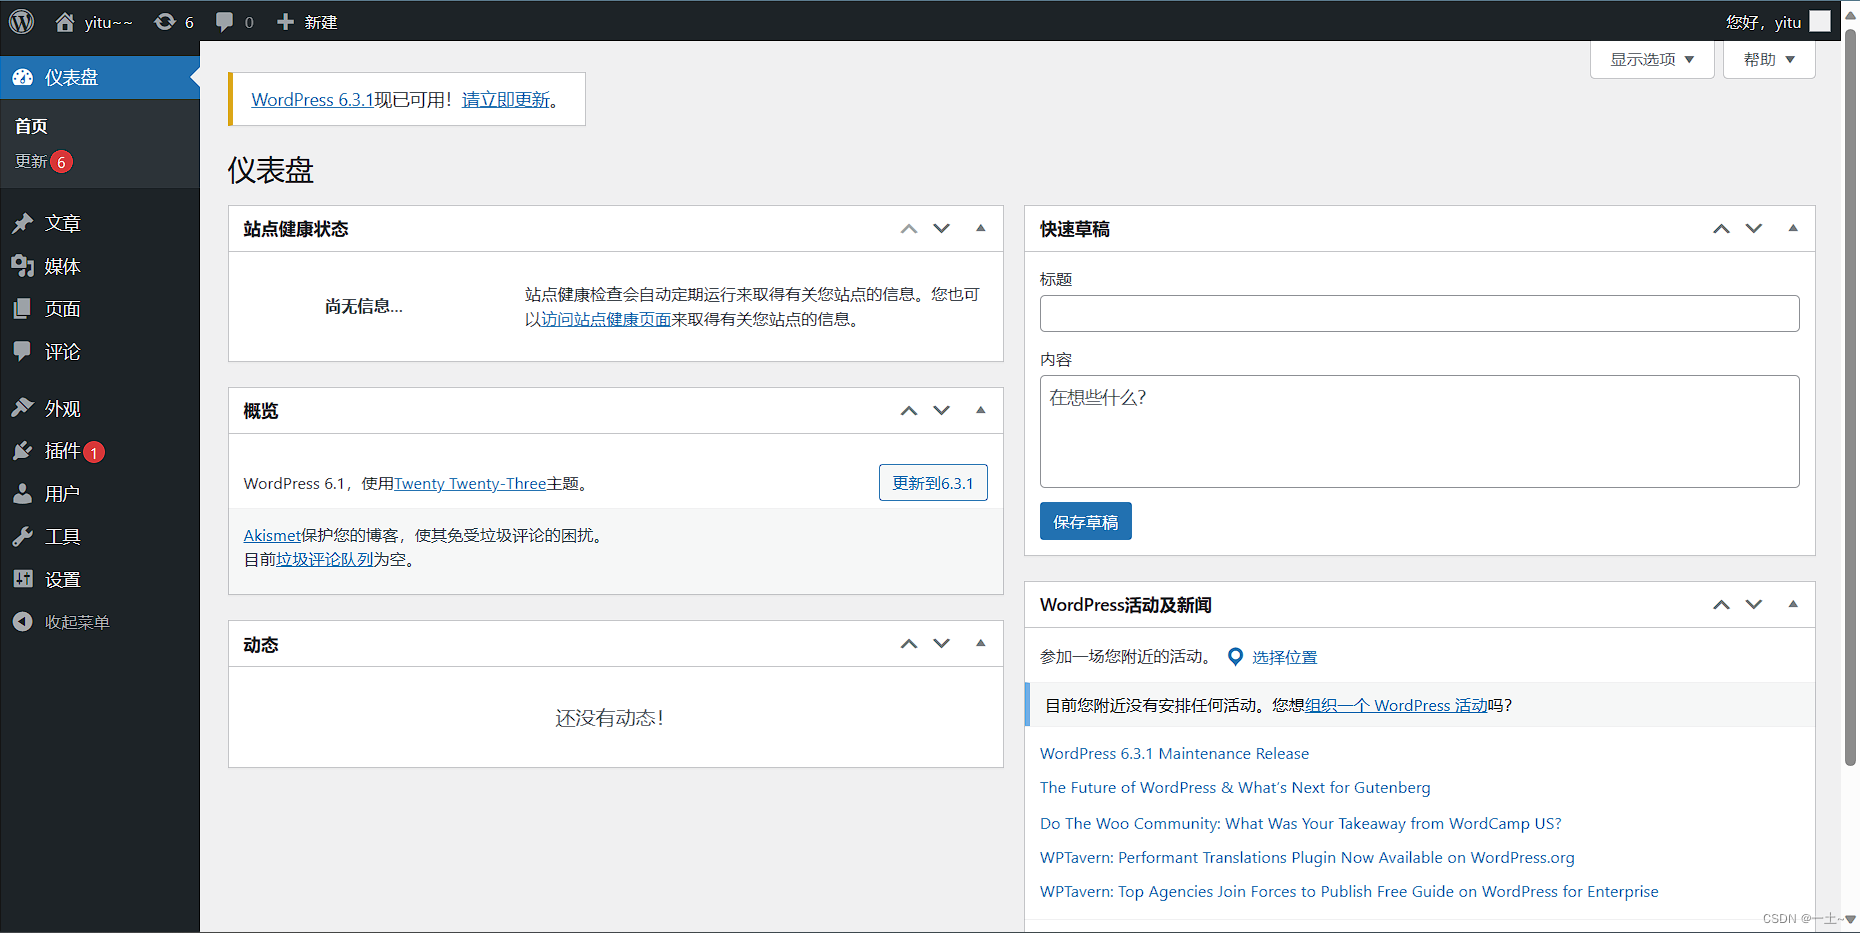
[root@leqingserver ~]\# vim /etc/httpd/conf/httpd.conf 122 DocumentRoot "/nextcloud" # 127 128 AllowOverride None 130 Require all granted 131 [root@leqingserver /]# systemctl restart httpd #重启服务 6. 安装nextcoud
点红色箭头标识处,展开数据库配置
填写数据库相关配置,并创建管理员的账户密码
然后点击安装,并等待安装完成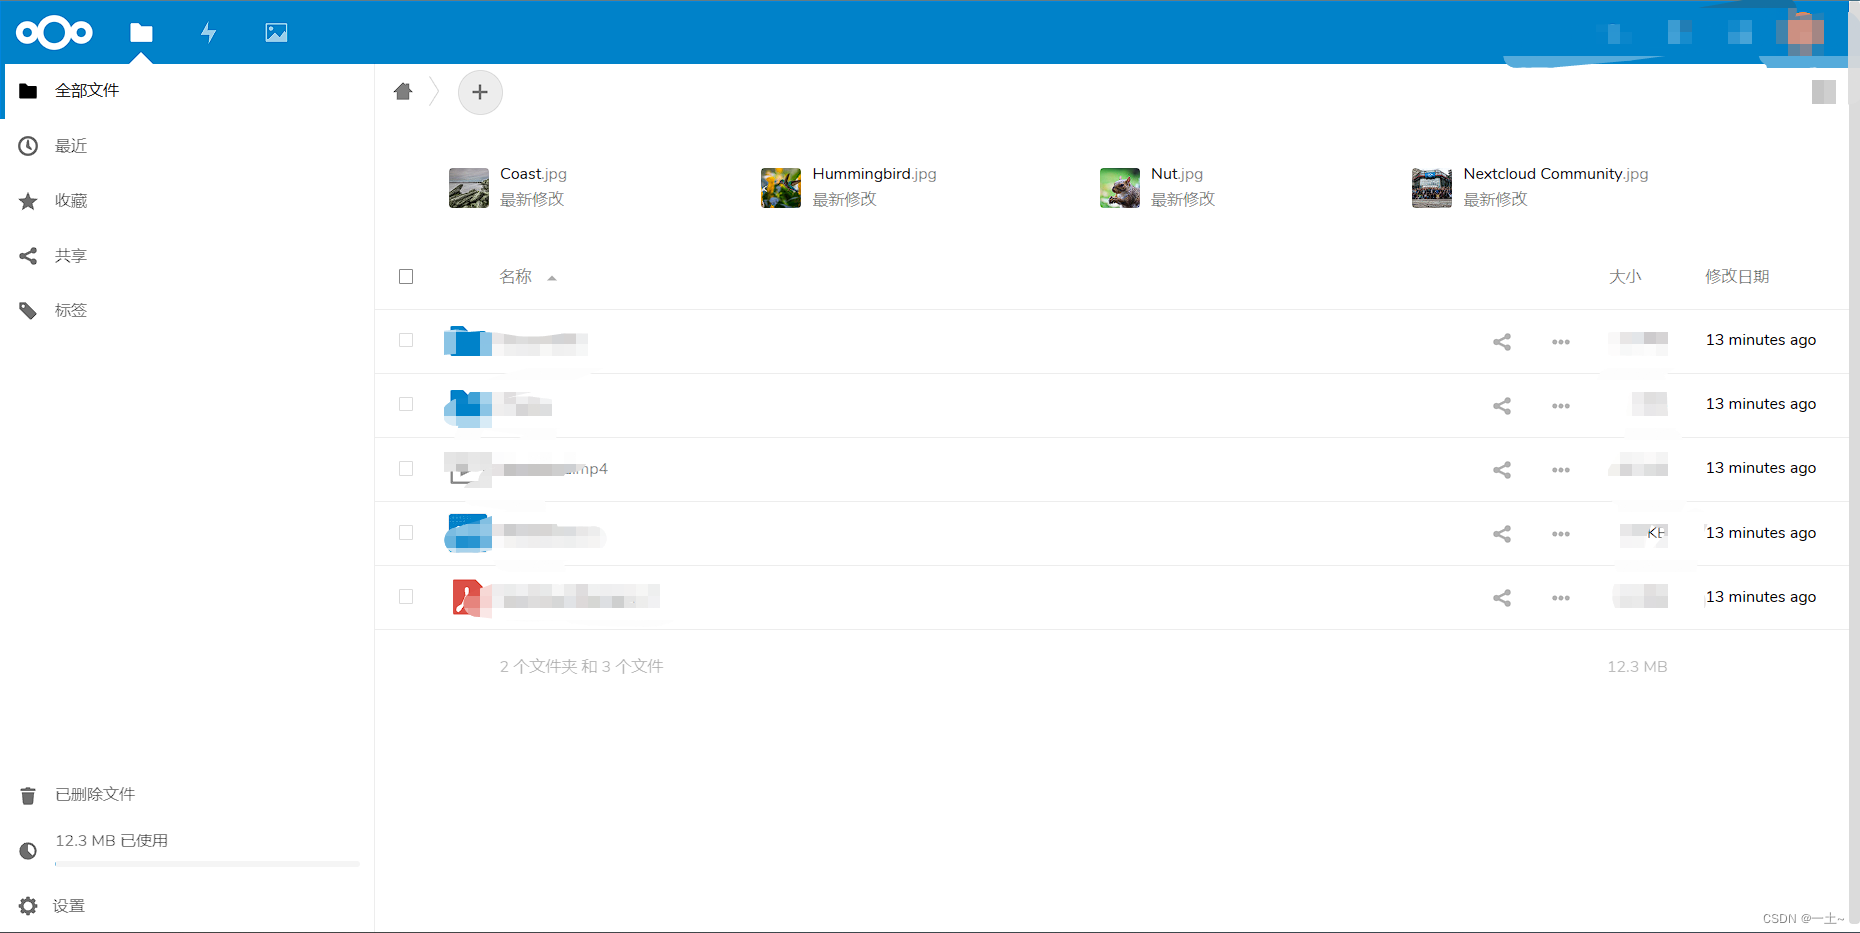
此时我们的私有云存储就部署好了。
第五章防火墙iptables&firewall
5.1 SELinux
概念
SELinux(Security-Enhanced Linux)是美国国家安全局在 Linux 开源社区的帮助下开发的一个强制访问控制(MAC,Mandatory Access Control)的安全子系统,用于各个服务进程都受到约束,使其仅获取到本应获取的资源
作用:
SELinux 域限制:对服务程序的功能进行限制,以确保服务程序做不了出格的事情
SELinux 安全上下文:对文件资源的访问限制,确保文件资源只能被其所属的服务程序访问
SELinux工作原理
主体(Subject):
- 主体就是想要访问的文件或者目录的进程。
- 进程得到资源的流程:用户调用命令,命令产生进程,由进程去访问文件和目录资源
- 自主访问控制系统中(Linux默认权限),靠权限控制的主体是用户。
- 强制访问控制系统中(SELinux),靠策略规则控制的主体是进程。
目标(Object):
- 目标就是需要访问的文件或者目录资源
策略(Policy):
Linux 系统中进程与文件的数量庞大,限制进程是否可以访问文件的 SELinux 规则数量就更加烦琐,如果每个规则都需要管理员手工设定,那么 SELinux 的可用性就会极低,所以SELinux 默认定义了两个策略来制订规则
2个默认策略
- -targeted:默认策略,用于限制网络服务(dhcpd,httpd,named,nscd,ntpd,portmap,snmpd,squid,以及 syslogd),对本机系统的限制极少
- -mls:多级安全保护策略,该策略限制更为严格
安全上下文(Security Context)
- 所有进程、文件、目录、都有自己的安全上下文
- 进程是否能访问文件或者目录,就要其安全上下文是否匹配
- 关系图
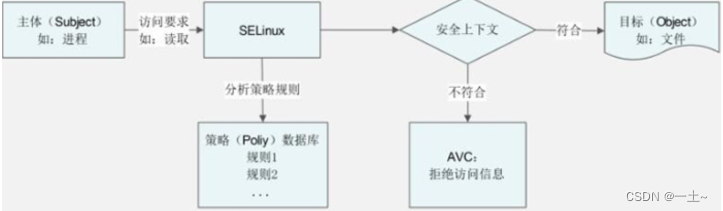
- 解释:
- 当进程访问目标时,首先和SELinux中定义好的策略进行匹配
- 当符合定义的规则,且主体的安全上下文和目标的安全上下文匹配允许访问文件
- 当安全上下文比较失败,则拒绝访问,并通过AVC(Access Vector Cache,访问向量缓存,主要记录所有和SELinux相关的统计信息)生成拒绝信息
- 注意:最终是否可以访问到文件还要匹配用户是否对目标文件拥有合理的rwx权限
文件安全上下文查看
[root@server ~]\# ls -Z system_u:object_r:admin_home_t:s0 anaconda-ks.cfg system_u:object_r:admin_home_t:s0 awk1.txt system_u:object_r:admin_home_t:s0 awk2.txt system_u:object_r:admin_home_t:s0 awk3.txt system_u:object_r:admin_home_t:s0
字段解释:
这个字段使用3个:分成四个部分
system_u:身份标识(identify)
- root:安全上下文的身份是 root,默认会映射为unconfined_u
-
[root@server ~]\# semanage login -l 登录名 SELinux 用户 MLS/MCS 范围 服务 __default__ unconfined_u s0-s0:c0.c1023 * root unconfined_u s0-s0:c0.c1023 * system_u:系统用户身份,其中“_u”代表 user
注意:user 字段只用于标识数据或进程被哪个身份所拥有,系统数据的 user 字段是 system_u,用户数据 user 字段是 user_u
seinfo 命令
作用:查询身份、角色等信息,需要安装才可使用
-
[root@server ~] \# yum install setools-console -y 参数:
-u: 列出SELinux中所有的身份(user); -r: 列出SELinux中所有的角色(role); -t: 列出SELinux中所有的类型(type); -b: 列出所有的布尔值(也就是策略中的具体规则名称); -x: 显示更多的信息; 角色(role):表示此数据是进程还是文件或目录包含(了解就行)
- object_r:代表该数据是文件或目录,r代表 role(角色的意思)
- system_r:进程r代表 role
类型(type):
-
seinfo -t | more # 5049个类型 最重要,进程是否可以访问文件,主要就是看进程的安全上下文类型字段是否和文件的安全上下文类型字段相匹配
在默认的targeted策略中
类型字段在主体(进程)的安全上下文中被称作域(domain)
类型字段在目标(文件或目录)的安全上下文中被称作类型(type)
进程的域与文件的类型是否匹配需要查询策略规则
-
灵敏度:用 s0、s1、s2 来命名,数字为灵敏度分级,数值越大,灵敏度越高
例:
[root@server ~]# yum install httpd -y [root@server ~]# ls -Zd /var/www/html system_u:object_r:httpd_sys_content_t:s0 /var/www/html SELinux的启动、关闭与查看
三种配置模式:
- enforcing:强制模式,启用SELinux,将拦截服务的不合法请求
- permissive:宽容模式,启用SELinux,遇到服务越权访问时,只发出警告而不强制拦截
- disabled:关闭模式,SELinux没有运行
模式管理
查看当前工作模式
[root@server ~]\# getenforce 临时开启selinux/临时关闭selinux
[root@server ~]# getenforce Enforcing [root@server ~]# setenforce 0 # 临时关闭进入宽容模式 [root@server ~]# getenforce Permissive [root@server ~]# setenforce 1 # 临时开启 [root@server ~]# getenforce Enforcing 永久性关闭
[root@server ~]# vim /etc/selinux/config SELINUX=disabled 注意:
- enforcing状态与permissive状态之间切换时,不需要重启系统
- enforcing、permissive与disabled之间切换时,必须重启系统才会生效
第六章 综合实验:分布式网站部署
环境准备:
| 主机 | 主机名 | 服务 |
|---|---|---|
| 192.168.110.131 | server | web |
| 192.168.110.132 | server-nfs | nfs |
| 192.168.110.133 | server-dns | dns |
业务需求:
server主机:配置web服务,内网通过域名访问web网站
server-nfs主机:配置nfs服务,将网站资源共享给server主机
server-dns主机:配置dns服务,分配dns给其他主机
6.1 基础配置-准备工作
- 将所有主机设为静态IP
#这是一个示例,三台主机用三个ip,同一网关。 [root@server ~]# nmcli connection modify ens160 ipv4.addresses 192.168.110.131/24 ipv4.gateway 192.168.110.2 ipv4.dns 114.114.114.114 ipv4.method manual - 修改主机名和host映射
#修改主机名 hostnamectl set-hostname server-nfs hostnamectl set-hostname server-dns 三台主机写入以下内容 vim /etc/hosts 192.168.110.131 server 192.168.110.132 server-nfs 192.168.110.133 server-dns - 开启防火墙
systemctl start firewalld.service systemctl enable firewalld.service - selinux配置
#nfs和dns端开启SElinux vim /etc/selinux/config SELINUX=enforcing - 时间同步
# server配置 [root@server ~]# yum install chrony 3 server ntp.aliyun.com iburst 26 allow 192.168.110.0/24 [root@server ~]# systemctl restart chronyd.service [root@server ~]# chronyc sources -V MS Name/IP address Stratum Poll Reach LastRx Last sample =============================================================================== ^* 203.107.6.88 2 6 177 5 -1331us[-3093us] +/- 32ms #为保证其他两台主机正常进行时间同步,server端开启chronyd服务要用的123端口 [root@server ~]# firewall-cmd --zone=public --add-port=123/udp --permanent success # nfs和dns配置 [root@server-nfs ~]# yum install chrony 3 server 192.168.110.131 iburst [root@server-nfs ~]# systemctl restart chronyd.service #测试时间同步状态 [root@server-nfs ~]# chronyc sources -V MS Name/IP address Stratum Poll Reach LastRx Last sample =============================================================================== ^* server 3 6 17 2 -47us[ -65us] +/- 37ms [root@server-dns ~]# chronyc sources -V MS Name/IP address Stratum Poll Reach LastRx Last sample =============================================================================== ^* server 3 6 7 1 +4908ns[-8949us] +/- 36ms - 配置ssh免密登录
在三台主机之间配置免密登录
server端:生成公私钥对 [root@server ~]# ssh-keygen -t rsa Generating public/private rsa key pair. Enter file in which to save the key (/root/.ssh/id_rsa): Created directory '/root/.ssh'. Enter passphrase (empty for no passphrase): Enter same passphrase again: Your identification has been saved in /root/.ssh/id_rsa Your public key has been saved in /root/.ssh/id_rsa.pub The key fingerprint is: SHA256:cUNOiqMh/L1+60otU9x1OKbk2gsBZTzyc/oNwGnlKZ4 root@server The key‘s randomart image is: +---[RSA 3072]----+ | .o o | | . .+o=. . | | o . ++o==.= . | | o + +O*+= o | | o .oSB+ | | +E+. | | = +..o | | o o..... | | o+o.. | +----[SHA256]-----+ [root@server ~]# ssh-copy-id 192.168.110.132 /usr/bin/ssh-copy-id: INFO: Source of key(s) to be installed: "/root/.ssh/id_rsa.pub" The authenticity of host '192.168.110.132 (192.168.110.132)' can’t be established. ED25519 key fingerprint is SHA256:iPPpVwQBFSX//xH3pUjZVklEVPozcl+iv4mX1Tb3gZs. This key is not known by any other names Are you sure you want to continue connecting (yes/no/[fingerprint])? y Please type 'yes', 'no' or the fingerprint: yes /usr/bin/ssh-copy-id: INFO: attempting to log in with the new key(s), to filter out any that are already installed /usr/bin/ssh-copy-id: INFO: 1 key(s) remain to be installed -- if you are prompted now it is to install the new keys root@192.168.110.132‘s password: Number of key(s) added: 1 Now try logging into the machine, with: "ssh '192.168.110.132'" and check to make sure that only the key(s) you wanted were added. #nfs和dns端同理 [root@server-nfs ~]# ssh-keygen -t rsa Generating public/private rsa key pair. Enter file in which to save the key (/root/.ssh/id_rsa): Enter passphrase (empty for no passphrase): Enter same passphrase again: Your identification has been saved in /root/.ssh/id_rsa Your public key has been saved in /root/.ssh/id_rsa.pub The key fingerprint is: SHA256:ghfIloGlX3FyXC6ZHBlW3IwDTSEuDdrLjBLoFiEJw7o root@server-nfs The key’s randomart image is: +---[RSA 3072]----+ |*o oo +.OX== | |o+oo * @o*= o | |o.o * = B .. | |o .+ * + . | | +. + * S | |E . . . | | | | | | | +----[SHA256]-----+ [root@server-nfs ~]# ssh-copy-id 192.168.110.131 /usr/bin/ssh-copy-id: INFO: Source of key(s) to be installed: "/root/.ssh/id_rsa.pub" The authenticity of host '192.168.110.131 (192.168.110.131)' can‘t be established. ED25519 key fingerprint is SHA256:iPPpVwQBFSX//xH3pUjZVklEVPozcl+iv4mX1Tb3gZs. This key is not known by any other names Are you sure you want to continue connecting (yes/no/[fingerprint])? yes /usr/bin/ssh-copy-id: INFO: attempting to log in with the new key(s), to filter out any that are already installed /usr/bin/ssh-copy-id: INFO: 1 key(s) remain to be installed -- if you are prompted now it is to install the new keys root@192.168.110.131’s password: Number of key(s) added: 1 Now try logging into the machine, with: "ssh '192.168.110.131'" and check to make sure that only the key(s) you wanted were added. # dns端同样操作 6.2 环境搭建
#在server端安装LAMP环境软件 [root@server ~] yum install httpd mariadb-server php* -y 6.2.1 NFS端配置
上传软件包 [root@server-nfs /]# ls afs boot etc lib media opt root sbin sys usr wordpress-6.1-zh_CN.zip bin dev home lib64 mnt proc run srv tmp var [root@server-nfs /]\# unzip wordpress-6.1-zh_CN.zip [root@server-nfs /]\# cd wordpress/ [root@server-nfs wordpress]\# ls index.php wp-admin wp-content wp-load.php wp-signup.php license.txt wp-blog-header.php wp-cron.php wp-login.php wp-trackback.php readme.html wp-comments-post.php wp-includes wp-mail.php xmlrpc.php wp-activate.php wp-config-sample.php wp-links-opml.php wp-settings.php server-nfs端的/wordpress目录共享给server主机
[root@server-nfs ~]\# yum install rpcbind -y [root@server-nfs ~]\# yum install nfs-utils -y [root@server-nfs ~]\# vim /etc/exports #编辑配置文件 /wordpress 192.168.110.131(rw,sync,all_squash) #设置权限 [root@server-nfs ~]\# chmod -Rf 777 /wordpress # 配置防火墙放行规则 [root@server-nfs ~]\# firewall-cmd --permanent --zone=public --add-service=mountd success [root@server-nfs ~]\# firewall-cmd --permanent --zone=public --add-service=rpc-bind success [root@server-nfs ~]\# firewall-cmd --permanent --zone=public --add-service=nfs success [root@server-nfs ~]\# firewall-cmd --reload success [root@server-nfs ~]\# systemctl start rpcbind.service [root@server-nfs ~]\# systemctl start nfs-server.service # 设置SEkinux上下文策略 [root@server-nfs ~]\# chcon -t httpd_sys_content_t /wordpress -Rv 6.2.2 远程共享配置
[root@server ~]\# yum install rpcbind -y [root@server ~]\# yum install nfs-utils -y [root@server ~]\# showmount -e 192.168.110.132 Export list for 192.168.110.132: /wordpress 192.168.110.131 [root@server ~]\# mkdir /wp #将远程目录挂载本地 [root@server ~]\# mount -t nfs 192.168.110.132:/wordpress /wp [root@server ~]# cd /wp/ [root@server wp]# ls 6.2.3 httpd设置
#配置防火墙放行 [root@server ~]\# firewall-cmd --permanent --zone=public --add-service=http success [root@server ~]\# firewall-cmd --reload success #修改httpd配置文件 [root@server ~]\# vim /etc/httpd/conf/httpd.conf 124 DocumentRoot "/wp" 129 130 AllowOverride None 132 Require all granted 133 6.2.4 修改wordpress配置文件
[root@server ~]\# cd /wp/ # 拷贝模板文件 [root@server wp]\# cp wp-config-sample.php wp-config.php #编辑wp-config.php配置文件 [root@server wp]\# vim wp-config.php 23 define( 'DB_NAME', 'wordpress' ); 26 define( 'DB_USER', 'root' ); 29 define( 'DB_PASSWORD', '123456' ); 6.2.5 数据库配置
[root@server ~]# systemctl start mariadb.service [root@server ~]# mysql Welcome to the MariaDB monitor. Commands end with ; or \g. Your MariaDB connection id is 3 Server version: 10.5.16-MariaDB MariaDB Server Copyright (c) 2000, 2018, Oracle, MariaDB Corporation Ab and others. Type 'help;' or '\h' for help. Type '\c' to clear the current input statement. MariaDB [(none)]> create database wordpress; Query OK, 1 row affected (0.000 sec) MariaDB [(none)]> alter user 'root'@'localhost' identified by '123456'; Query OK, 0 rows affected (0.001 sec) MariaDB [(none)]> grant all on wordpress.* to 'root'@'localhost'; Query OK, 0 rows affected (0.002 sec) MariaDB [(none)]> exit; Bye #重启数据库和httpd [root@server ~]# systemctl restart mariadb [root@server ~]# systemctl restart httpd 在浏览器输入server主机的ip来进行安装
6.3 配置DNS
[root@server-dns ~]\# yum install bind -y [root@server-dns ~]\# firewall-cmd --permanent --zone=public --add-service=dns success [root@server-dns ~]\# firewall-cmd --reload success [root@server-dns ~]\# systemctl restart named #编辑主配置文件 [root@server-dns ~]\# vim /etc/named.conf 11 listen-on port 53 { any; }; 19 allow-query { any; }; #编辑区域配置文件 [root@server-dns ~]\# vim /etc/named.rfc1912.zones zone "yitu.com" IN { type master; file "yitu.com.zone"; allow-update { none; }; }; [root@server-dns named]\# vim yitu.com.zone $TTL 1D @ IN SOA yitu.com. wzh.yitu.com. ( 0 ; serial 1D ; refresh 1H ; retry 1W ; expire 3H ) ; minimum NS www.yitu.com. www A 192.168.110.131 在浏览器输入域名进行验证
此时可以看到我们通过域名成功进行了网站访问。本次实验我们通过三台主机进行配置,分别承担了httpd、NFS、DNS三种服务,他们都是较为安全的,因为我们开启了防火墙和SELinux在这些主机上面,这种方式是分布式的,可以有效防止服务器宕机造成的影响,减少了宕机后服务恢复的时间。