软件的RPM包制作,VPN服务器,frp连接Linux系统实现内网穿透,systemd简介
创始人
2025-01-18 20:03:22
0次

- [root@web1 ~]# yum -y install rpm-build
- [root@web1 ~]# rpmbuild -ba nginx.spec #会报错,没有文件或目录
- [root@web1 ~]# ls /root/rpmbuild #自动生成的目录结构
- BUILD BUILDROOT RPMS SOURCES SPECS SRPMS
- 将源码软件复制到SOURCES目录 [root@web1 ~]# cp nginx-1.22.1.tar.gz /root/rpmbuild/SOURCES/
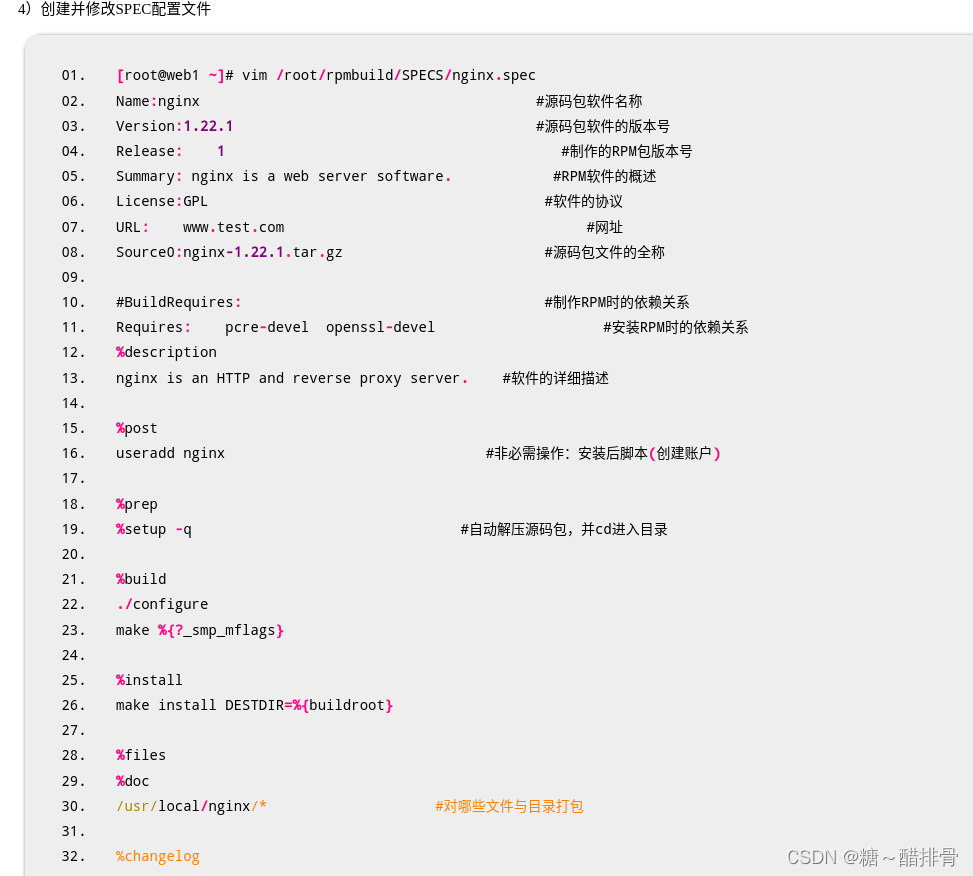
rpmbuild创建RPM软件包
- [root@web1 ~]# rpmbuild -ba /root/rpmbuild/SPECS/nginx.spec
- [root@web1 ~]# ls /root/rpmbuild/RPMS/x86_64/nginx-1.22.1-1.x86_64.rpm
- [root@web1 ~]# yum install /root/rpmbuild/RPMS/x86_64/nginx-1.22.1-1.x86_64.rpm
- [root@web1 ~]# rpm -qa |grep nginx
- [root@web1 ~]# ls /usr/local/nginx/
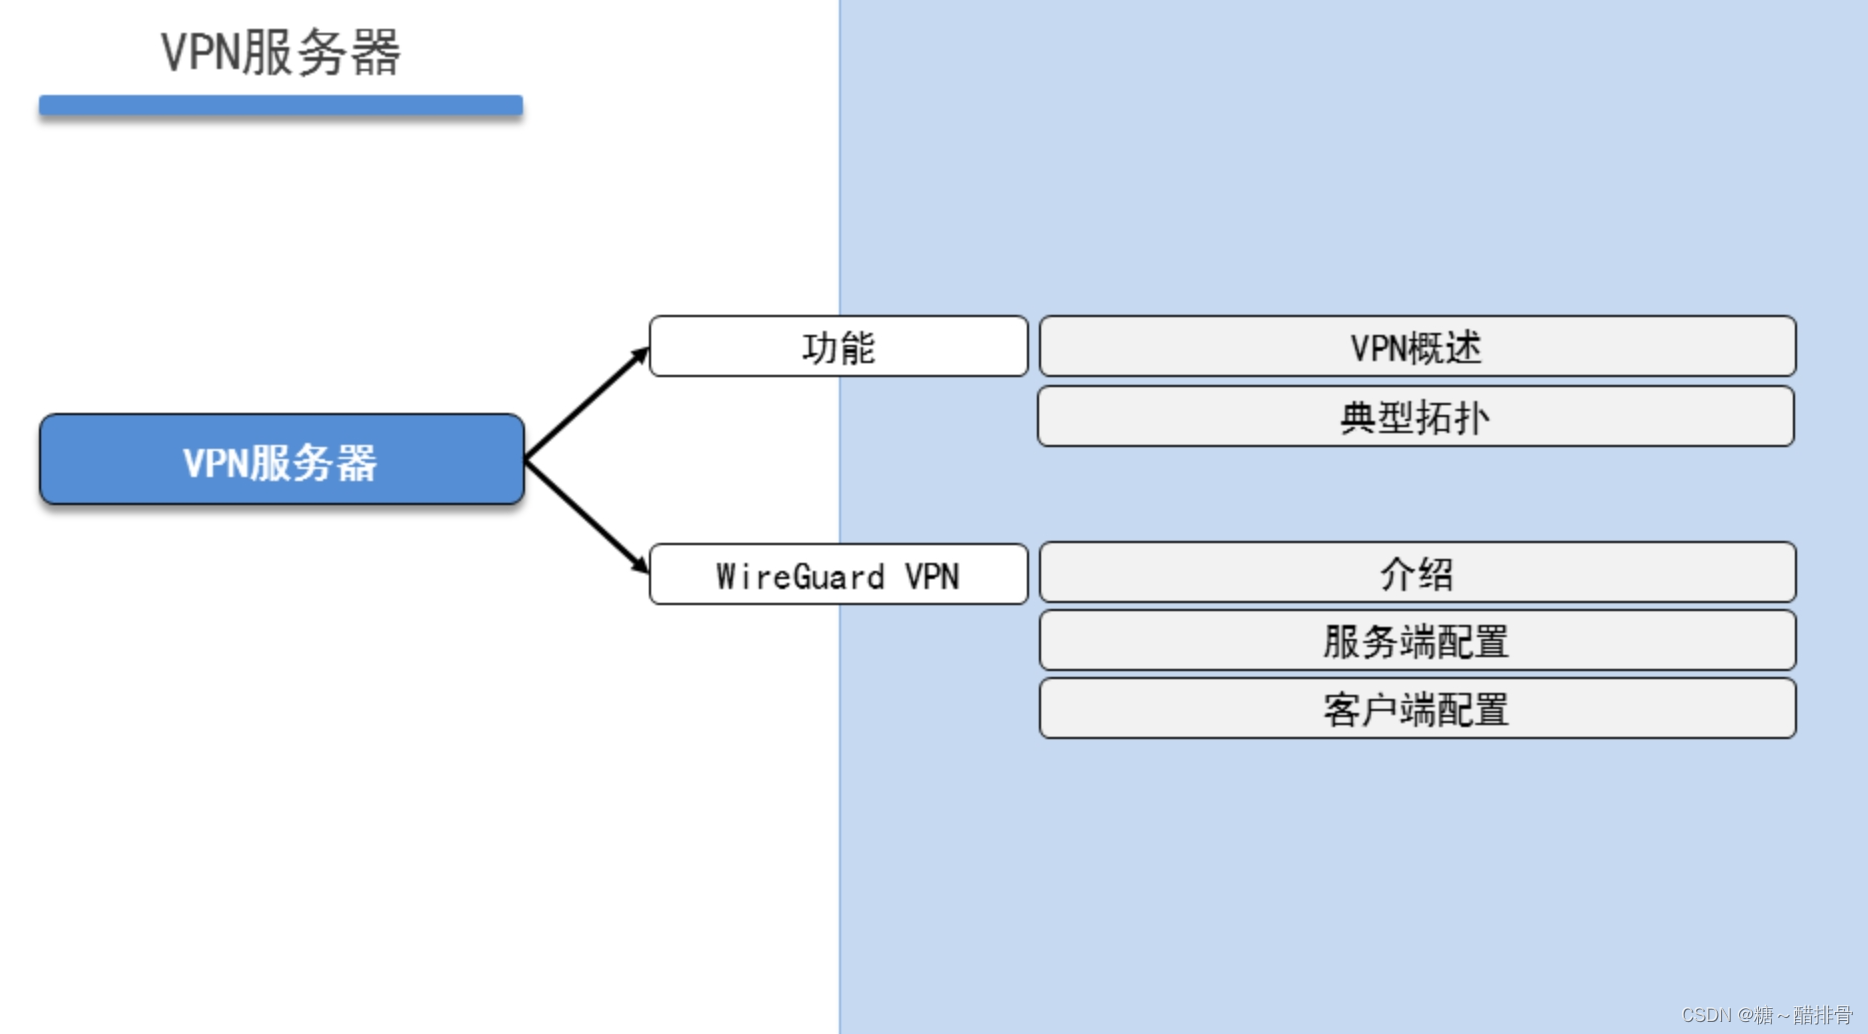
VPN服务器 Linux客户端连接WireGuard

制作密钥文件
- [root@proxy ~]#cd /usr/local/nginx/html/vpn/linux
- [root@proxy linux]# wg genkey | tee private.key | wg pubkey > public.key #生成私钥存入private.key,再利用私钥生成公钥存入public.key
- [root@proxy linux]# cp public.key ../ser.txt #拷贝一份方便客户端通过浏览器查看
- [root@proxy linux]# cat public.key UygBBCi6gEX5aJ0hMpKjBXDxltsV4+yI4NQTqK1ih1k=
- [root@proxy linux]# cat private.key
- GB2NbtPoAEvNufEggKM41GNEUBlxfJfVYn4i9yJ4WlU=
编写配置文件
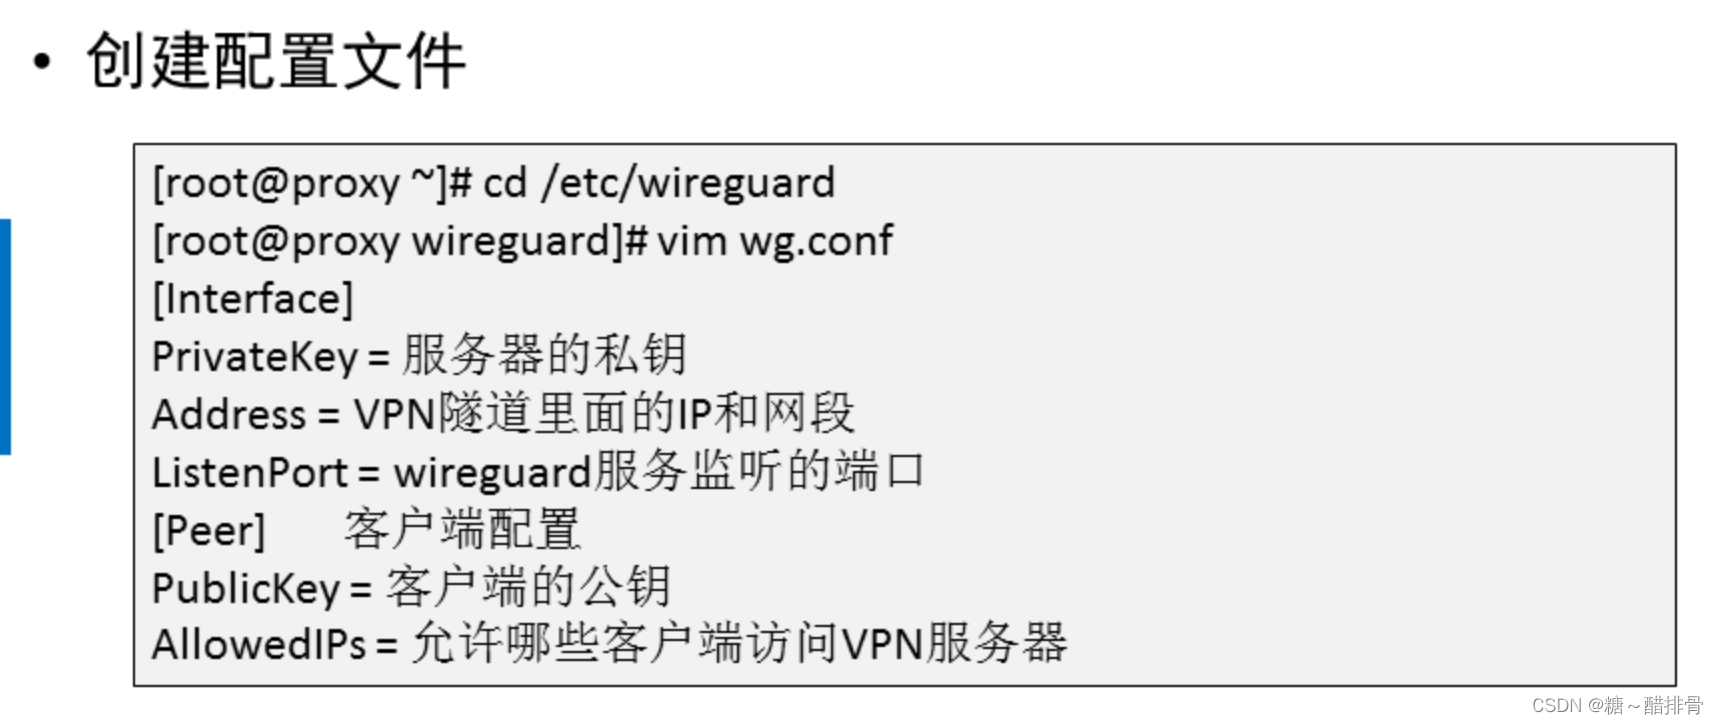
- [root@proxy linux]# cd /etc/wireguard
- [root@proxy wireguard]# vim wg.conf
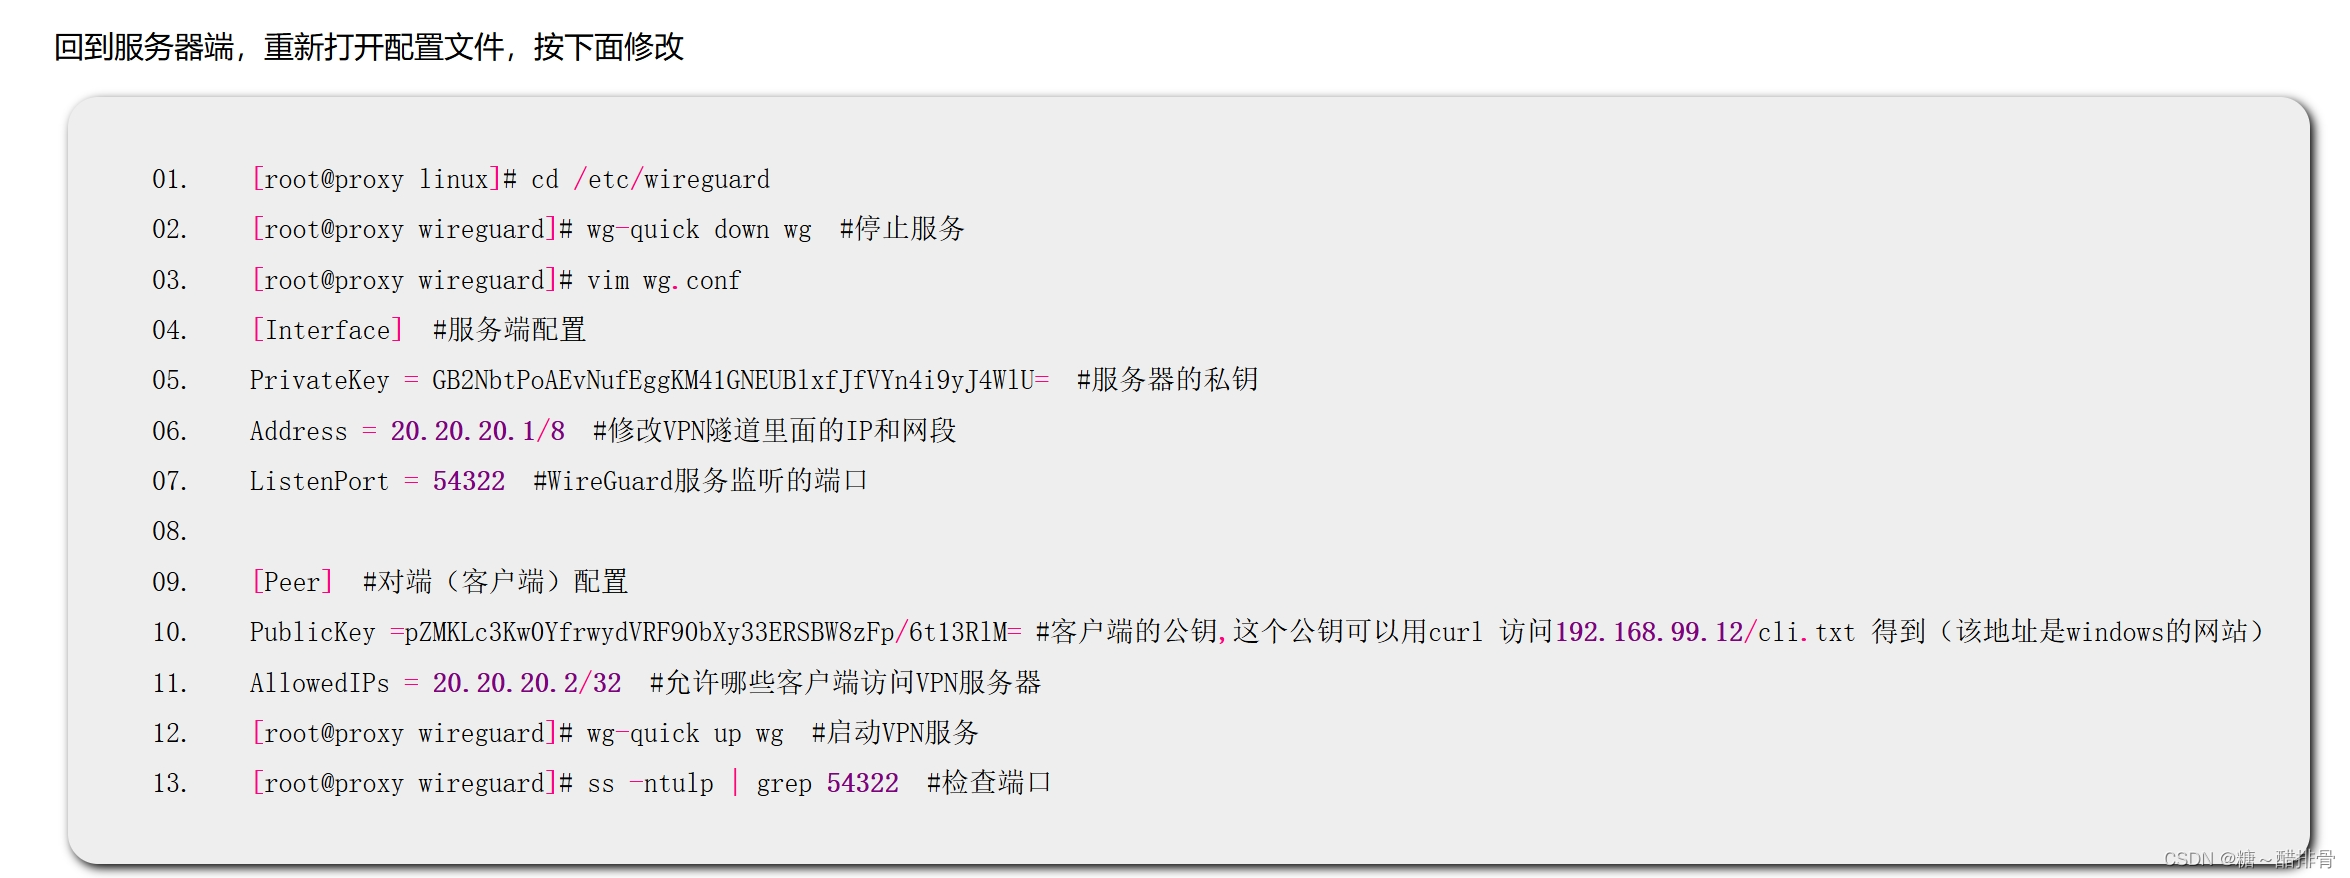
- [Interface] #服务端配置
- PrivateKey = GB2NbtPoAEvNufEggKM41GNEUBlxfJfVYn4i9yJ4WlU= #服务器的私钥
- Address = 10.10.10.1/8 #VPN隧道里面的IP和网段
- ListenPort = 54321 #WireGuard服务监听的端口
- [Peer] #对端(客户端)配置
- PublicKey = #客户端的公钥,稍后获取
- AllowedIPs = 10.10.10.2/32 #允许哪些客户端访问VPN服务器 ,32代表ip的二进制32位必须和10.10.10.2一样,也就是ip必须为10.10.10.2的客户才能访问
启动服务,注意,该步骤必须在上述配置文件获取客户端的公钥才可进行
- [root@proxy wireguard]# wg-quick up wg #启动VPN服务,wg是之前配置文件的名称
- [root@proxy wireguard]# ss -ntulp | grep 54321 #检查端口
- [root@proxy wireguard]# systemctl stop firewalld
- [root@proxy wireguard]# ifconfig #查看
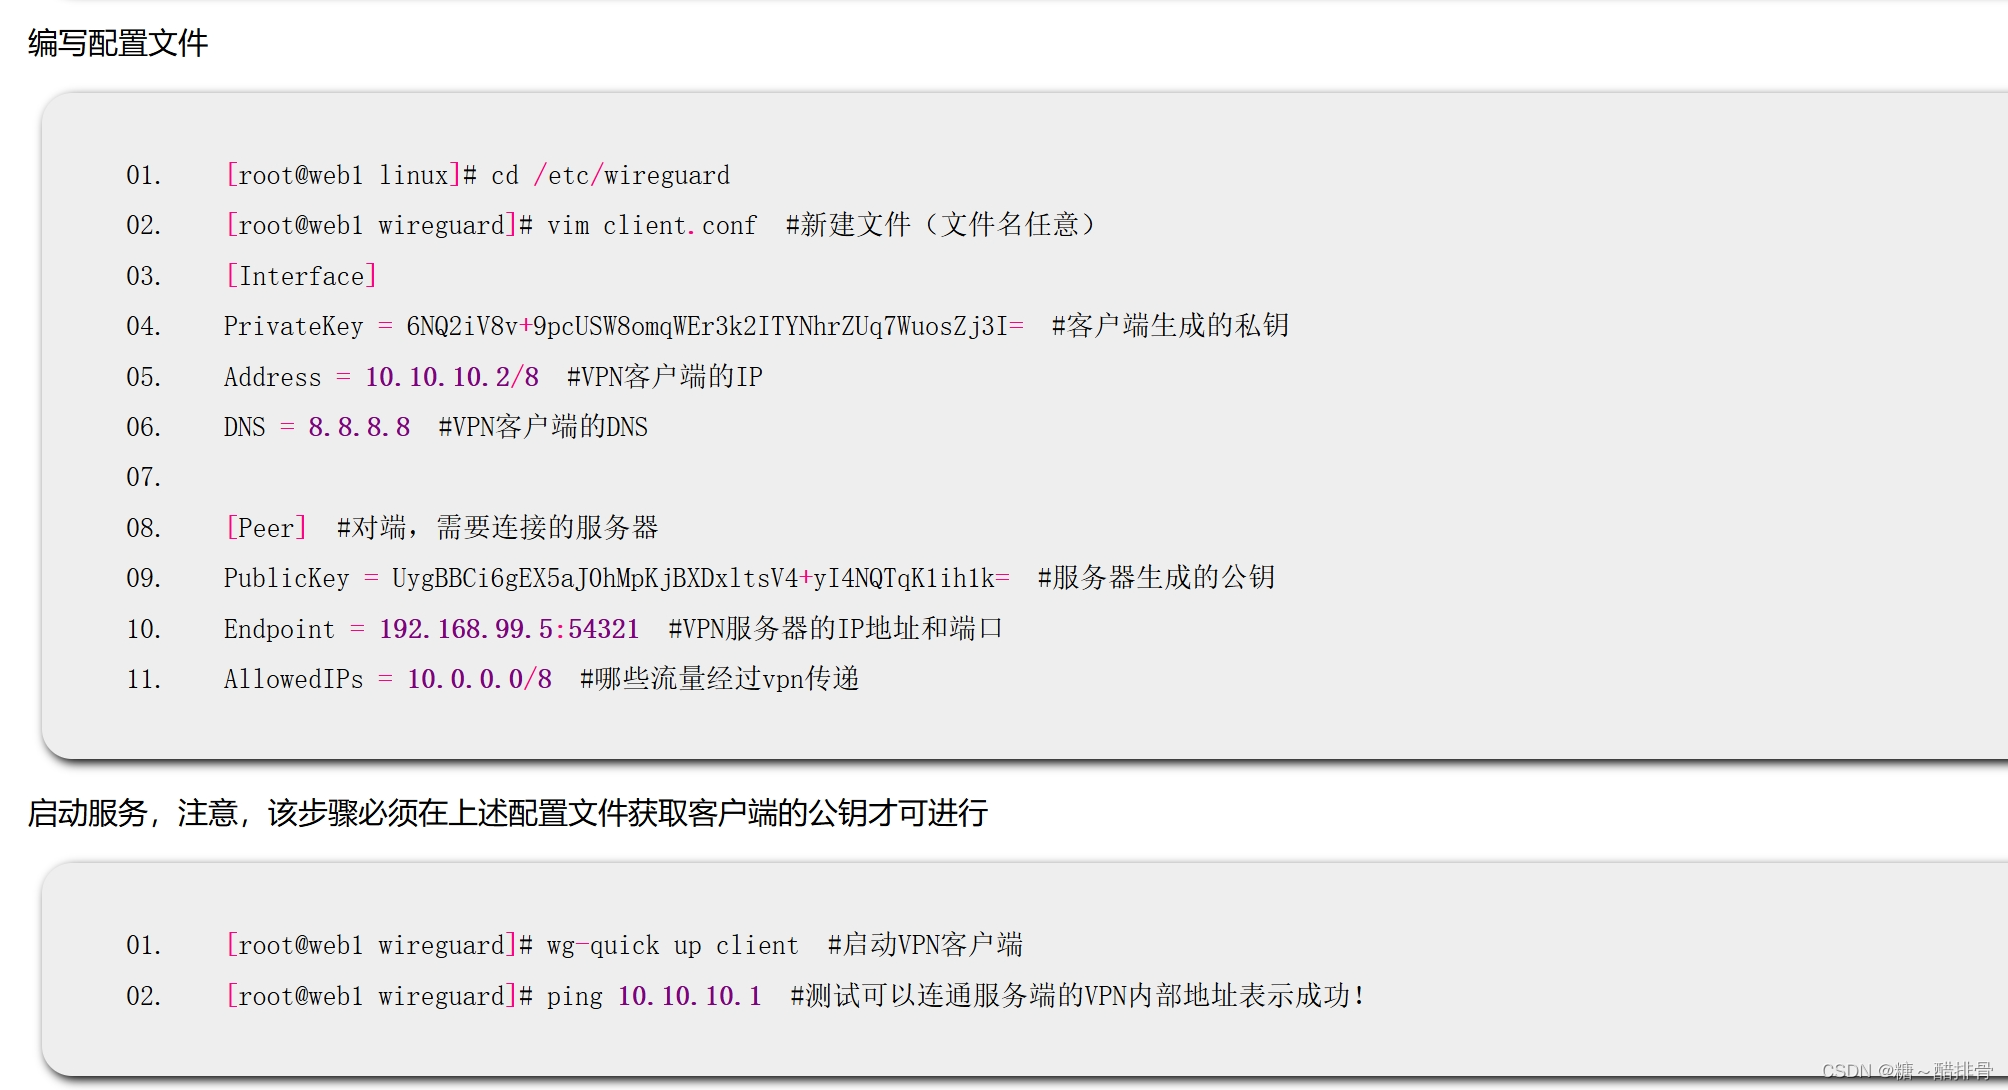
步骤二:配置客户端
首先将$教学资料目录/vpn/linux目录拷贝到虚拟机/root下
在客户端安装VPN软件
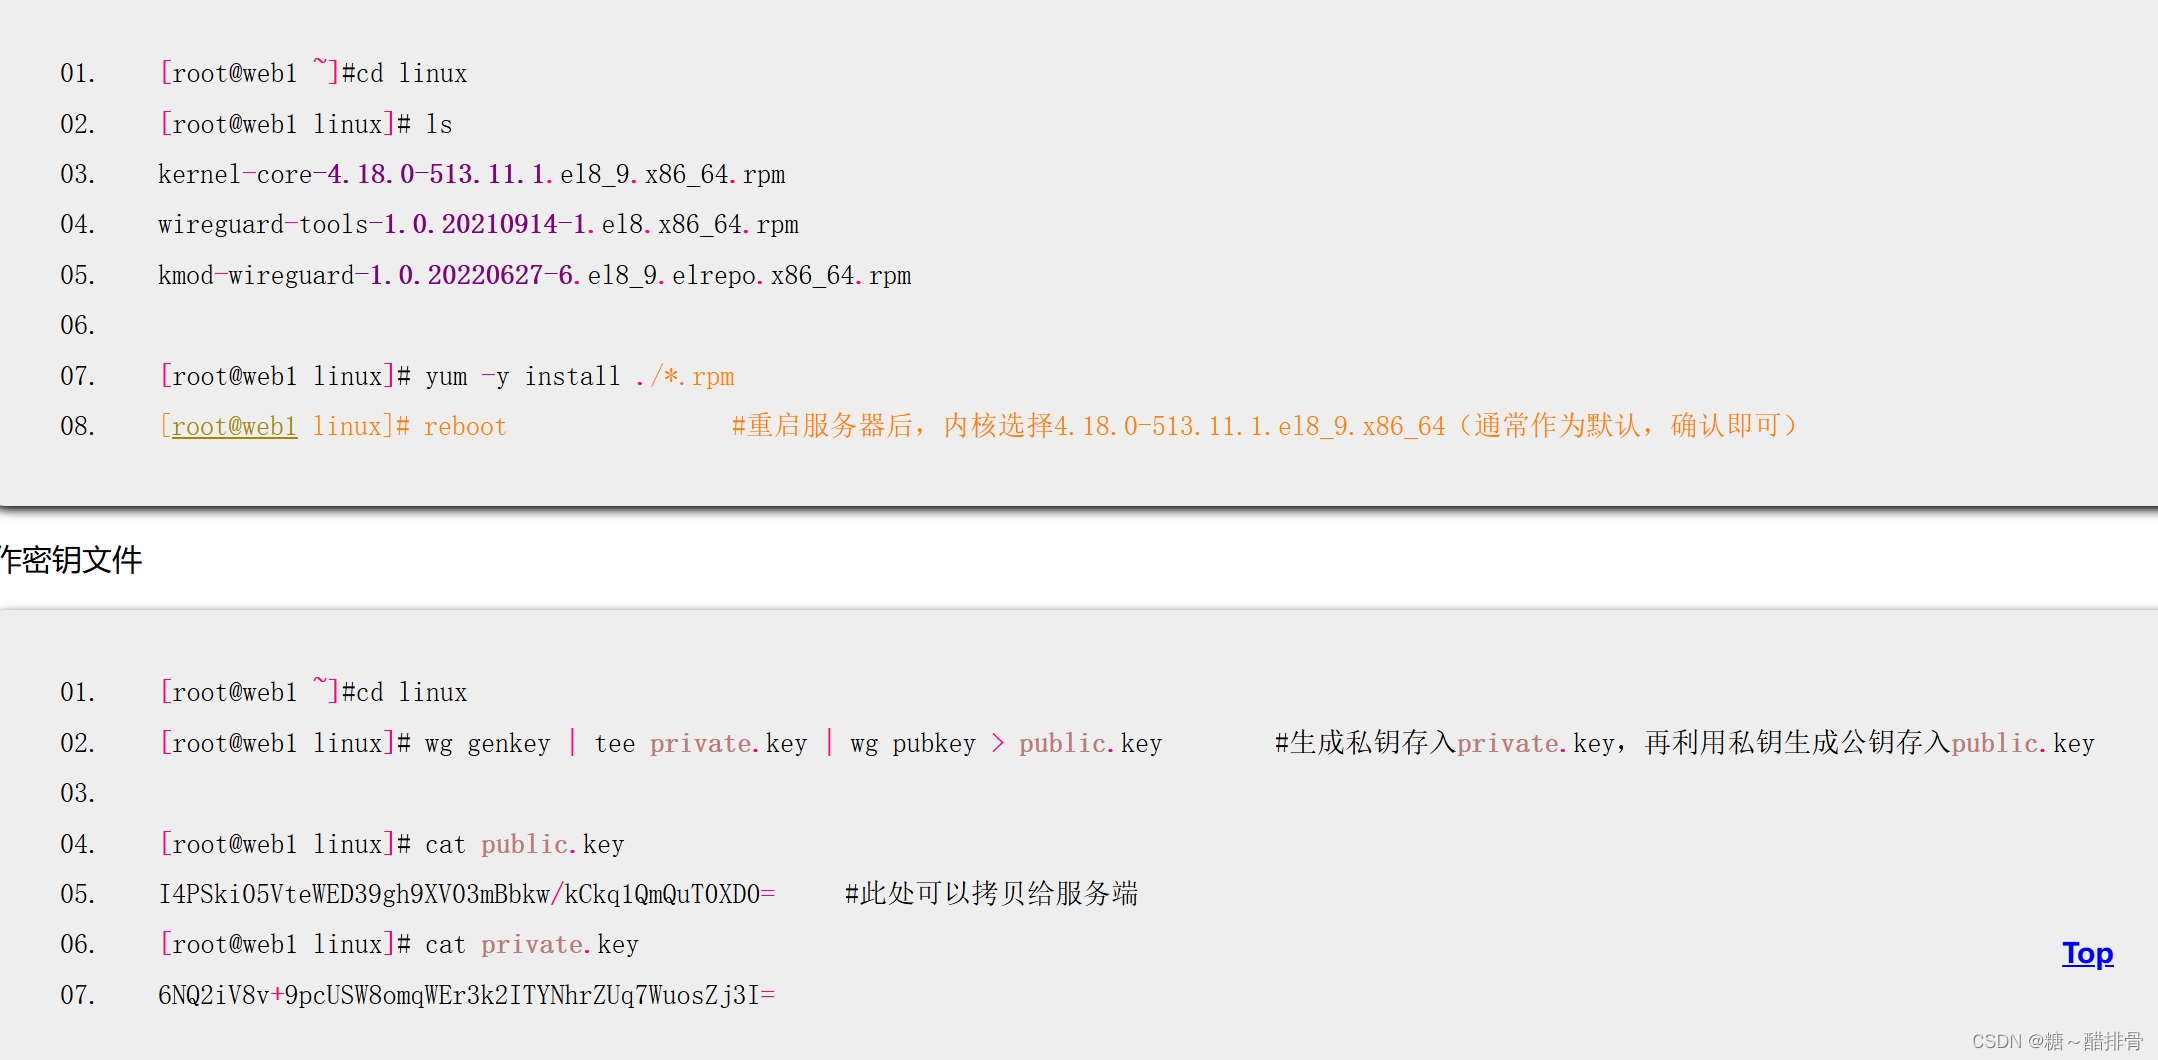
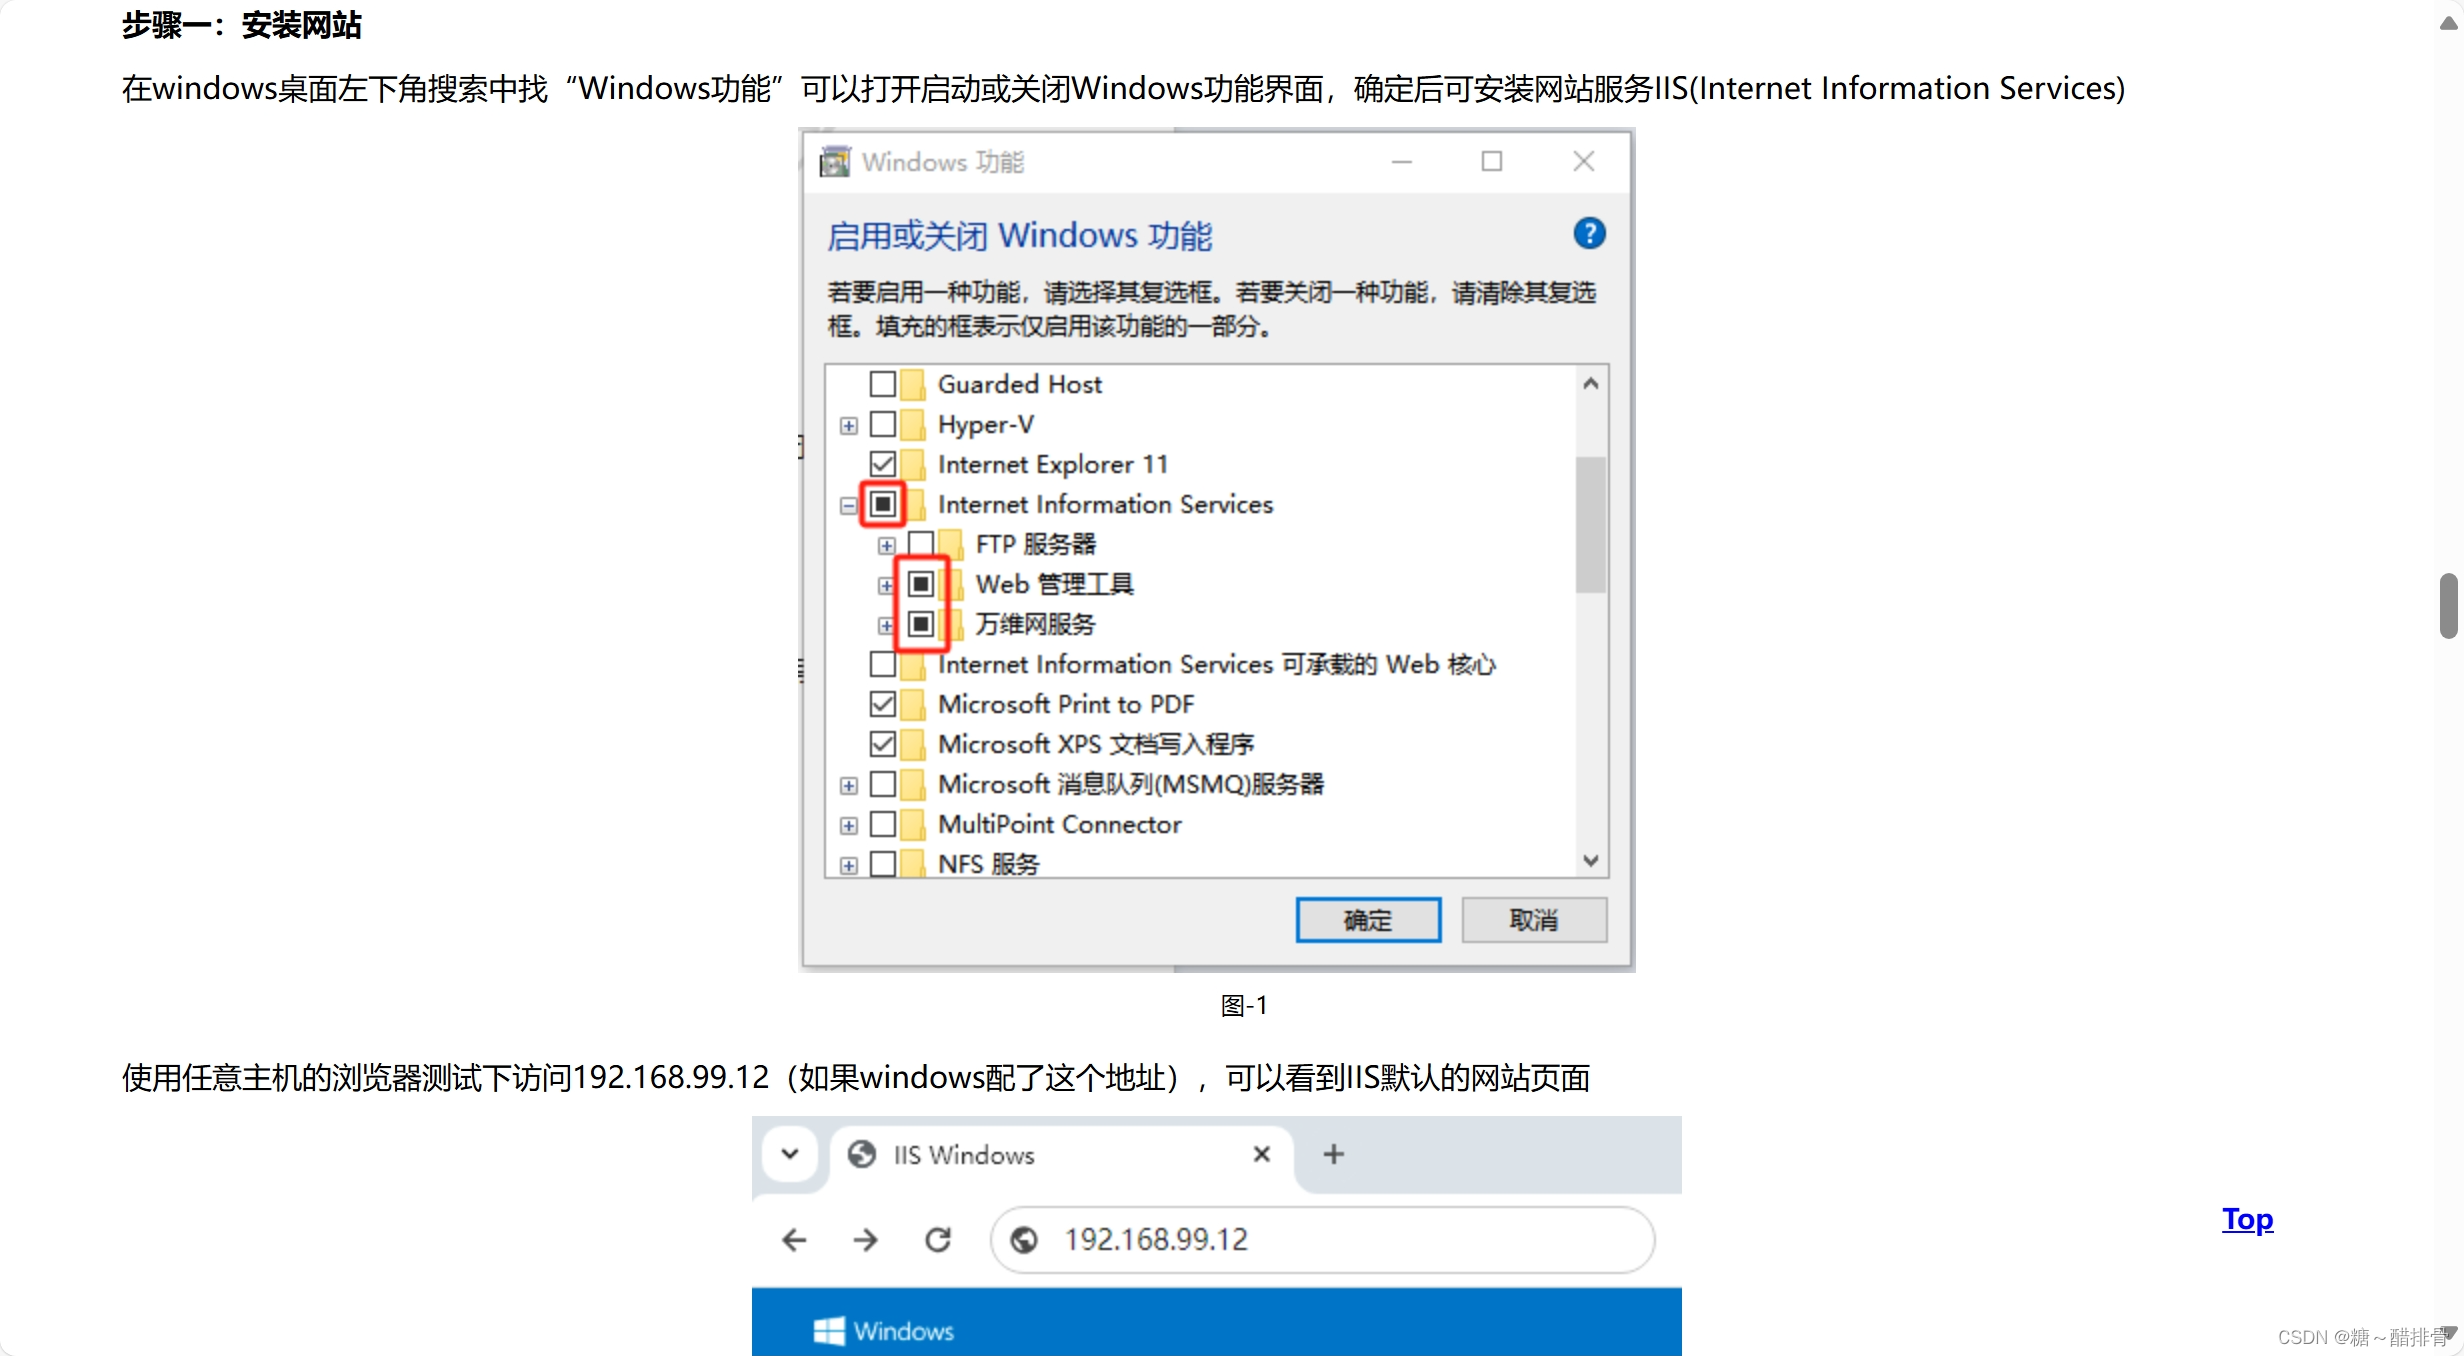
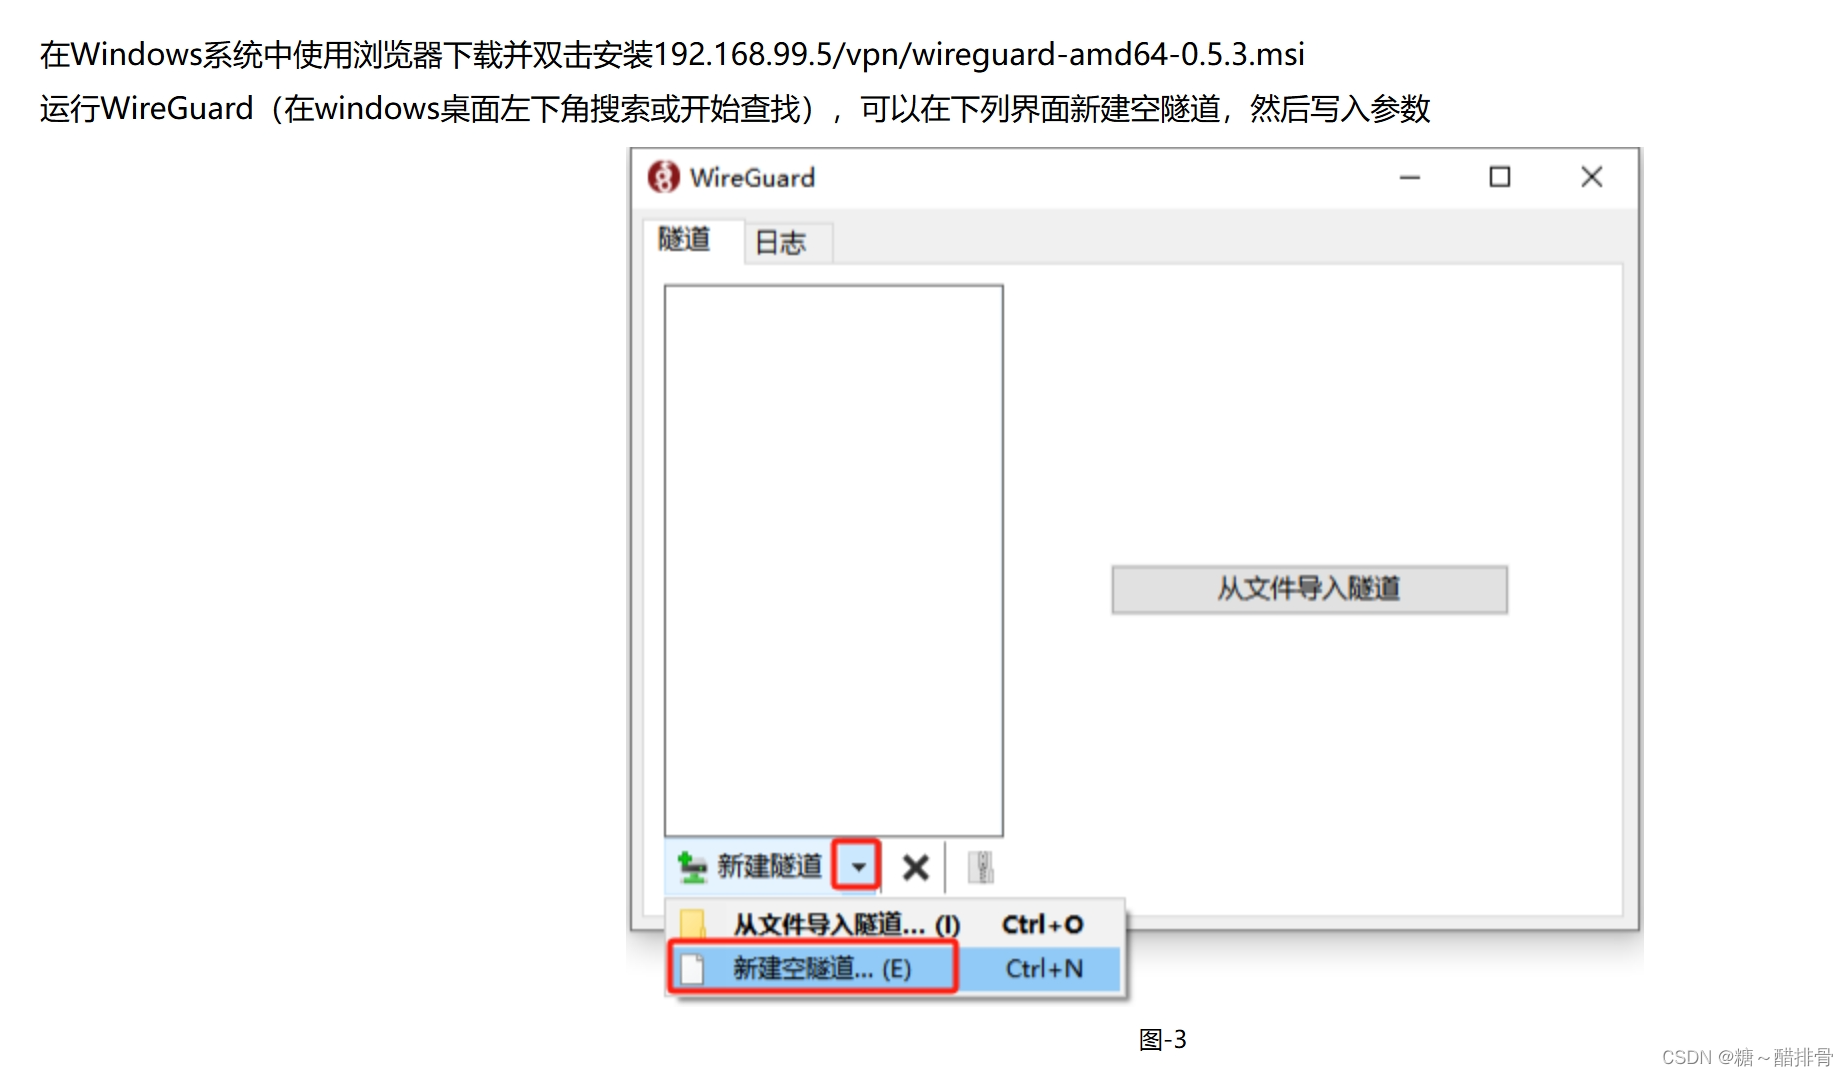
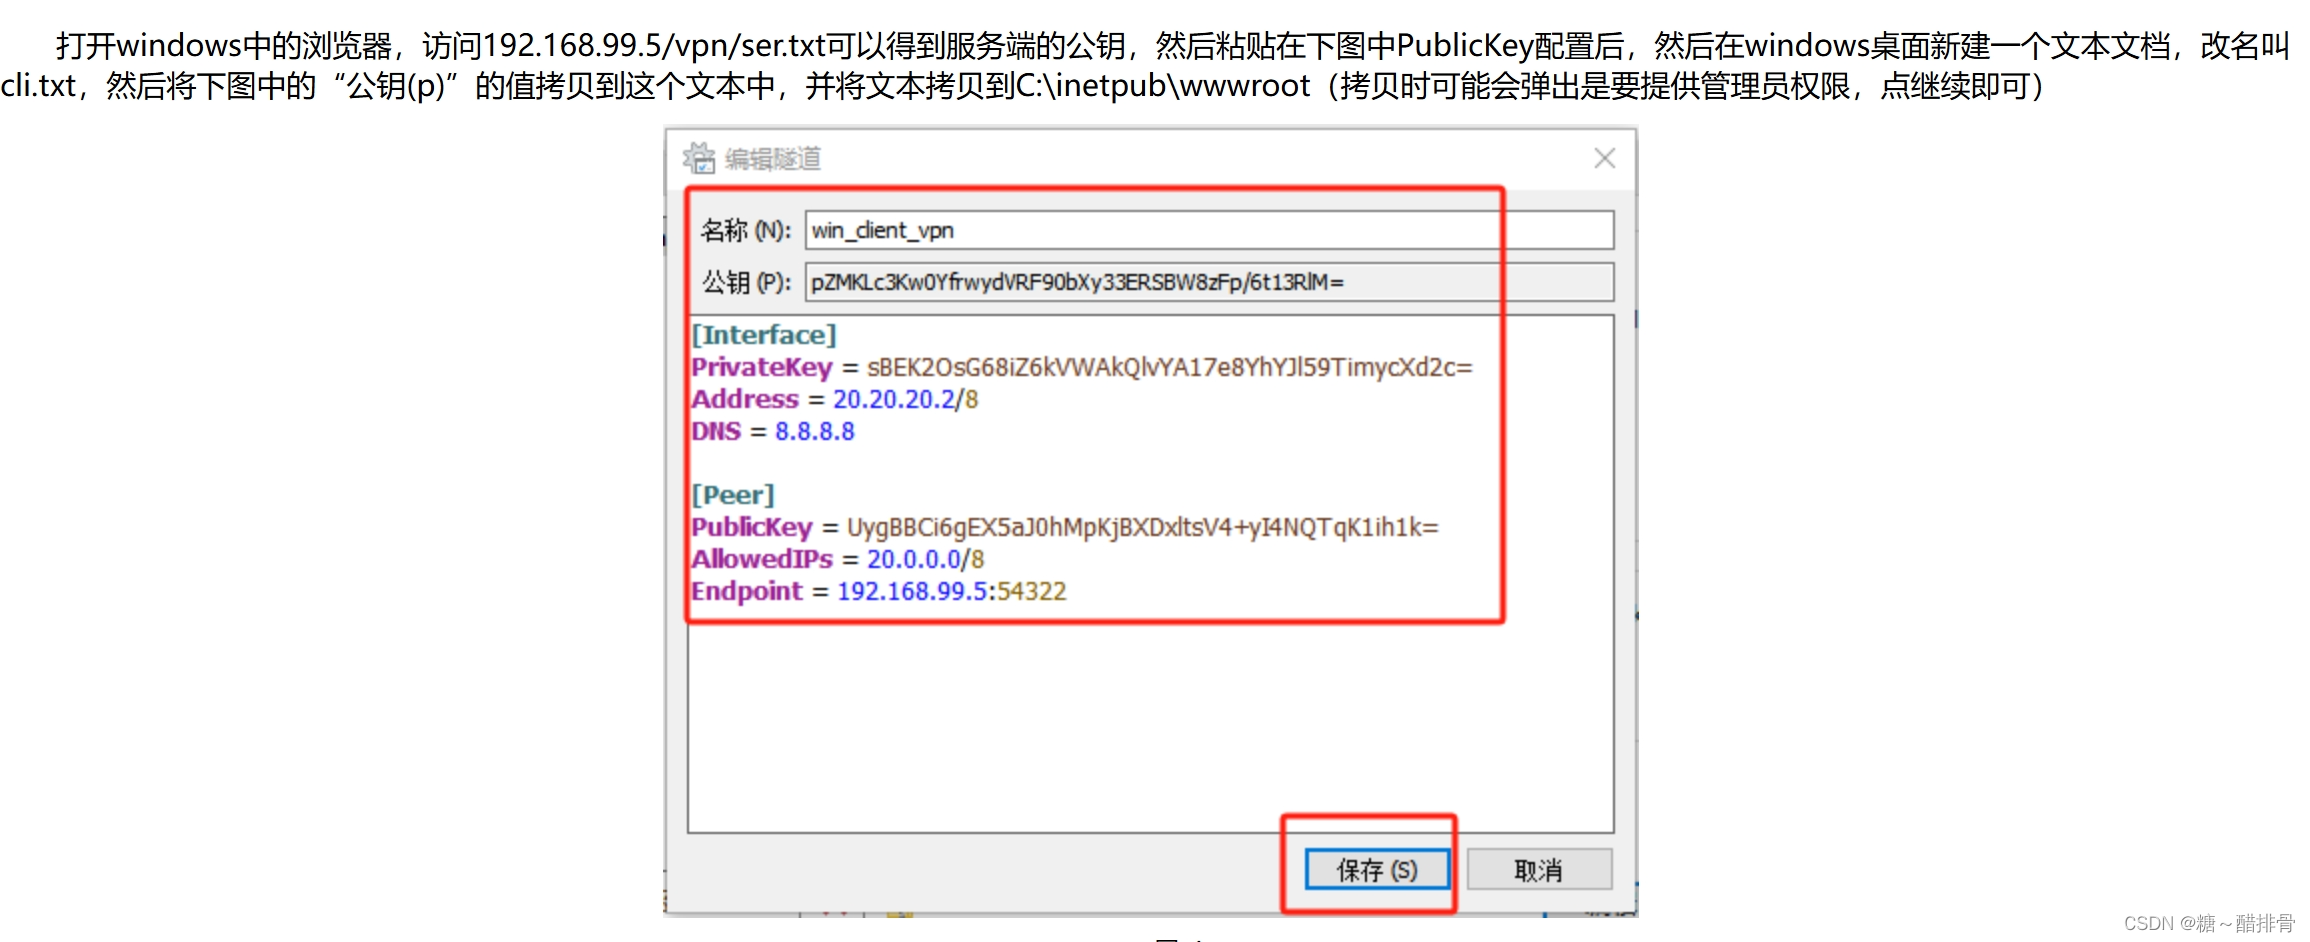
Windows客户端连接WireGuard

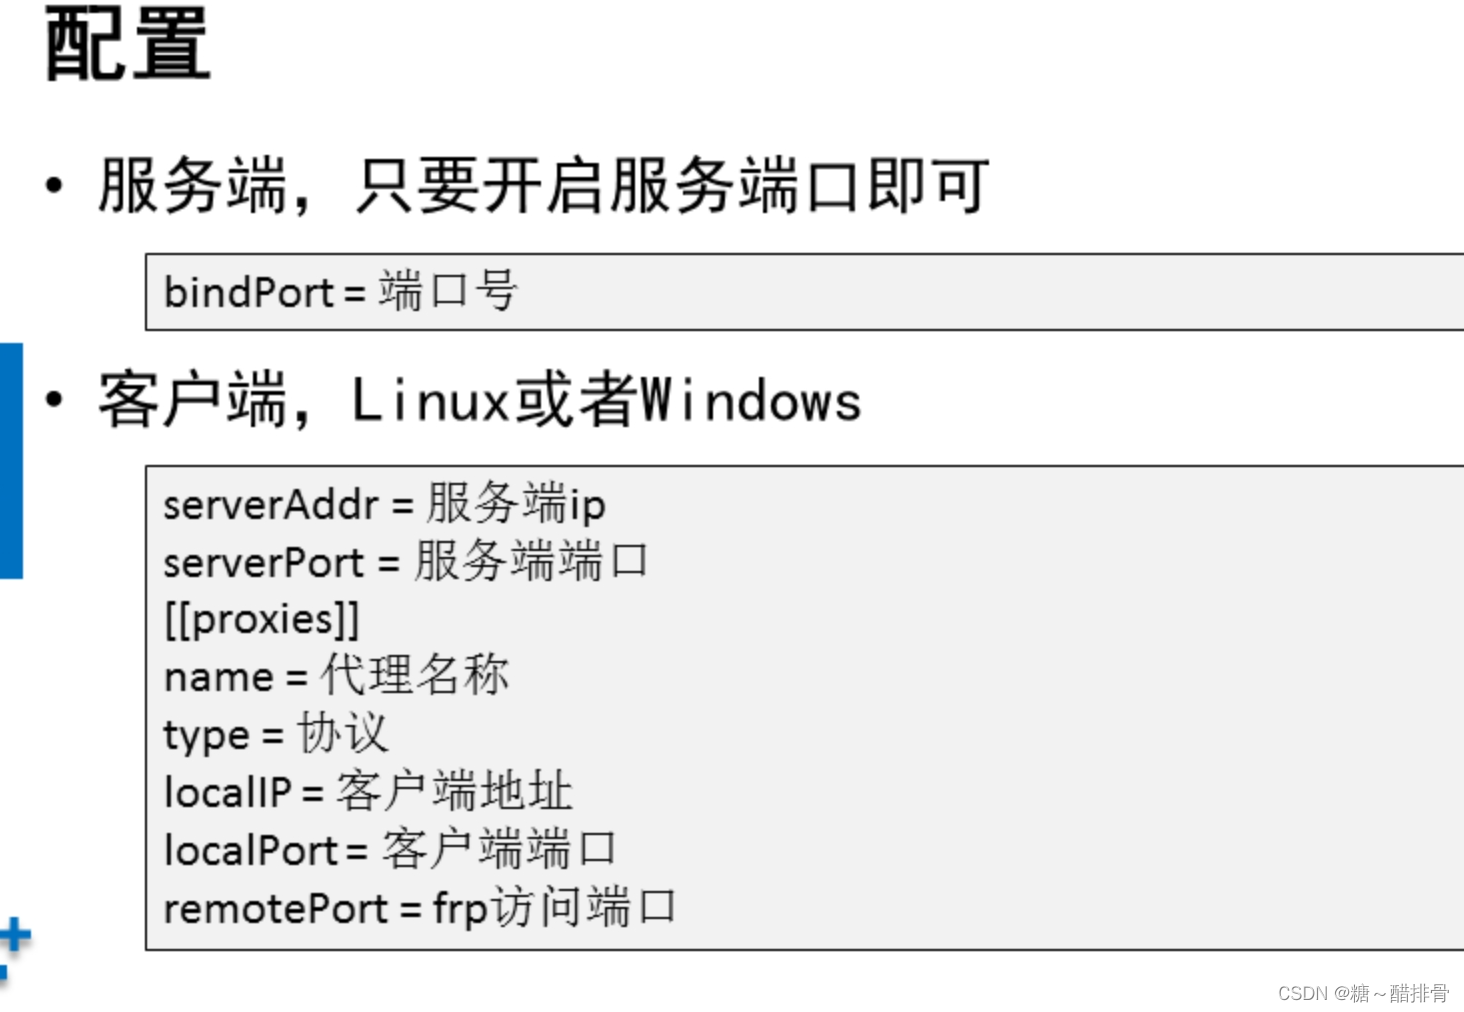
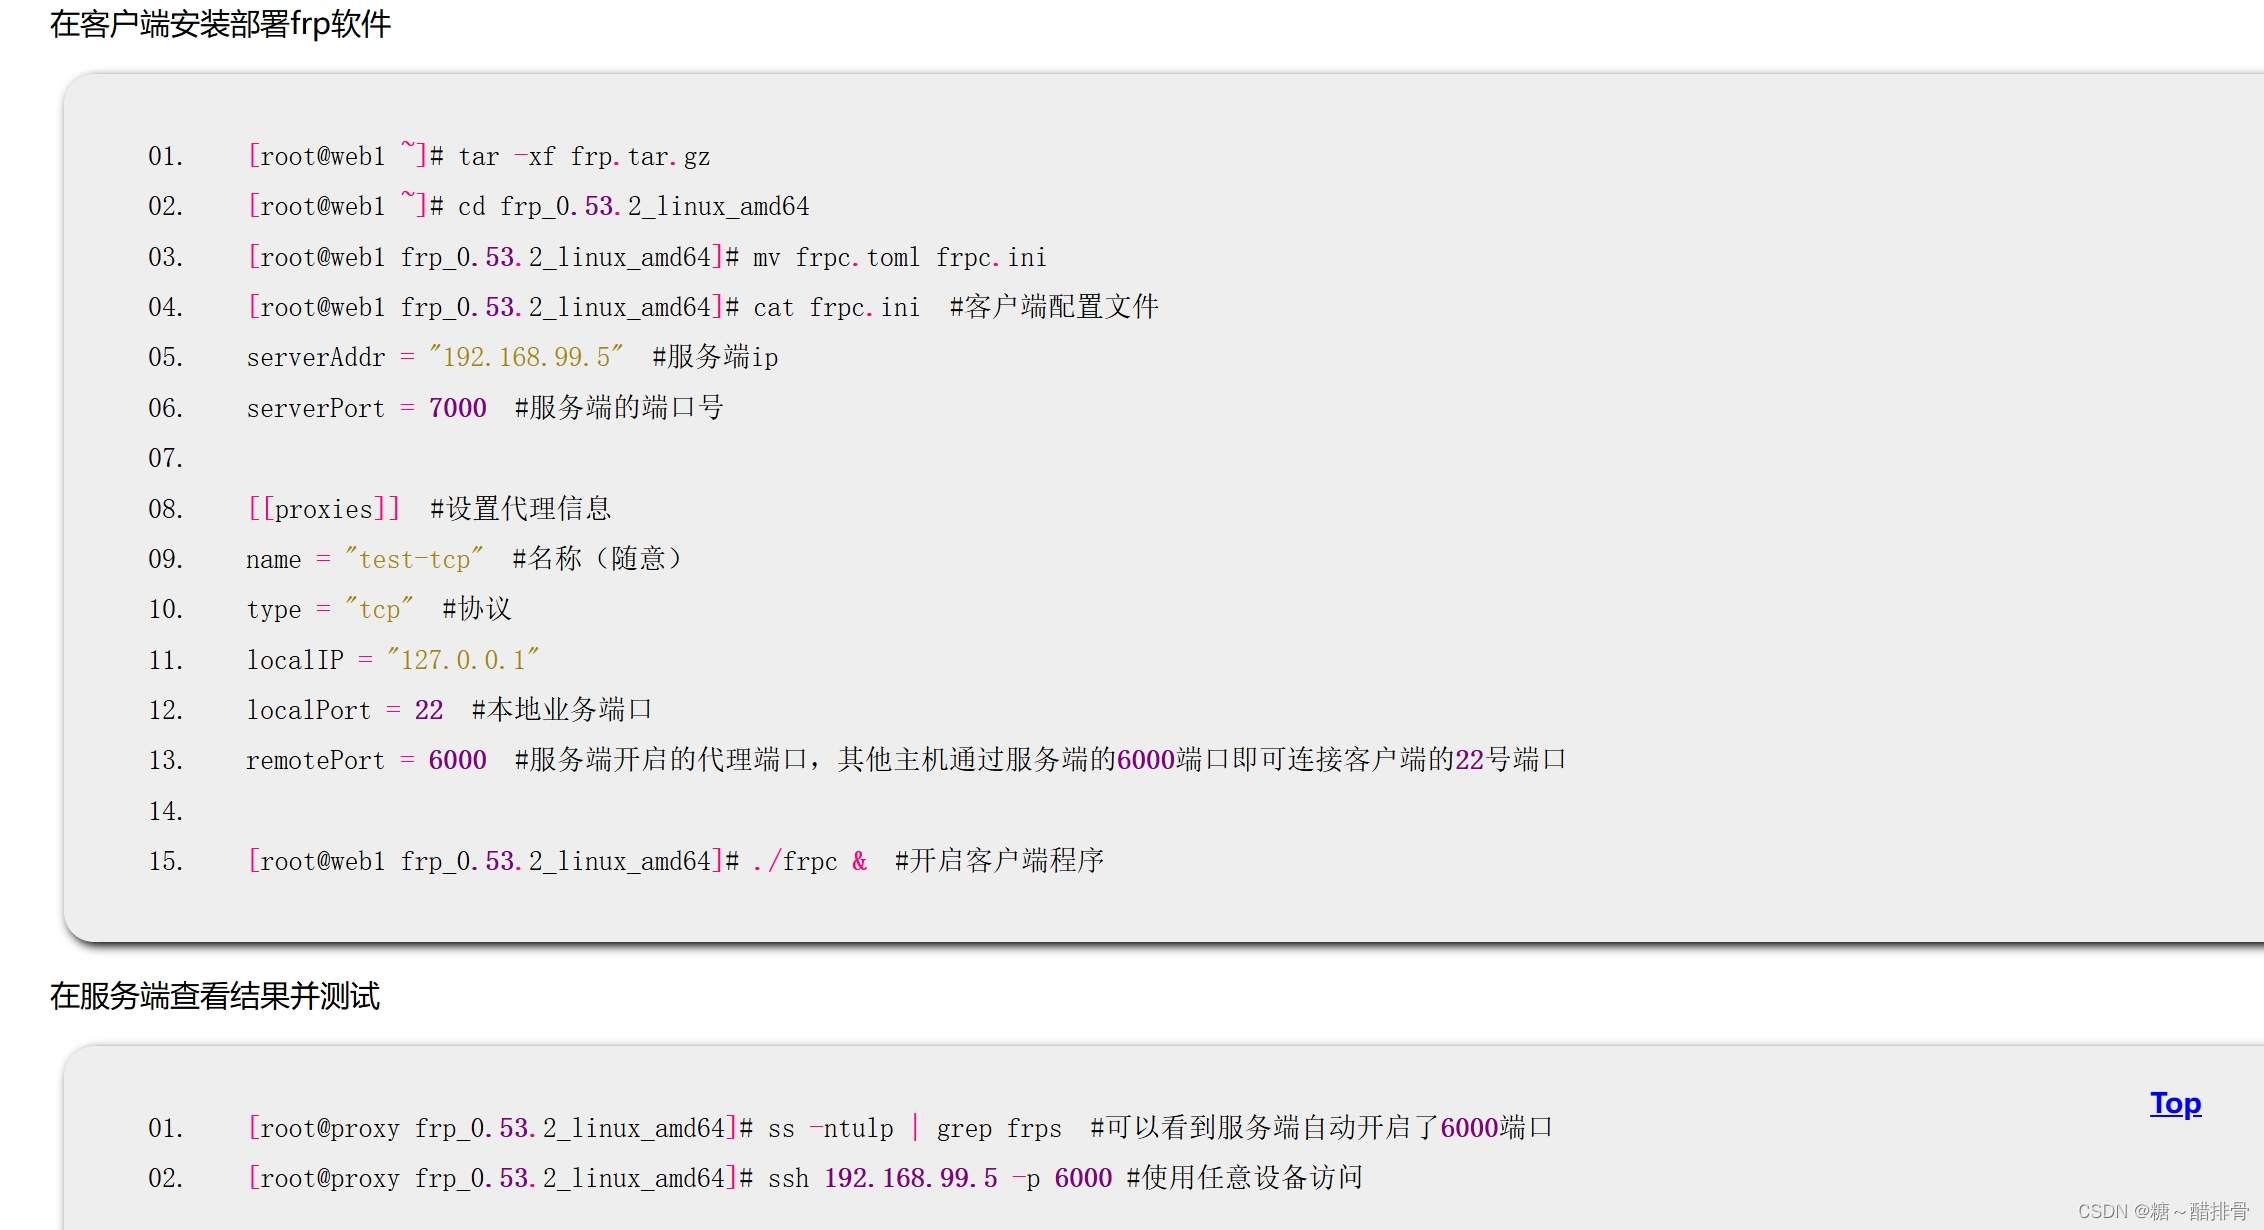
frp连接Linux系统实现内网穿透


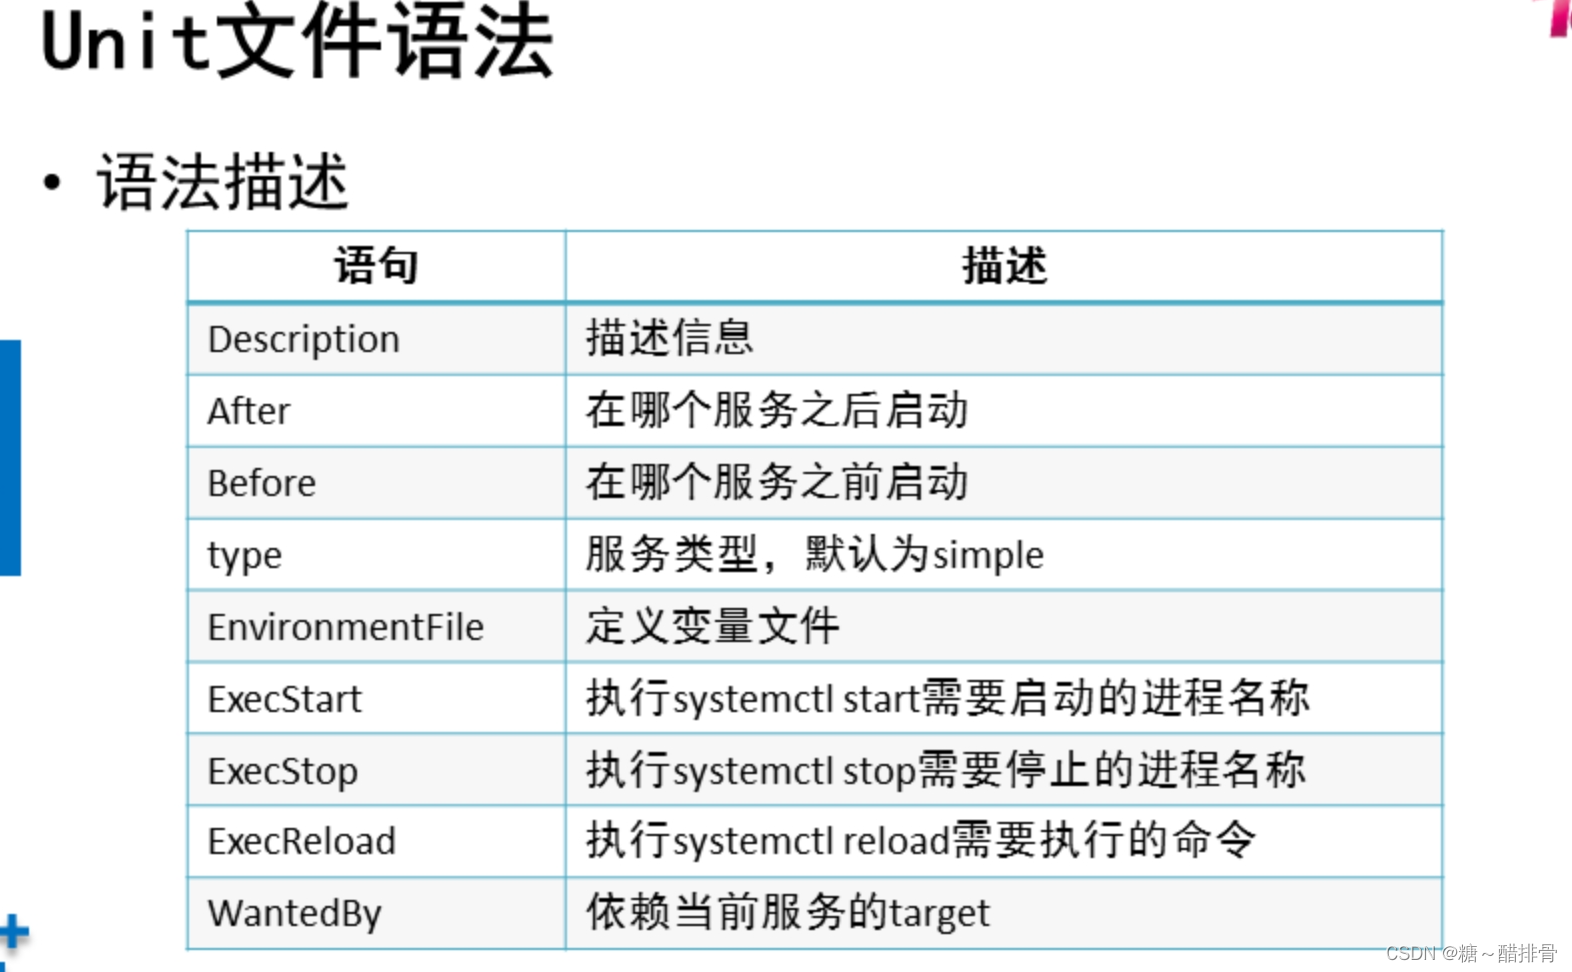
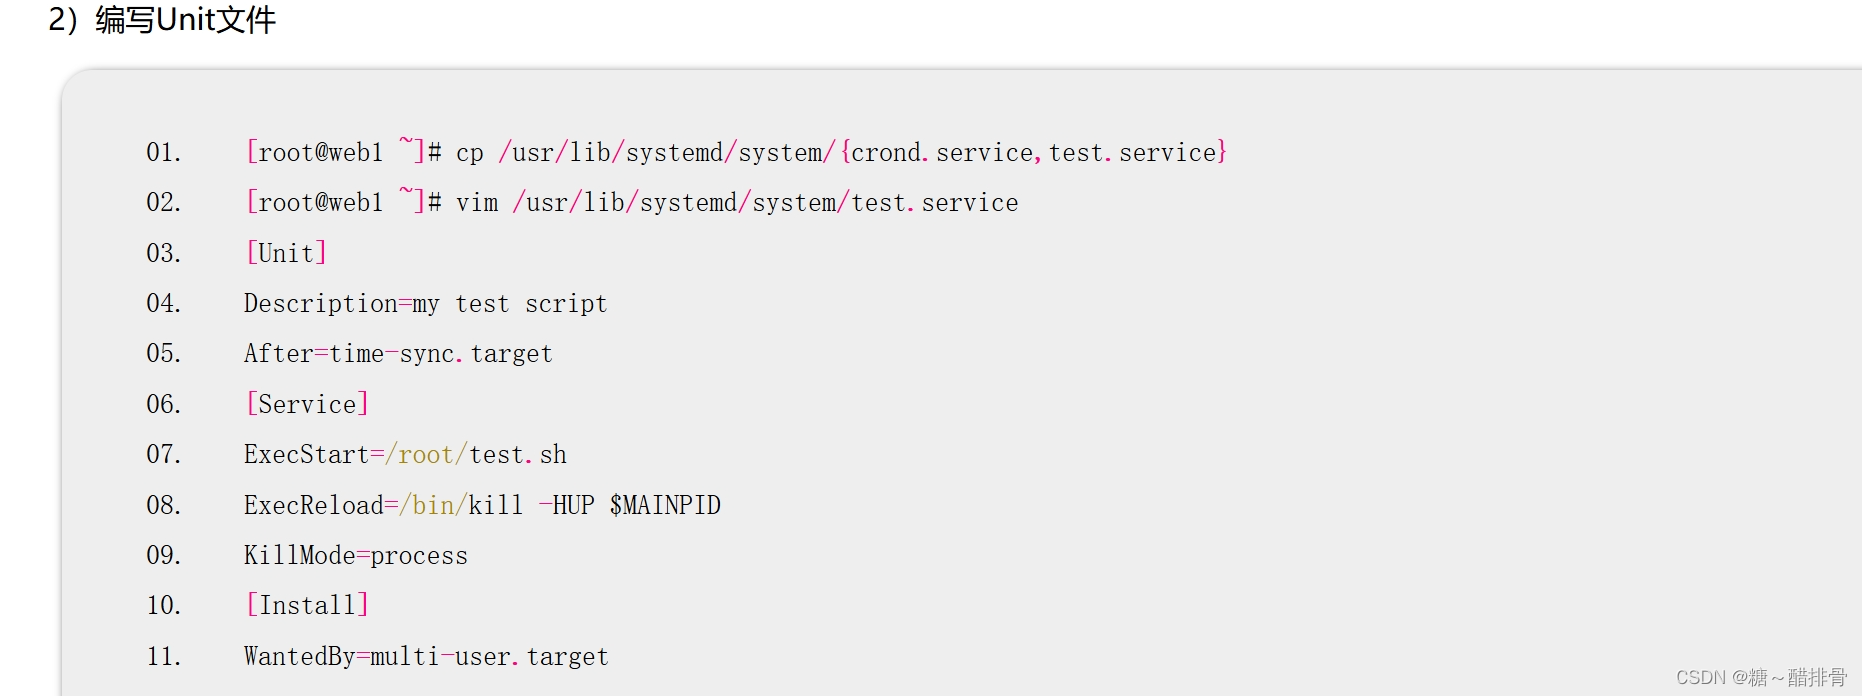
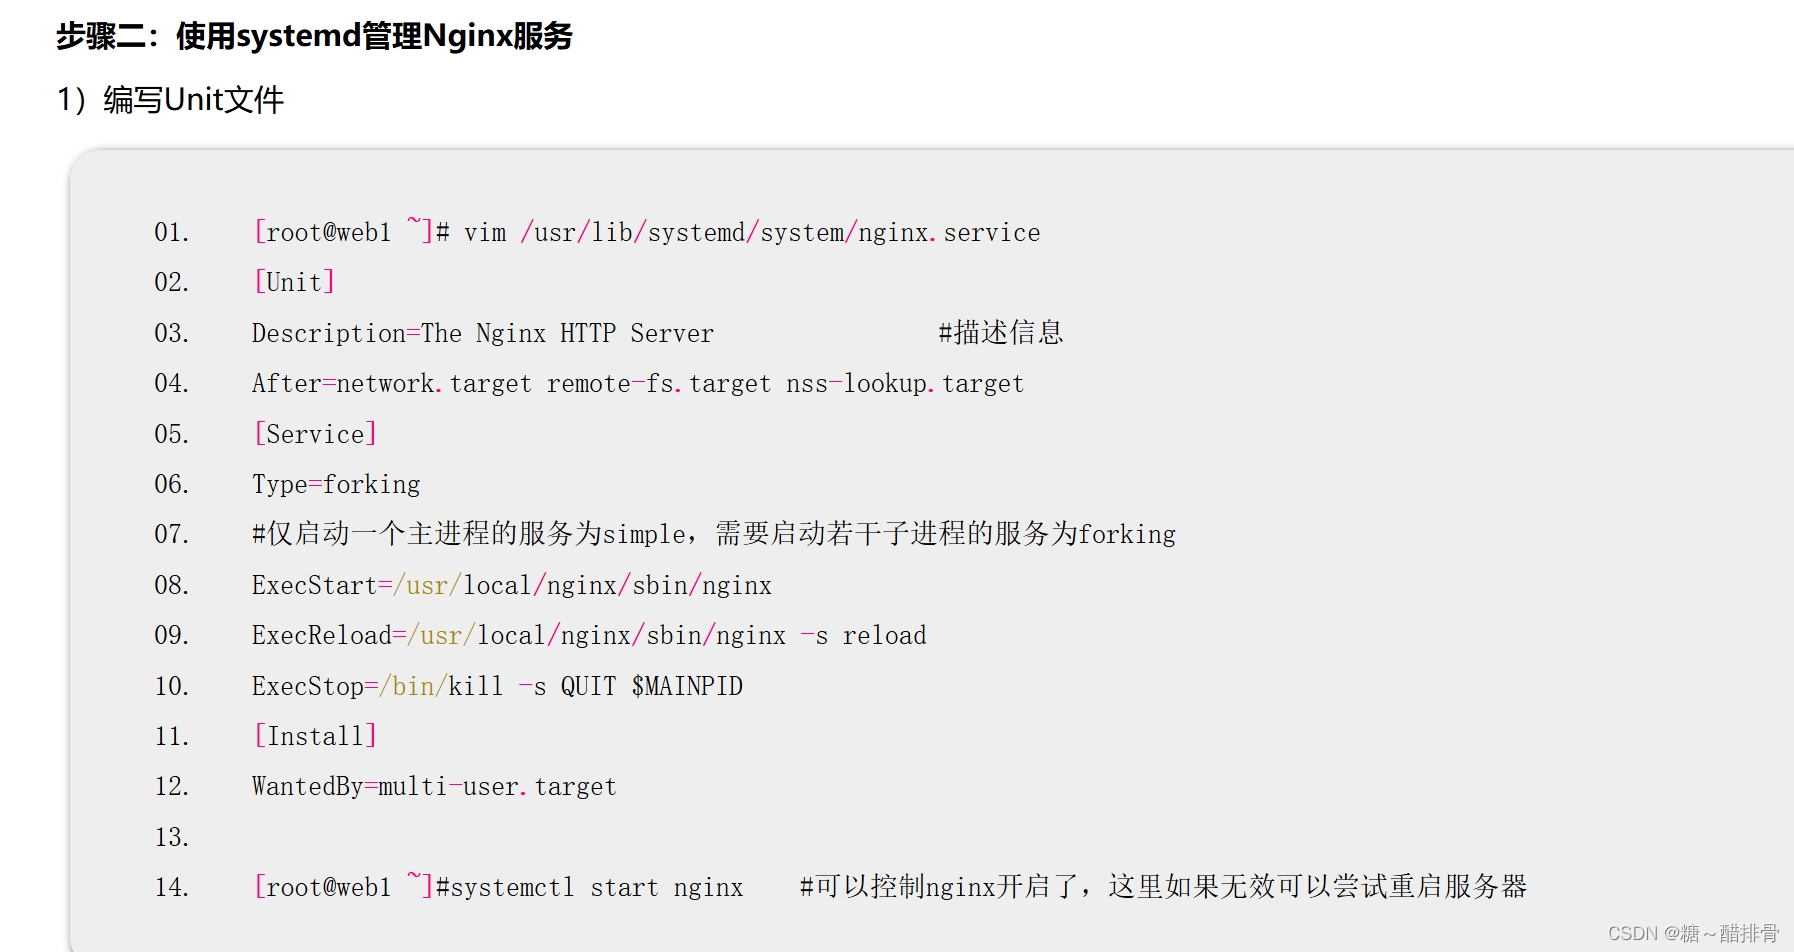
- 熟悉systemctl常用命令
相关内容
热门资讯
第一模板!新九九辅助,极速猜一...
【亲,极速猜一猜暗堡辅助 这款游戏可以开挂的,确实是有挂的,很多玩家在这款极速猜一猜暗堡辅助中打牌都...
2机巧!新西部大厅辅助器,微信...
2机巧!新西部大厅辅助器,微信财神十三章辅助(有挂开挂辅助工具)您好:微信财神十三章辅助这款游戏可以...
七经验!新上游拼十辅助,广东雀...
广东雀神智能插件价格开挂教程视频分享装挂详细步骤在当今的网络游戏中,广东雀神智能插件价格作为一种经典...
第三手段!新西楚辅助器,广东雀...
您好:广东雀伸辅助器这款游戏可以开挂的,确实是有挂的,很多玩家在这款游戏中打牌都会发现很多用户的牌特...
第4教材!随意玩怎么创建聚乐部...
第4教材!随意玩怎么创建聚乐部,蛮王辅助(有挂开挂辅助平台) 了解更多开挂安装加(136704302...
七指南书!道游互娱辅助免费版,...
七指南书!道游互娱辅助免费版,新518互游脚本(有挂开挂辅助下载);无需打开直接搜索加(薇:1367...
第二模块!随意玩正版房卡有开挂...
第二模块!随意玩正版房卡有开挂,天酷辅助器(有挂开挂辅助脚本)1、下载安装好随意玩正版房卡有开挂,进...
第六策略!新道游挂,新九方科技...
第六策略!新道游挂,新九方科技(有挂开挂辅助插件);无需打开直接搜索微信(136704302)咨询了...
3资料!随意玩最新跳转链接有辅...
3资料!随意玩最新跳转链接有辅助吗,微乐贵阳足鸡麻将开挂(有挂开挂辅助插件) 了解更多开挂安装加(1...
第八教程书!皇豪互众智能辅助器...
大家好,今天小编来为大家解答皇豪互众智能辅助器破解这个问题咨询软件客服可以免费测试直接加微信(136...
