搭建SMTP服务器白皮书(Linux)
在工作重要搭建SMTP服务器,但是没有一个能说清楚怎么打搭建的,所以我就来做一个最基本的SMTP白皮书帮助有需要的人解决最基本的问题吧
具体MUA—MUS 等概念我就不再这里多说了(有需要请看鸟哥的书,或者Linux就该这么学,都行),直接上步骤:
- 定义邮件服务器的Hostname: mail.jaylab.com
Vi /etc/hostname or hostnamectl set-hostname XXX
- 搭建yum源: 我把iso上传到了VM,因为我的VM无法connect 原始iso文件。 也为大家提供了额外绑定本地yum源的方法
[root@mail conf.d]# cat /etc/yum.repos.d/test.repo
[Testyum]
name=Testyum
baseurl=file:///mnt/cdrom/
gpgcheck=0
enabled=1
绑定本地iso :
mount -o loop /mnt/CentOS-7-x86_64-Everything-2003.iso /mnt/cdrom/
查看:
[root@mail conf.d]# df -Th
Filesystem Type Size Used Avail Use% Mounted on
/dev/mapper/centos-root ext4 17G 12G 4.4G 73% /
devtmpfs devtmpfs 908M 0 908M 0% /dev
tmpfs tmpfs 920M 0 920M 0% /dev/shm
tmpfs tmpfs 920M 8.9M 911M 1% /run
tmpfs tmpfs 920M 0 920M 0% /sys/fs/cgroup
/dev/sda1 xfs 1014M 145M 870M 15% /boot
tmpfs tmpfs 184M 0 184M 0% /run/user/0
/dev/loop0 iso9660 9.6G 9.6G 0 100% /mnt/cdrom
- 安装postfix:
yum install -y posftfix
- 安装dovecot
yum install -y dovecot
- 关闭firewalld(iptables)
Systemctl stop firewalld
- 配置postfix-à发送邮件的功能
Vi /etc/postfix/main.cf
配置如下:高亮是我改动的配置,具体解释请翻阅网上资料(鸟哥)
[root@mail conf.d]# grep -v '^#' /etc/postfix/main.cf > /tmp/postfix.conf
[root@mail conf.d]# vi /tmp/postfix.conf
queue_directory = /var/spool/postfix
command_directory = /usr/sbin
daemon_directory = /usr/libexec/postfix
data_directory = /var/lib/postfix
mail_owner = postfix
myhostname = mail.jaylab.com
mydomain = jaylab.com
myorigin = $mydomain
inet_interfaces = all
inet_protocols = all
mydestination = $myhostname, $mydomain
unknown_local_recipient_reject_code = 550
smtpd_recipient_restrictions = permit_mynetworks
mynetworks = 127.0.0.0/8,192.168.64.0/21,192.168.67.18
relay_domains = $mydestination
alias_maps = hash:/etc/aliases
alias_database = hash:/etc/aliases
debug_peer_level = 2
debugger_command =
PATH=/bin:/usr/bin:/usr/local/bin:/usr/X11R6/bin
ddd $daemon_directory/$process_name $process_id & sleep 5
sendmail_path = /usr/sbin/sendmail.postfix
newaliases_path = /usr/bin/newaliases.postfix
mailq_path = /usr/bin/mailq.postfix
setgid_group = postdrop
html_directory = no
manpage_directory = /usr/share/man
sample_directory = /usr/share/doc/postfix-2.10.1/samples
readme_directory = /usr/share/doc/postfix-2.10.1/README_FILES
- 配置dovecot--à收邮件的功能
/etc/dovecot/dovecot.conf
protocols = imap pop3 lmtp
disable_plaintext_auth = no
login_trusted_networks = 192.168.64.1/21
/etc/dovecot/conf.d/10-mail.conf
mail_location = mbox:~/mail:INBOX=/var/mail/%u
vi /etc/dovecot/conf.d/10-ssl.conf
ssl = no
In /etc/dovecot/conf.d/10-auth.conf ----àcheck this setting and ensure its value is %u
auth_username_format=%u
- 检查postfix,dovecot 监听端口


- 因为postfix会抓取本地账户来建立邮件数据库,所以只要建立本地用户即可用于邮件账号
991 useradd boss
993 su - boss
995 echo "Redhat123" | passwd --stdin boss
切换用户boss
建立收件箱目录—>mkdir -p mail/.imap/INBOX
- 在windows server 上安装DNS服务器, 具体步骤google或者百度吧,这里及就不过多赘述了
- 配置DNS服务器如下: NS,MX,以及A记录

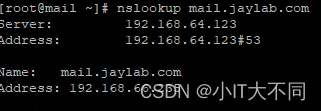
- 配置好了以后,解析结果如下 。 192.168.64.123 是我的DNS服务器地址,192.168.66.235是我邮件服务器地址
- 测试账户 能否被解析成功
[root@mail ~]# doveadm user boss@jaylab.com
field value
user boss
uid 1005
gid 1008
home /home/boss
mail mbox:~/mail:INBOX=/var/mail/boss
system_groups_user boss
- 测试发送邮件:

切换用户jay –通过mail命令来查看邮件系统

如果能收到说明就成功啦!
- Thunderbird
为了进一步去实现email功能, 我用开源软件Thunderbird 来做测试。配置如下,建议测试接连会得到如下截图结果:
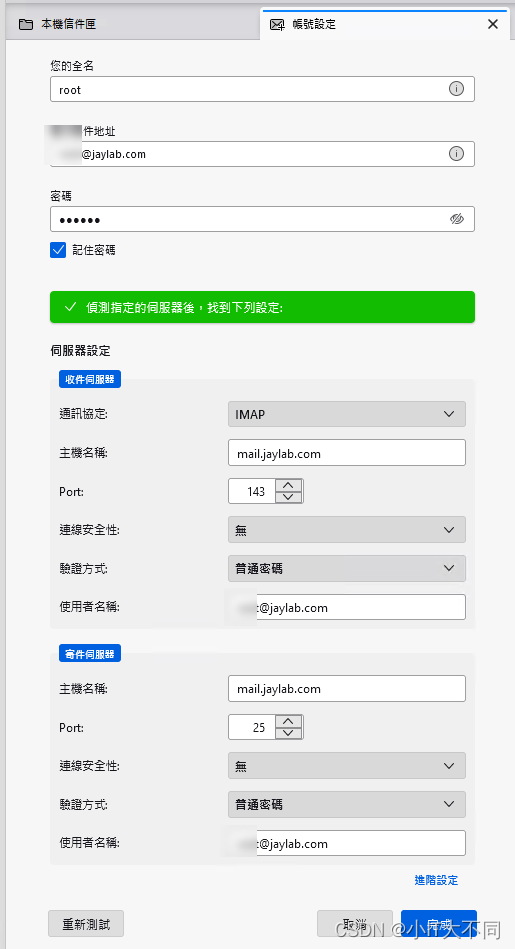
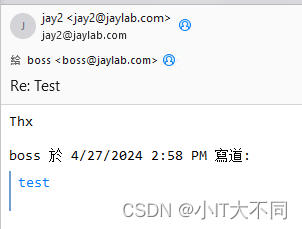
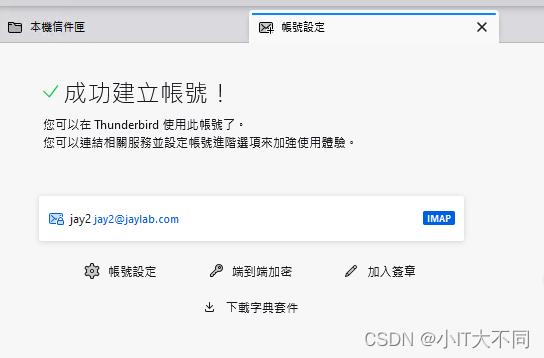 测试收发都没有问题—>
但是在搭建的过程中肯定遇到了很多问题,有些问题当时很头疼,不知道怎么去修复,有的时候我真的要放弃了,但是我就是想搞定它。
于是开了相关的bebug给我很大帮助:
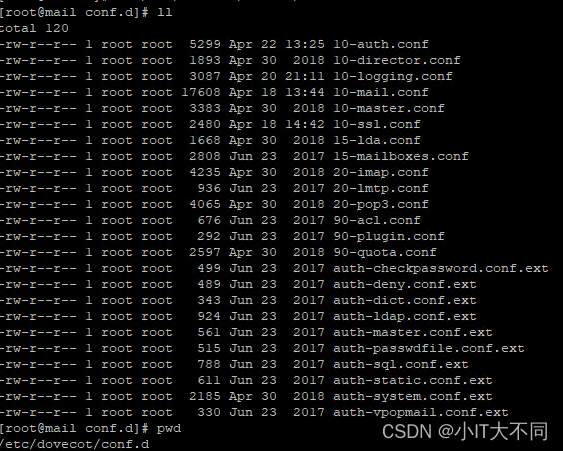
其中10-logging.conf是开启debug的文件
我的设置如下:
[root@mail conf.d]# grep -v '^#' 10-logging.conf
log_path = /var/log/syslog
debug_log_path = /var/log/dodebuglog
auth_verbose = yes
auth_verbose_passwords = yes
auth_debug = yes
auth_debug_passwords = yes
mail_debug = yes
verbose_ssl = no
这样我就可以去/var/log中找我设置的debug 文件了,并且好处是postfix的maillog都在同一个目录。
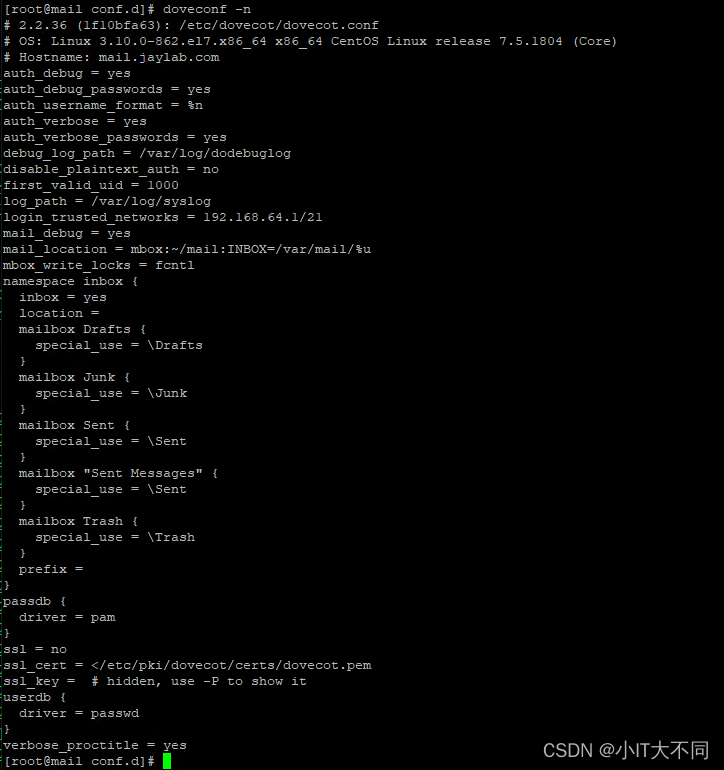
最后通过命令 doveconf -n来看程序设定:
好啦,最后讲讲我遇到的问题
1.Telnet无法成功个链接端口25.

原因:25端口监控了在本地localhost 127.0.0.1上,但是此端口应该监控在所有的地址上

解决办法:
发现配置错了,inet_interfaces = all 此外还打开了inet_interfaces = localhost(默认配置),注销掉就可以了
2.无法注册在Thunderbird
报错:
Syslog中:
Apr 22 06:50:02 imap-login: Info: Disconnected (no auth attempts in 0 secs): user=<>, rip=192.168.67.18, lip=192.168.66.235, session=
发现配置错误,因为dovecot找用户是根据配置 10-auth.conf 来找用户的
Userids in Dovecot using passdb don't include the domain. The userid the user should use the local part, not the full email address.
The checks that are passing and failing are working as expected. Setting auth_username_format=%n before the password db definition does work. The domain is not validated though.
每次链接在dovecotdebug中有输出,去探索吧。
3.有的时候Dovedebug的日志并不能记录其他信息,所以我建议查看如下日志来具体分析问题
[root@mail log]# ls -lt
total 47912
-rw------- 1 root root 42577 Apr 27 14:45 syslog <ß收发信件的日志
-rw------- 1 root root 112573 Apr 27 14:45 dodebuglog << -rw------- 1 root root 251071 Apr 27 14:45 secure <<<安全认证 -rw------- 1 root root 613797 Apr 27 14:45 maillog <<<邮件系统的日志 例如;用户密码错误无法登录邮箱(thunderbird) [root@mail log]# tail -f secure Apr 27 14:45:12 mail journal: auth worker: PASSV: pam_unix(dovecot:auth): authentication failure; logname= uid=0 euid=0 tty=dovecot ruser=jay2 rhost=192.168.67.18 user=jay2 用户没有建立自己的INBOX导致邮件无法收发: [root@mail log]# tail -f syslog Apr 27 14:58:36 imap(jay2): Error: fchown(/home/jay2/mail/.imap/INBOX, group=12(mail)) failed: Operation not permitted (egid=1001(jay2), group based on /var/mail/jay2 - see http://wiki2.dovecot.org/Errors/ChgrpNoPerm) Apr 27 14:58:36 imap(jay2): Error: mkdir_parents(/home/jay2/mail/.imap/INBOX) failed: Operation not permitted Apr 27 14:58:39 imap(jay2): Error: fchown(/home/jay2/mail/.imap/INBOX, group=12(mail)) failed: Operation not permitted (egid=1001(jay2), group based on /var/mail/jay2 - see http://wiki2.dovecot.org/Errors/ChgrpNoPerm) Apr 27 14:58:39 imap(jay2): Error: mkdir_parents(/home/jay2/mail/.imap/INBOX) failed: Operation not permitted Apr 27 14:59:00 imap(jay2): Error: fchown(/home/jay2/mail/.imap/INBOX, group=12(mail)) failed: Operation not permitted (egid=1001(jay2), group based on /var/mail/jay2 - see Change Group Operation Not Permitted — Dovecot documentation) 后继: 邮箱有很多功能,如别名设置,TLS加密传输等等。。但是我们要起码知道她最基本的工作方式,希望我的白皮书能对你今后的需要有所帮助。 感谢
