玩客云改造HP2130打印机服务器
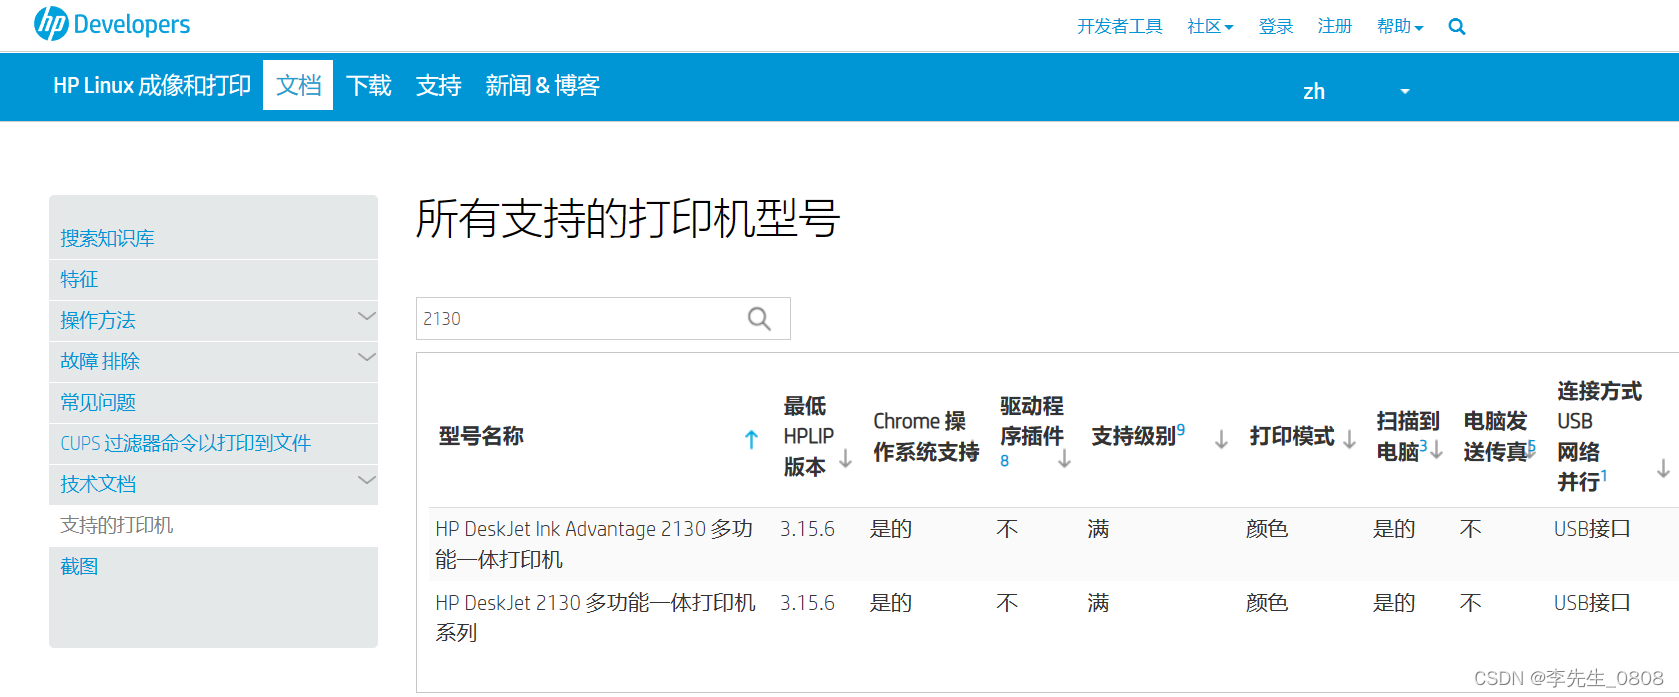
查看HPLinux驱动是否支持该型号
查看地址HP Developers Portal | All Supported Printer Models
刷机准备:
直刷包:
Releases · hzyitc/armbian-onecloud (github.com)
下拉,找到这种带burn后缀的才是直刷包
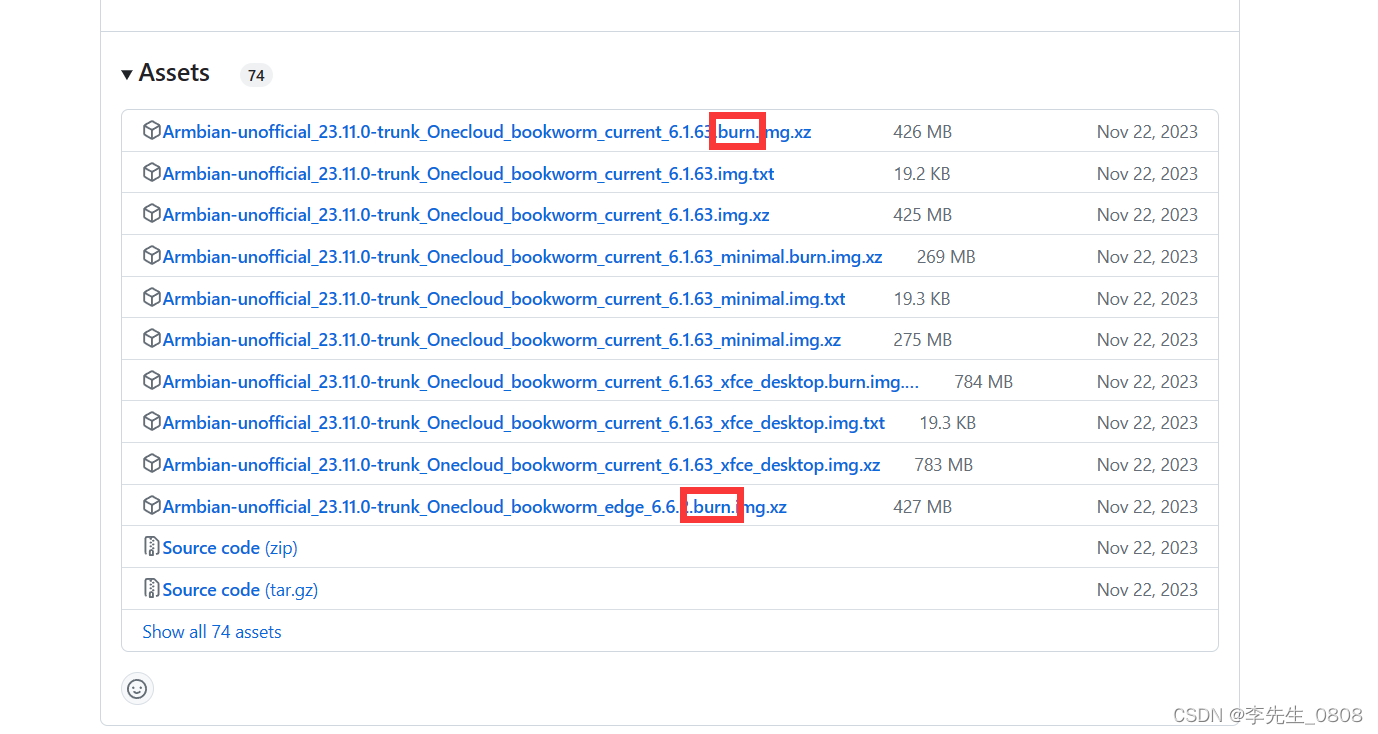
下载后解压获得.img后缀的文件
烧录工具:
Amlogic_USB_ Burning_Tool_setup_v2.2.0.zip - 蓝奏云文件大小:8.0 M| https://wwfw.lanzouj.com/iNo3y1l42a2b
- 一根 公对公USB线
- 用于短接的镊子或者铁丝(能导电就行)
SSH工具:PuTTY
使用本教程下载的包第一次连接请用此工具,否则有可能报错
http://xz.w10a.com/small/PuTTY_hh.rarhttp://xz.w10a.com/small/PuTTY_hh.rar
刷机教程:
拆机
参考这个视频
玩客云拆机 - 刷机 一气呵成_哔哩哔哩_bilibili玩客云拆机 - 刷机 一气呵成, 视频播放量 987、弹幕量 0、点赞数 3、投硬币枚数 0、收藏人数 7、转发人数 0, 视频作者 宅东宅西, 作者简介 拆了装、装了拆、让我们一起搞机吧~,相关视频:4.已经刷了点心云的N1盒子如何重新刷机成N1点心云,3.N1刷机点心云,玩客云刷casaos全过程,图文并茂简单实用,5.N1盒子 从 OEPNWRT 刷点心云系统,USB公对公制作 usb-m*2条改刷机线,2.N1盒子拆机刷机官改固件 打开adb,1.N1盒子拆机,玩客云 casaos之同步神器 syncthing配置及简单使用,玩客云不能错过的玩法,直刷openwrt。,玩客云刷机安装casaos一站式服务,内网穿透及各种软件应用。https://www.bilibili.com/video/BV1uC4y1J79e
烧录
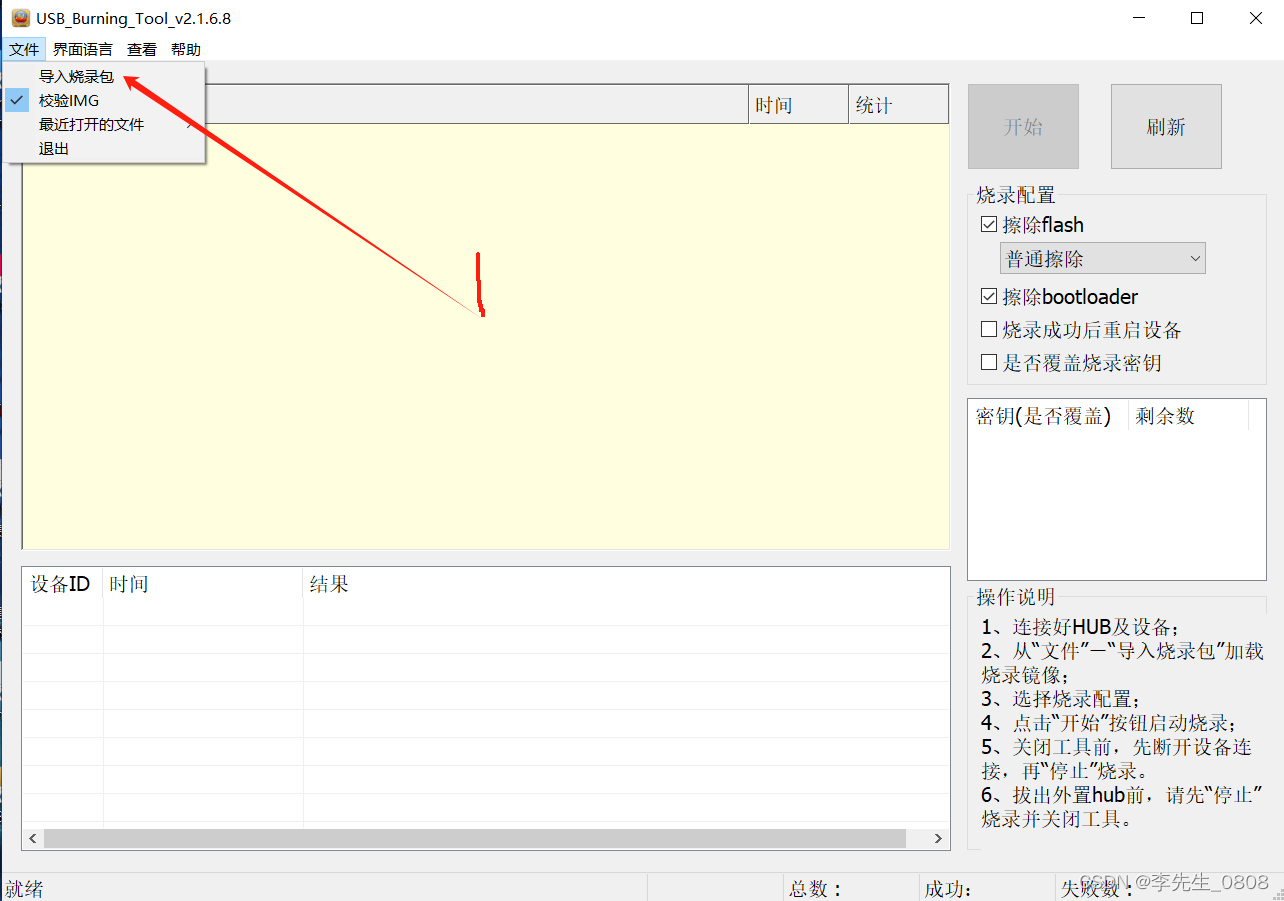
电脑打开Amlogic_USB_ Burning_Tool
导入下载好的直刷包.img
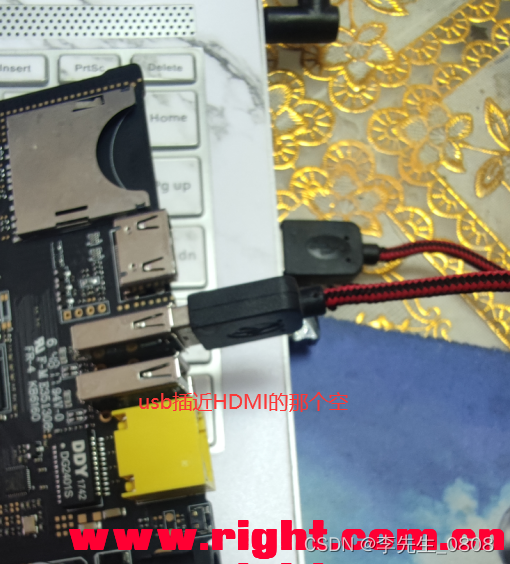
使用公对公USB线连接玩客云和电脑
短接点:
玩客云刷机短接图 - 哔哩哔哩 (bilibili.com)https://www.bilibili.com/read/cv21738633/
总体顺序
- 导入直刷包后 点击开始按钮
- 用准备好的摄子或其他短路工具,玩客云背面短接后,不要松手
- 再给玩客云通电,软件上有动静后,松开摄子或者短路工具(电源线和数据线不要动)至烧录成功
- 点击”停止”,退出软件
- 拔下USB线,断电玩客云,放到一边备用
SSH连接
烧录成功后进入下一步SSH连接
- 将玩客云通过网线插入路由器LAN口
- 在浏览器登陆路由器后台:一般是192.168.1.1 或者1921.168.0.1
- 查看后台信息找到onecloud点击进去查看该设备IP
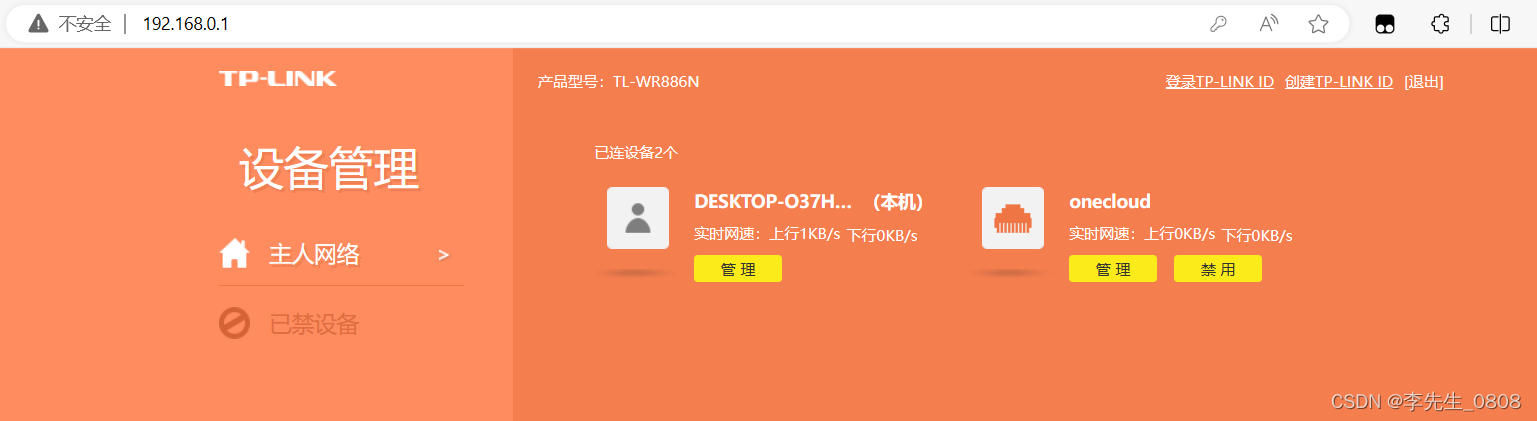
 这里建议 将IP与MAC地址绑定
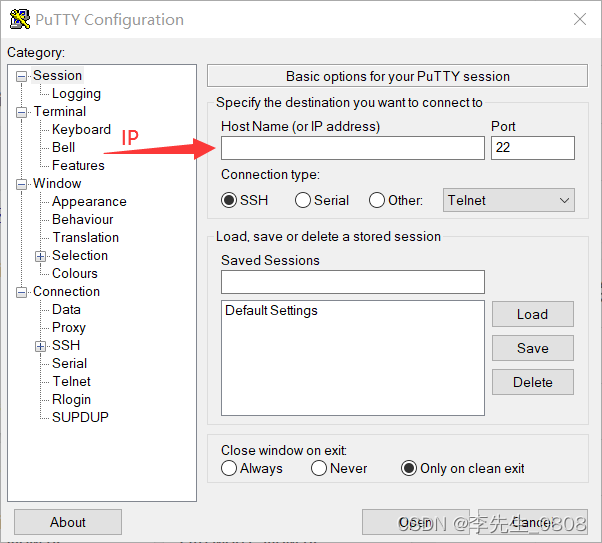
 - 打开下载好的PuTTY软件
填写刚刚在路由器看到的IP地址
打开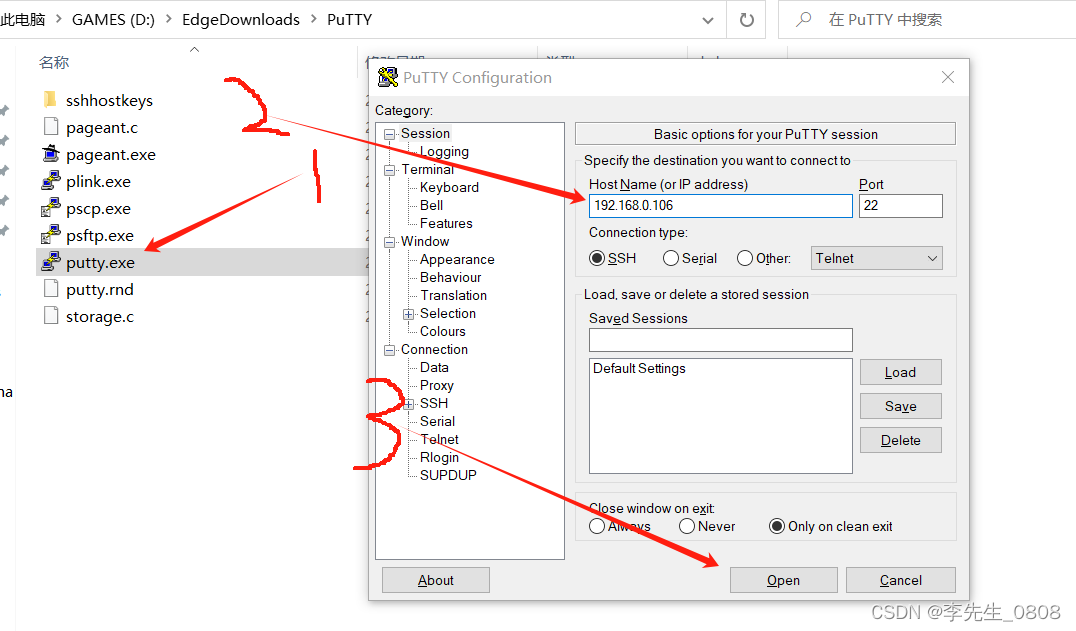
- 输入用户名密码,默认
用户:root
密码:1234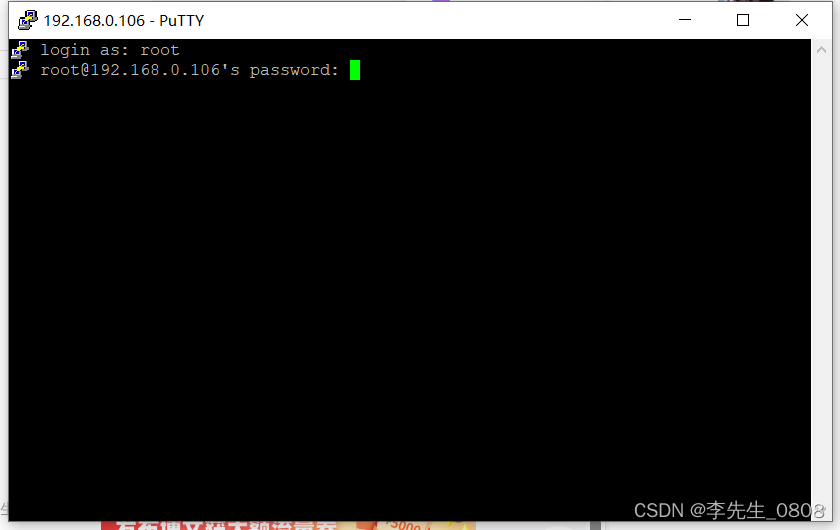
- 初次进入设置一些参数:
1.创建新密码
2.出现该选项时,键盘输入1回车
1)bash
2)zsh
3.然后要求创建新账户,直接回车即可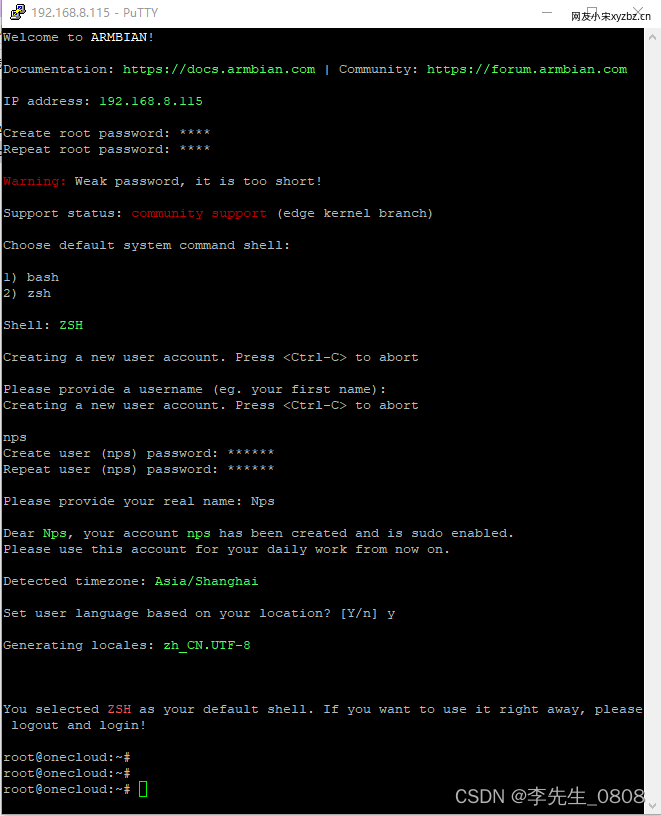
安装cups和添加打印机
更改系统时区和时间
进入系统后首先更改时区和时间,否则apt会更新失败
sudo ln -sf /usr/share/zoneinfo/Asia/Shanghai /etc/localtime && echo "Asia/Shanghai" > /etc/timezone更换软件源
查看版本
cat /etc/os-release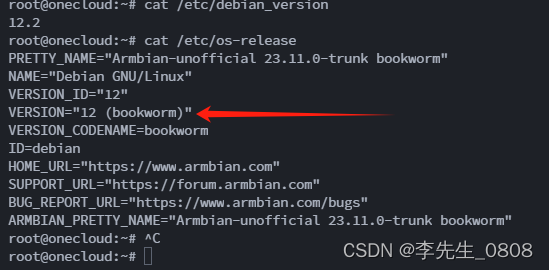
查到内核版本是debian12
我们可以用清华大学源
debian | 镜像站使用帮助 | 清华大学开源软件镜像站 | Tsinghua Open Source Mirrorhttps://mirrors.tuna.tsinghua.edu.cn/help/debian/我复制到了这里(非12不要使用这个):
# 默认注释了源码镜像以提高 apt update 速度,如有需要可自行取消注释 deb https://mirrors.tuna.tsinghua.edu.cn/debian/ bookworm main contrib non-free non-free-firmware # deb-src https://mirrors.tuna.tsinghua.edu.cn/debian/ bookworm main contrib non-free non-free-firmware deb https://mirrors.tuna.tsinghua.edu.cn/debian/ bookworm-updates main contrib non-free non-free-firmware # deb-src https://mirrors.tuna.tsinghua.edu.cn/debian/ bookworm-updates main contrib non-free non-free-firmware deb https://mirrors.tuna.tsinghua.edu.cn/debian/ bookworm-backports main contrib non-free non-free-firmware # deb-src https://mirrors.tuna.tsinghua.edu.cn/debian/ bookworm-backports main contrib non-free non-free-firmware deb https://security.debian.org/debian-security bookworm-security main contrib non-free non-free-firmware # deb-src https://security.debian.org/debian-security bookworm-security main contrib non-free non-free-firmware修改/etc/apt/sources.list 文件
nano /etc/apt/sources.list注释掉原来的,将上面复制进去
修改好之后,使用 ctrl+X -> 按Y -> 按回车 保存退出
更新
apt update安装cups和惠普驱动
(安装过程按Y确定)
apt-get install cups apt-get install hplip编辑cups的配置文件
nano /etc/cups/cupsd.conf进入文件内
首先将
Listen localhost:631
修改为
Listen 0.0.0.0:631
然后将以下四段在下面增加 Allow all
如下所示:
# Restrict access to the server... Order allow,deny Allow all # Restrict access to configuration files... AuthType Default Require user @SYSTEM Order allow,deny Allow all # Restrict access to log files... AuthType Default Require user @SYSTEM Order allow,deny Allow all
保存文件,并重启cups进程
service cups restart在WEB端操作
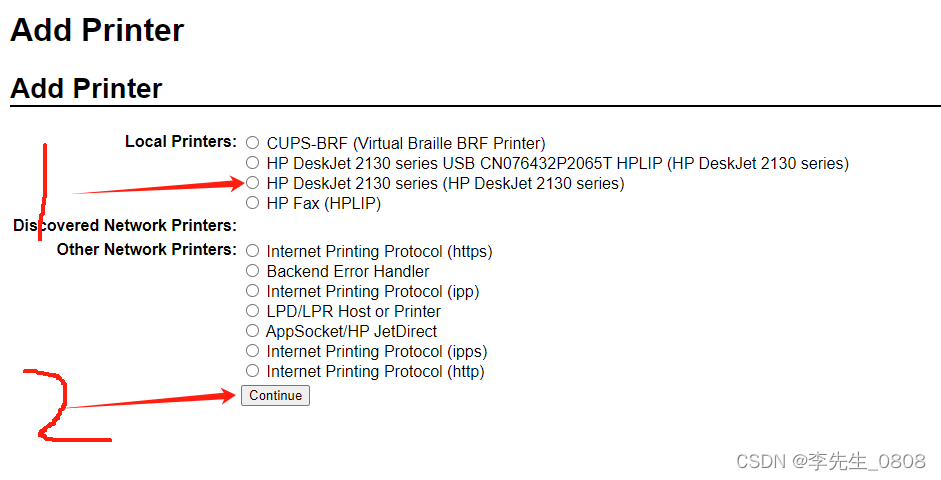
将打印机usb线连接到玩客云
浏览器输入:http://玩客云的IP地址:631,进入cups的管理页面

如果弹出需要输入账号密码弹窗:
账号和密码就是系统的账号密码:root/1234
点击添加后:
下一步:
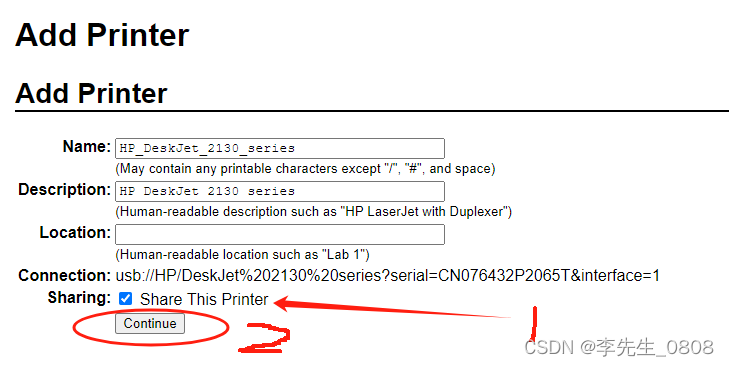
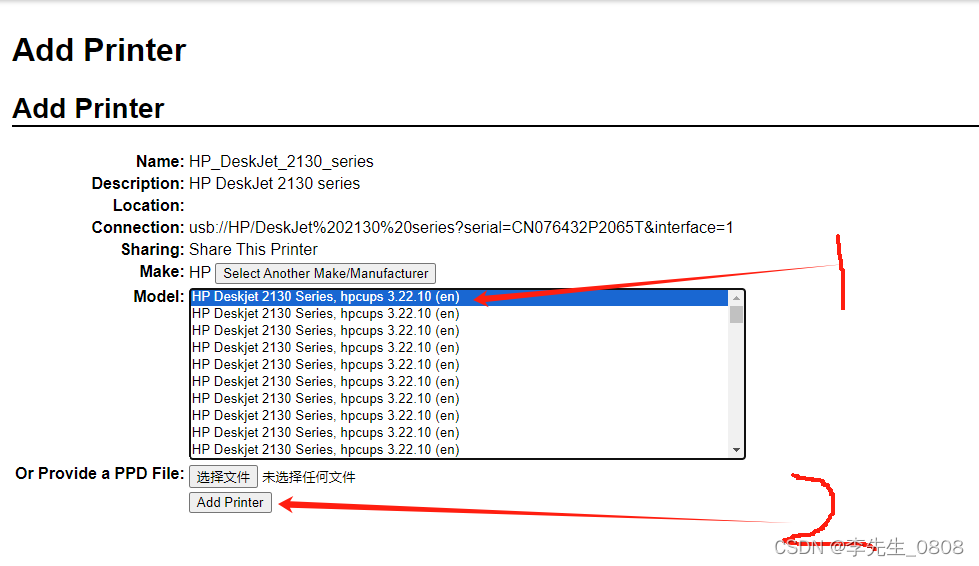
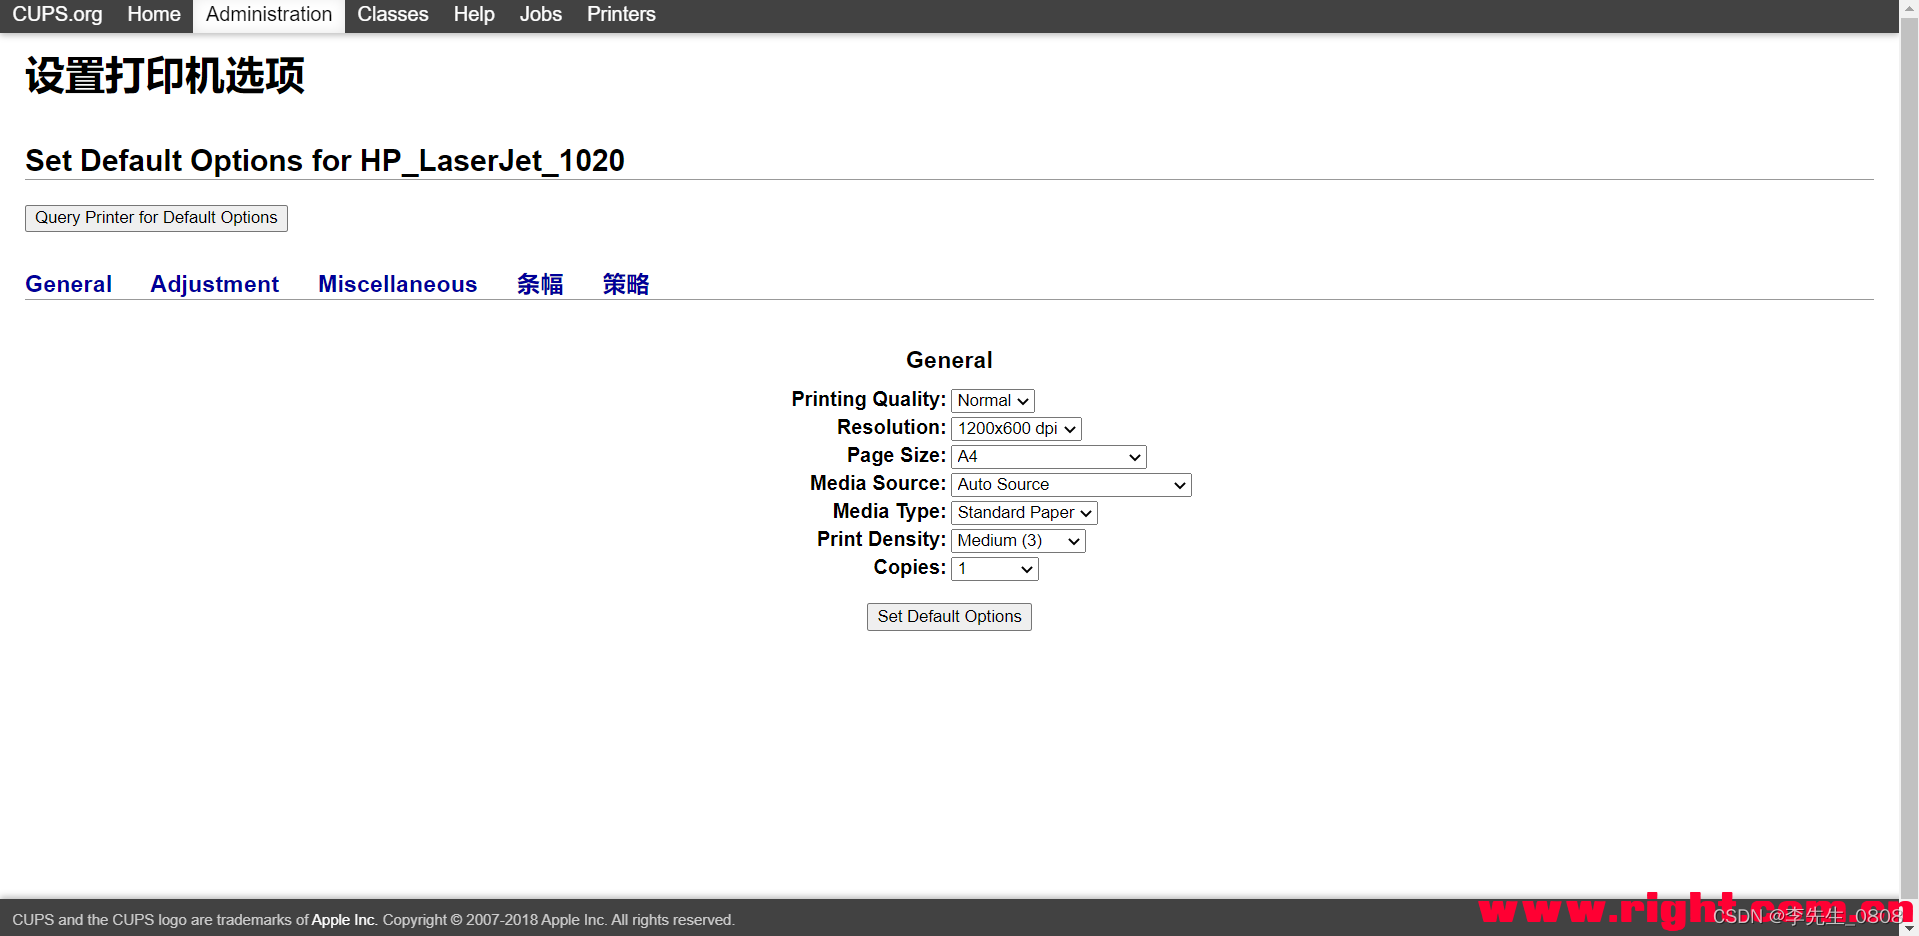
配置默认配置
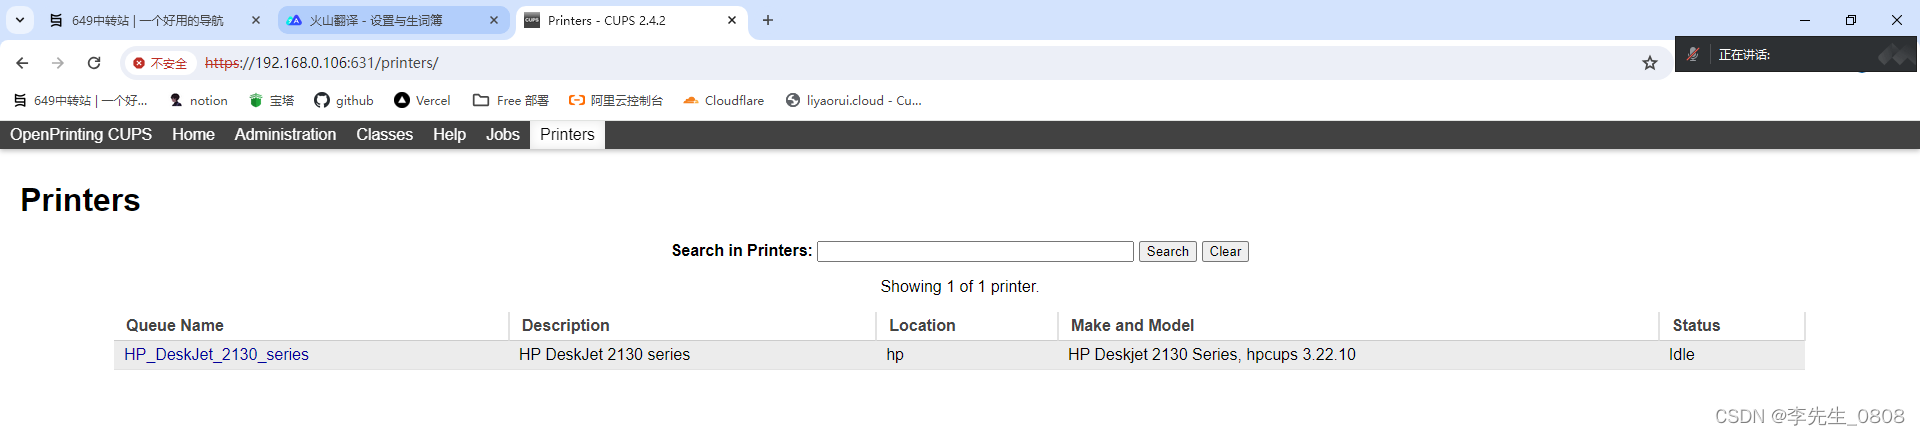
完成后就长这样
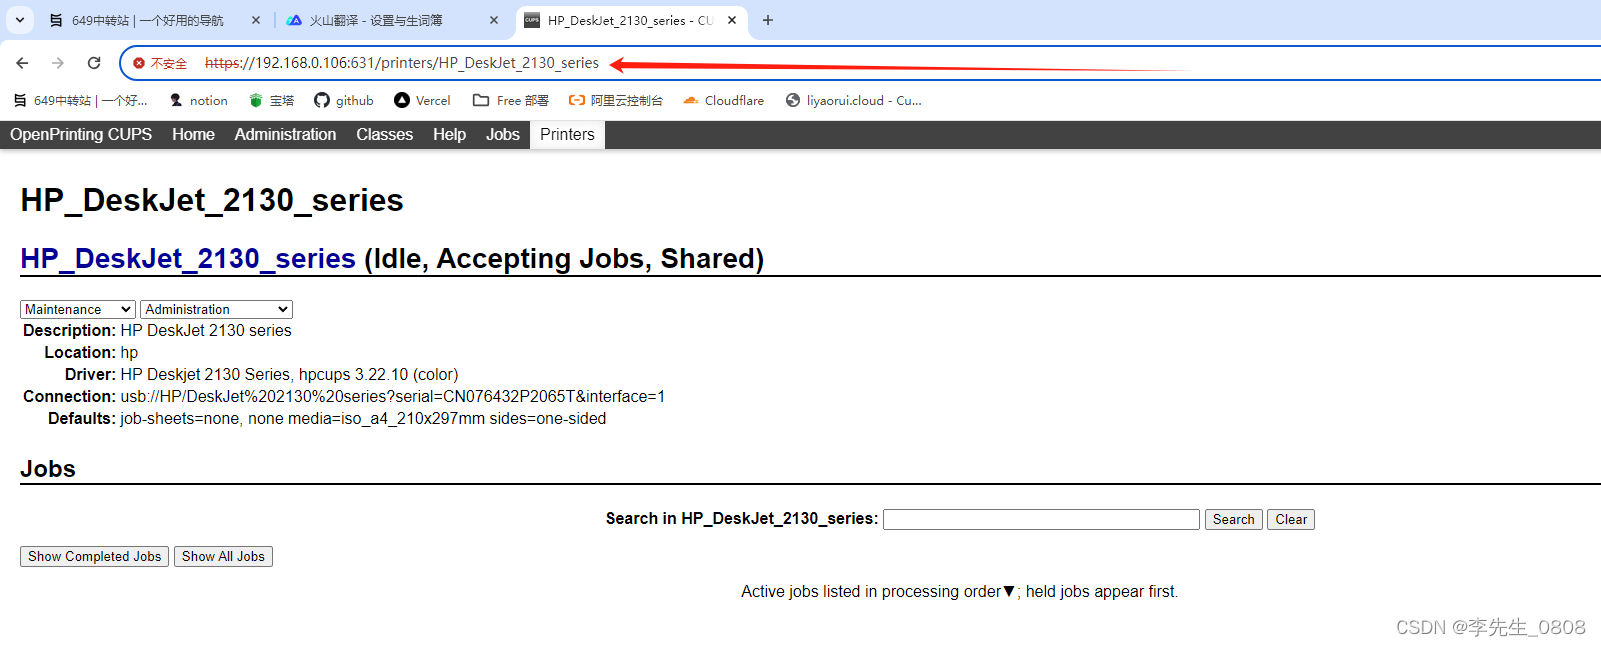
 点进去之后,保存这个链接,添加打印机会用上
PC/手机连接
电脑链接:
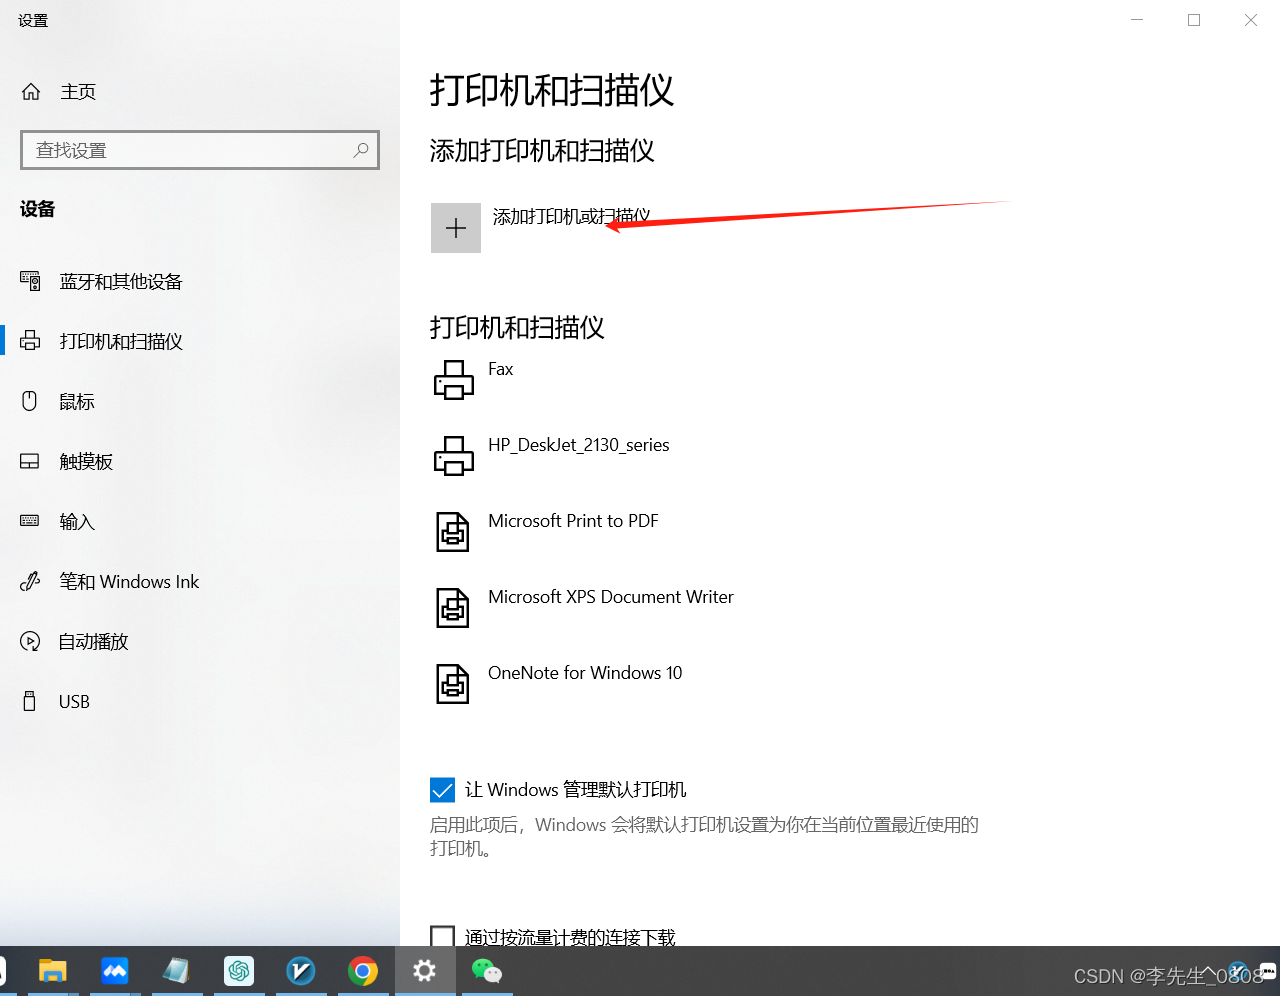
将刚刚的链接复制进去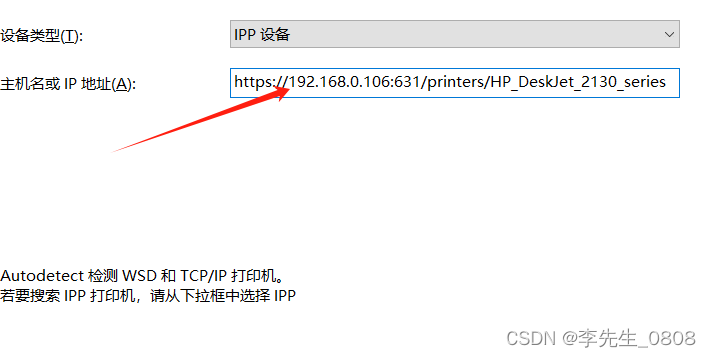
添加成功

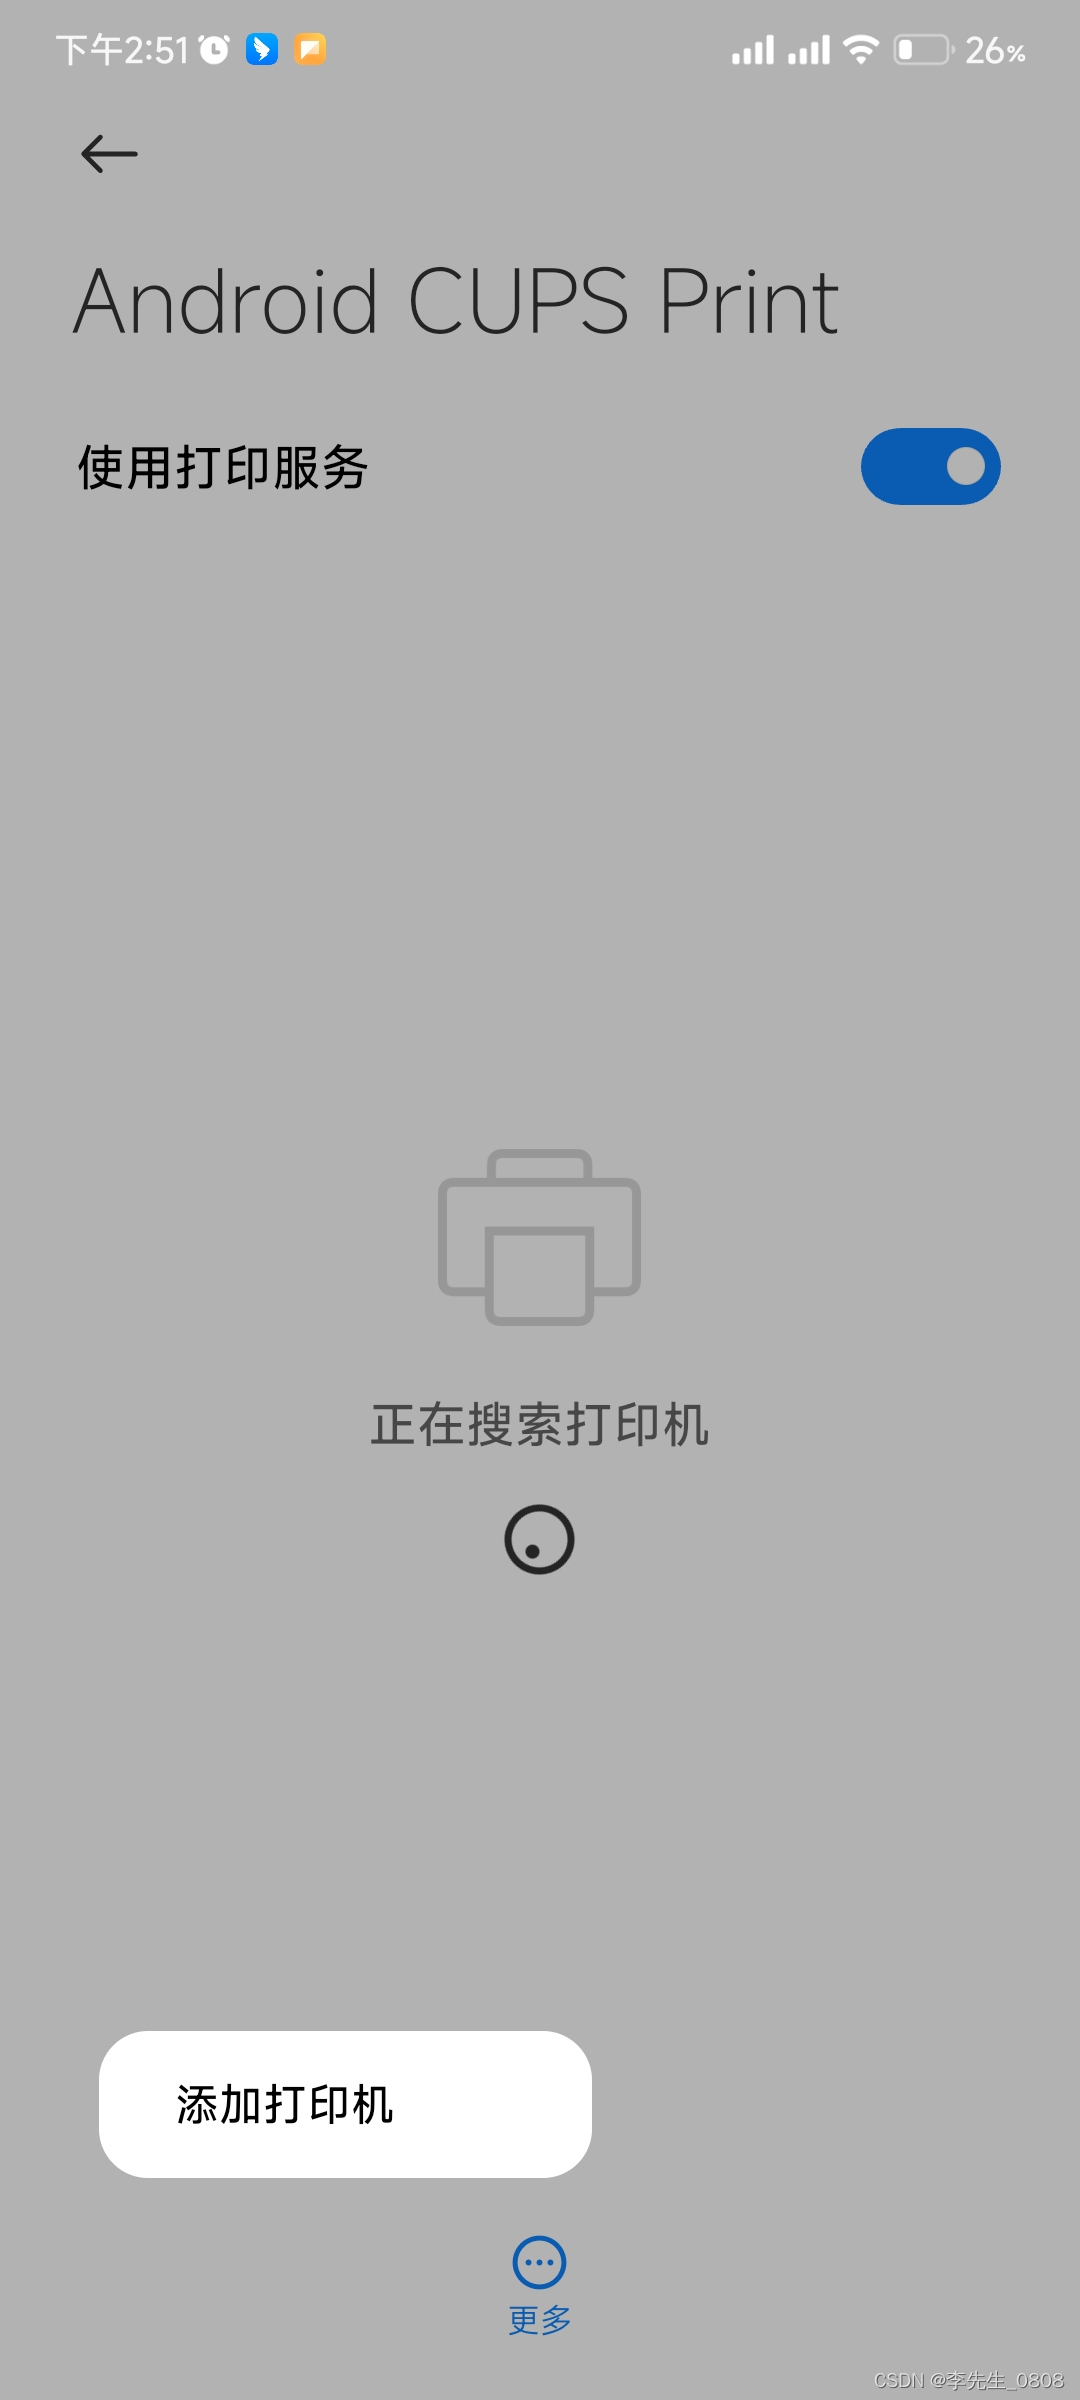
手机连接:
下载软件
https://wwfw.lanzouj.com/iiXQu1l62zbchttps://wwfw.lanzouj.com/iiXQu1l62zbc
密码:7ggc
添加打印机

输入链接和给他备注,点击ADD
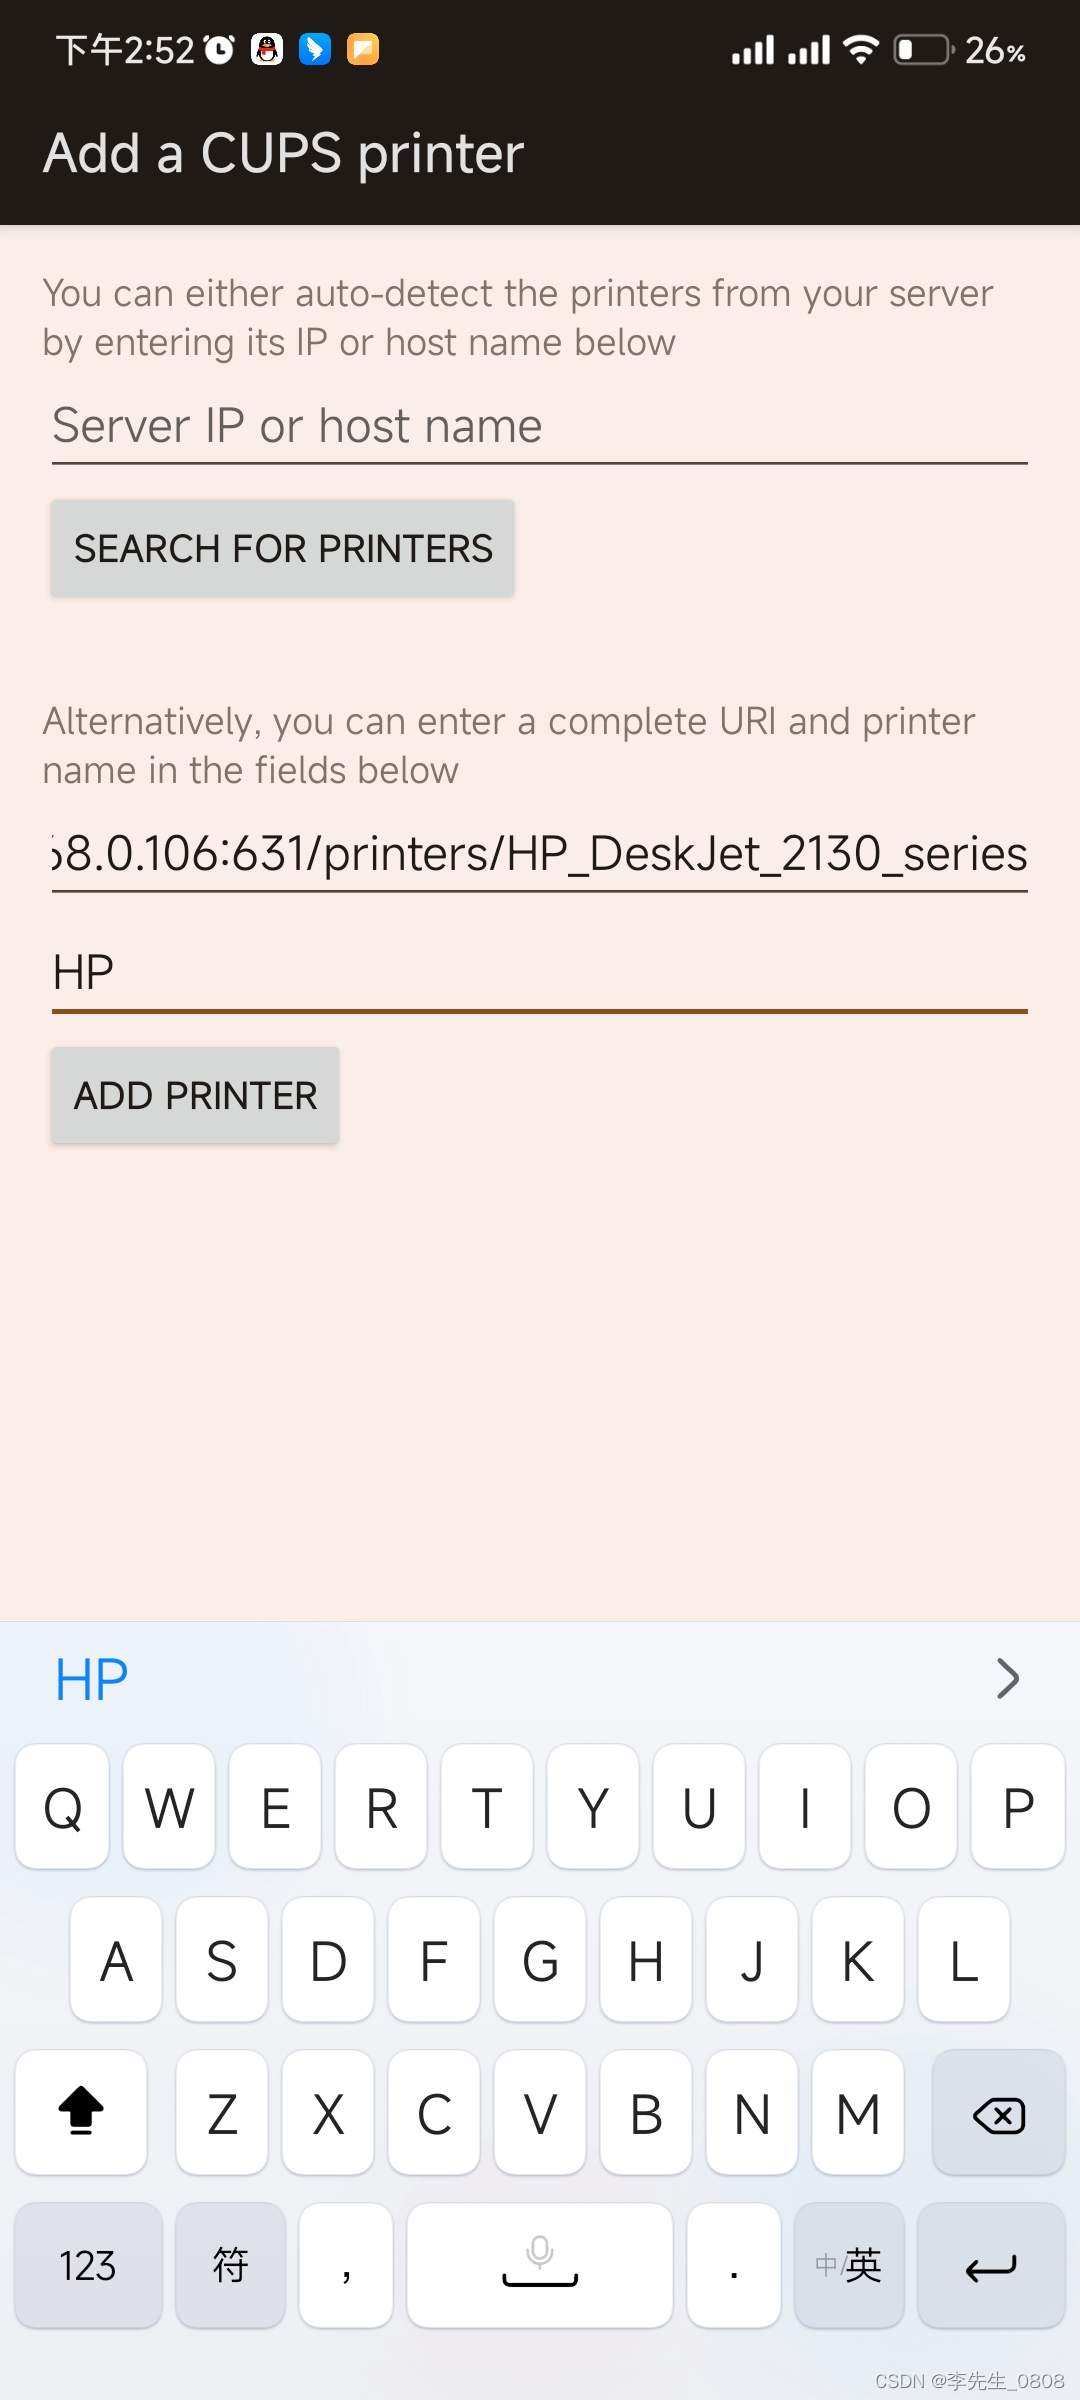
添加后有延迟稍等一下
如果搜到了,打开下载的软件会显示设备,并弹窗,点击下方的信任设备即可
PS:在软件点击设备会直接删除 不要瞎点,然后就可以使用了,关于APP的更多细节可以评论问我