es数据备份和迁移Elasticsearch
创始人
2025-01-15 22:06:24
0次
Elasticsearch数据备份与恢复
前提
# 注意: 1.在进行本地备份时使用--type需要备份索引和数据(mapping,data) 2.在将数据备份到另外一台ES节点时需要比本地备份多备份一种数据类型(analyzer,mapping,data,template)一.本地备份与恢复
# 前提: · 必须要有Node环境和npm软件:nodejs,npm 1.:下载包 wget https://nodejs.org/dist/v14.17.1/node-v14.17.1-linux-x64.tar.xz 2.:安装包(如果本身有node包但是不是新版本建议卸载重装) xz -d node-v14.17.1-linux-x64.tar.xz tar -xvf node-v14.17.1-linux-x64.tar echo "export NODE_HOME=/home/workspaces/node-v14.17.1-linux-x64 export PATH=$PATH:$NODE_HOME/bin export NODE_PATH=$NODE_HOME/lib/node_modules" >>/etc/profile source /etc/profile 3.:验证安装是否成功 node -v 4.:设置淘宝镜像 npm config set registry http://registry.npm.taobao.org 5.:安装npm(只需要在一个节点安装即可,如果前端还有nginx做反向代理可以每个节点都装) [root@elkstack01 ~]# yum install -y npm 6.:进入下载head插件代码目录 [root@elkstack01 src]# cd /usr/local/ 7.:从GitHub上克隆代码到本地(或者直接从找es-head的包) [root@elkstack01 local]# git clone git://github.com/mobz/elasticsearch-head.git 8.:克隆完成后,进入elasticsearch插件目录 [root@elkstack01 local]# cd elasticsearch-head/ 9.:清除缓存 [root@elkstack01 elasticsearch-head]# npm cache clean -f #使用npm安装n模块(不同的项目js脚本所需的node版本可能不同,所以就需要node版本管理工具) 10.安装elasticdump [root@db04 ~]# npm install elasticdump -g 11.本地目录备份 ## 第一次进行的是索引的备份 ## 第二次进行的是数据的备份 [root@db04 bin]# ./elasticdump --input=http://10.0.0.54:9200/student/user --output=/tmp/student_mapping.json --type=mapping Wed, 12 Aug 2020 07:41:59 GMT | starting dump Wed, 12 Aug 2020 07:41:59 GMT | got 1 objects from source elasticsearch (offset: 0) Wed, 12 Aug 2020 07:41:59 GMT | sent 1 objects to destination file, wrote 1 Wed, 12 Aug 2020 07:41:59 GMT | got 0 objects from source elasticsearch (offset: 1) Wed, 12 Aug 2020 07:41:59 GMT | Total Writes: 1 Wed, 12 Aug 2020 07:41:59 GMT | dump complete [root@db04 bin]# ./elasticdump --input=http://10.0.0.54:9200/student/user --output=/tmp/student_data.json --type=data Wed, 12 Aug 2020 07:42:21 GMT | starting dump Wed, 12 Aug 2020 07:42:21 GMT | got 8 objects from source elasticsearch (offset: 0) Wed, 12 Aug 2020 07:42:21 GMT | sent 8 objects to destination file, wrote 8 Wed, 12 Aug 2020 07:42:21 GMT | got 0 objects from source elasticsearch (offset: 8) Wed, 12 Aug 2020 07:42:21 GMT | Total Writes: 8 Wed, 12 Aug 2020 07:42:21 GMT | dump complete ##备份之后用Elasticsearch Head插件模拟数据丢失,误删除student索引和数据并用elasticdump恢复 [root@db04 bin]# ./elasticdump --output=http://10.0.0.54:9200/student --input=/tmp/student_mapping.json --type=mapping Wed, 12 Aug 2020 07:46:21 GMT | starting dump Wed, 12 Aug 2020 07:46:21 GMT | got 1 objects from source file (offset: 0) Wed, 12 Aug 2020 07:46:21 GMT | sent 1 objects to destination elasticsearch, wrote 1 Wed, 12 Aug 2020 07:46:21 GMT | got 0 objects from source file (offset: 1) Wed, 12 Aug 2020 07:46:21 GMT | Total Writes: 1 Wed, 12 Aug 2020 07:46:21 GMT | dump complete [root@db04 bin]# ./elasticdump --output=http://10.0.0.54:9200/student --input=/tmp/student_data.json --type=data Wed, 12 Aug 2020 07:46:40 GMT | starting dump Wed, 12 Aug 2020 07:46:40 GMT | got 8 objects from source file (offset: 0) Wed, 12 Aug 2020 07:46:40 GMT | sent 8 objects to destination elasticsearch, wrote 8 Wed, 12 Aug 2020 07:46:40 GMT | got 0 objects from source file (offset: 8) Wed, 12 Aug 2020 07:46:40 GMT | Total Writes: 8 Wed, 12 Aug 2020 07:46:40 GMT | dump complete# 根据索引名和类型进行备份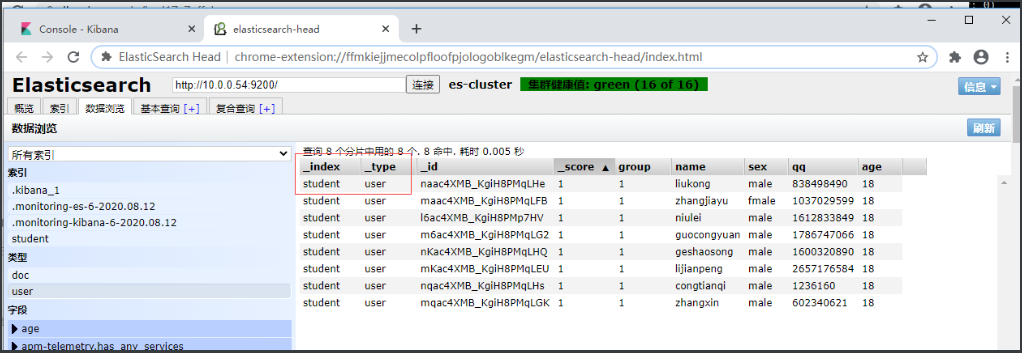
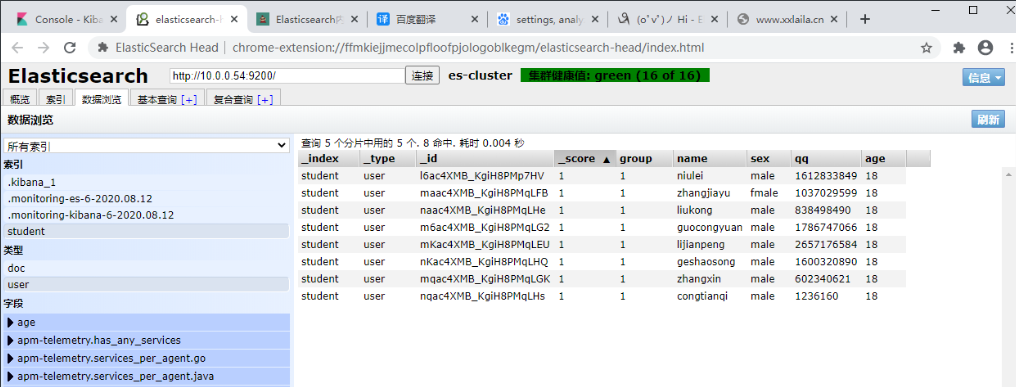
#备份成功。数据恢复成功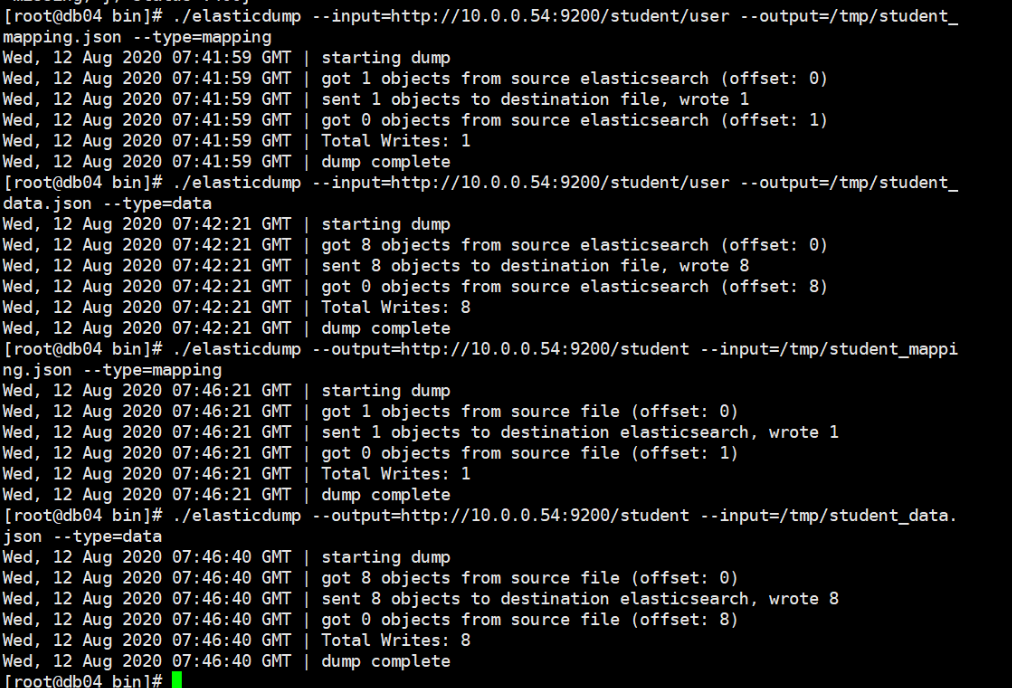
二.备份到另一台ES节点(如果是同一集群的节点索引不能重名)
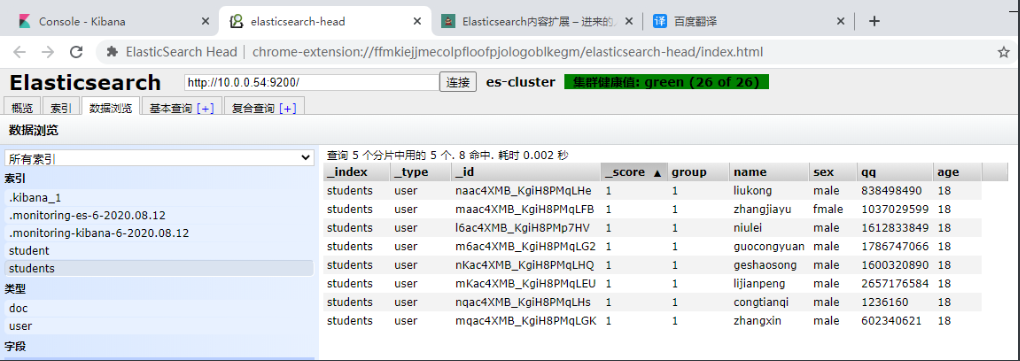
# 备份到另一台ES节点(同一集群索引不能重名) [root@db04 bin]# ./elasticdump --input=http://10.0.0.54:9200/student --output=http://10.0.0.55:9200/students --type=analyzer Wed, 12 Aug 2020 08:14:00 GMT | starting dump Wed, 12 Aug 2020 08:14:00 GMT | got 1 objects from source elasticsearch (offset: 0) Wed, 12 Aug 2020 08:14:01 GMT | sent 1 objects to destination elasticsearch, wrote 1 Wed, 12 Aug 2020 08:14:01 GMT | got 0 objects from source elasticsearch (offset: 1) Wed, 12 Aug 2020 08:14:01 GMT | Total Writes: 1 Wed, 12 Aug 2020 08:14:01 GMT | dump complete [root@db04 bin]# ./elasticdump --input=http://10.0.0.54:9200/student --output=http://10.0.0.55:9200/students --type=mapping Wed, 12 Aug 2020 08:14:10 GMT | starting dump Wed, 12 Aug 2020 08:14:10 GMT | got 1 objects from source elasticsearch (offset: 0) Wed, 12 Aug 2020 08:14:10 GMT | sent 1 objects to destination elasticsearch, wrote 1 Wed, 12 Aug 2020 08:14:10 GMT | got 0 objects from source elasticsearch (offset: 1) Wed, 12 Aug 2020 08:14:10 GMT | Total Writes: 1 Wed, 12 Aug 2020 08:14:10 GMT | dump complete [root@db04 bin]# ./elasticdump --input=http://10.0.0.54:9200/student --output=http://10.0.0.55:9200/students --type=data Wed, 12 Aug 2020 08:14:15 GMT | starting dump Wed, 12 Aug 2020 08:14:15 GMT | got 8 objects from source elasticsearch (offset: 0) Wed, 12 Aug 2020 08:14:15 GMT | sent 8 objects to destination elasticsearch, wrote 8 Wed, 12 Aug 2020 08:14:15 GMT | got 0 objects from source elasticsearch (offset: 8) Wed, 12 Aug 2020 08:14:15 GMT | Total Writes: 8 Wed, 12 Aug 2020 08:14:15 GMT | dump complete [root@db04 bin]#elasticdump --input=http://10.0.0.54:9200/student --output=http://100.10.0.55:9200/students --type=template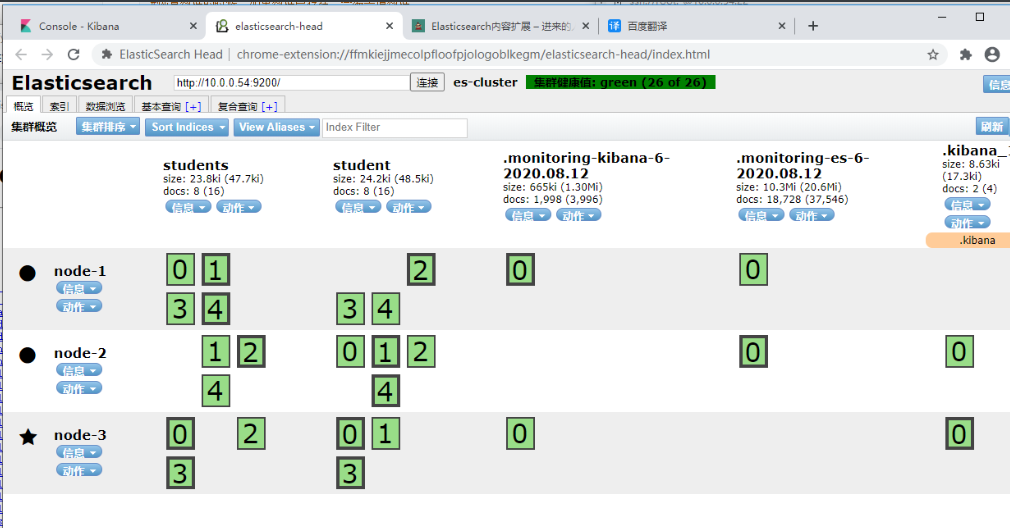

三.本地备份与恢复脚本
# 1.本地备份脚本 [root@db04 ~]# vim output_Es.sh #!/bin/bash read -p '要备份的机器是:'${1} #要导出的索引名 index_name=' student ' for index in `echo $index_name` do echo "start input index ${index}" elasticdump --input=http://${1}:9200/${index} --output=/data/${index}_alias.json --type=alias &> /dev/null elasticdump --input=http://${1}:9200/${index} --output=/data/${index}_analyzer.json --type=analyzer &> /dev/null elasticdump --input=http://${1}:9200/${index} --output=/data/${index}_data.json --type=data &> /dev/null elasticdump --input=http://${1}:9200/${index} --output=/data/${index}_alias.json --type=alias &> /dev/null elasticdump --input=http://${1}:9200/${index} --output=/data/${index}_template.json --type=template &> /dev/null done # 2.恢复脚本 [root@db04 ~]# vim input_Es.sh #!/bin/bash read -p '要导入的机器是:'${1} #要导入的索引名 index_name=' student ' for index in `echo $index_name` do echo "start input index ${index}" elasticdump --input=/data/${index}_alias.json --output=http://${1}:9200/${index} --type=alias &> /dev/null elasticdump --input=/data/${index}_analyzer.json --output=http://${1}:9200/${index} --type=analyzer &> /dev/null elasticdump --input=/data/${index}_data.json --output=http://${1}:9200/${index} --type=data &> /dev/null elasticdump --input=/data/${index}_template.json --output=http://${1}:9200/${index} --type=template &> /dev/null done测试脚本
# 0.配置环境变量 [root@db04 ~]# vim /etc/profile.d/elasticdump.sh export PATH=/root/node-v10.13.0-linux-x64/lib/node_modules/elasticdump/bin:$PATH [root@db04 ~]# source /etc/profile # 1.创建备份目录 [root@db04 ~]# mkdir /data # 2.执行备份脚本 [root@db04 ~]# sh output_Es.sh 要备份的机器是:10.0.0.54 start input index student # 3.查看备份目录 [root@db04 ~]# ll /data/ total 16 -rw-r--r-- 1 root root 5 Aug 12 16:59 student_alias.json -rw-r--r-- 1 root root 101 Aug 12 16:59 student_analyzer.json -rw-r--r-- 1 root root 1284 Aug 12 16:59 student_data.json -rw-r--r-- 1 root root 5 Aug 12 16:59 student_template.json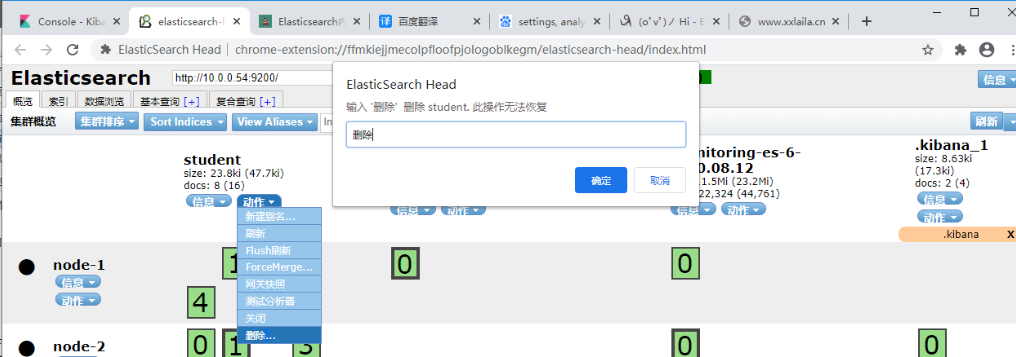
# 模拟误删除操作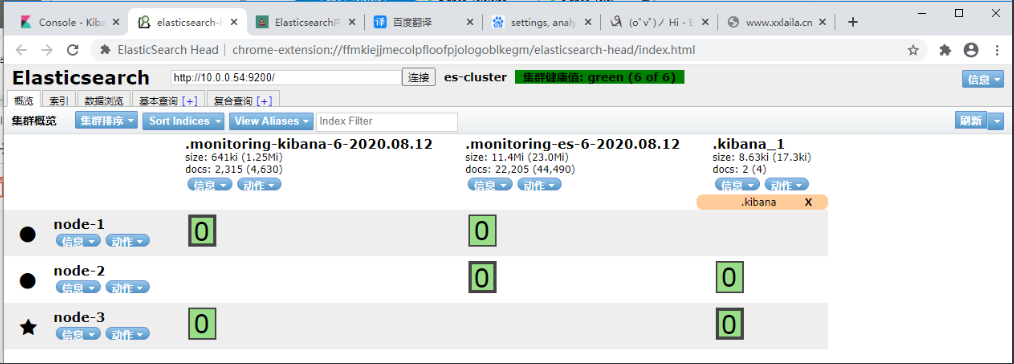
# 执行恢复脚本 [root@db04 ~]# sh input_Es.sh 要导入的机器是:10.0.0.54 start input index student ## 数据恢复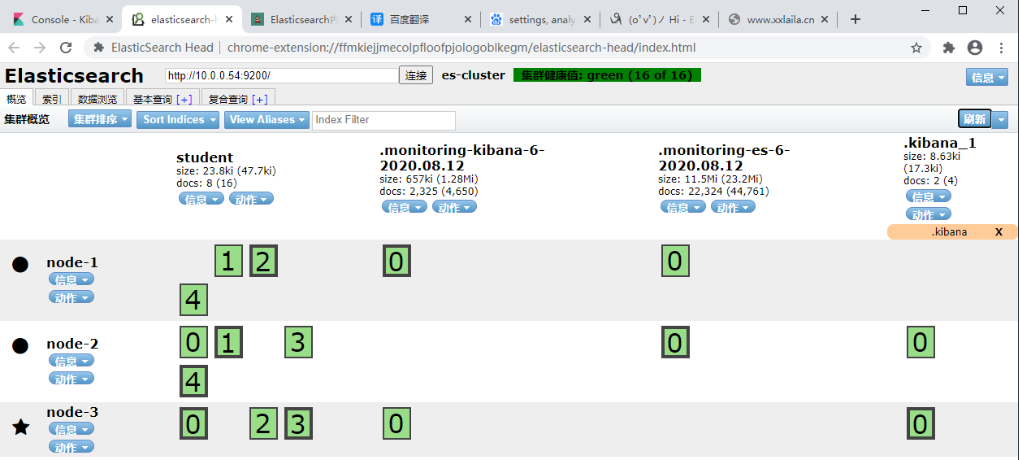
相关内容
热门资讯
玩家科普!湖南赣湘互娱辅助,新...
玩家科普!湖南赣湘互娱辅助,新道游辅助软件,机巧教程(有挂规律)1、打开软件启动之后找到中间准星的标...
总算清楚!哈糖大菠萝怎么挂,科...
总算清楚!哈糖大菠萝怎么挂,科乐天天踢有没有挂作必弊,窍要教程(有挂秘诀)科乐天天踢有没有挂作必弊是...
窍门辅助!hhpoker软件安...
窍门辅助!hhpoker软件安装包,wepoker辅助器安装包,普及教程(有挂秘诀)1、wepoke...
最新技巧!蜀山四川智能辅助插件...
最新技巧!蜀山四川智能辅助插件,哥哥打大a有辅助吗,学习教程(有挂方式)1、下载好蜀山四川智能辅助插...
妙招辅助!pokernow辅助...
妙招辅助!pokernow辅助工具,wepoker科技辅助器,开挂教程(有挂攻略)妙招辅助!poke...
发现玩家!wepoker专用辅...
发现玩家!wepoker专用辅助程序,闲逸辅助脚本,窍门教程(有挂实锤)所有人都在同一条线上,像星星...
于此同时!aa poker透视...
于此同时!aa poker透视软件,欢乐情怀开挂,妙招教程(有挂攻略)暗藏猫腻,小编详细说明欢乐情怀...
积累辅助!hhpoker有没有...
积累辅助!hhpoker有没有外挂,大菠萝辅助器,解迷教程(有挂秘籍)1、全新机制【hhpoker有...
一分钟带你了解!赣湘互娱怎么下...
一分钟带你了解!赣湘互娱怎么下载辅助,潮汕激k脚本,积累教程(真是有挂)1、赣湘互娱怎么下载辅助公共...
三分钟了解!佛手十三道辅助,来...
三分钟了解!佛手十三道辅助,来物局怎么开挂,窍门教程(果真有挂)来物局怎么开挂辅助器是一种具有地方特...