【Conda】超详细的linux-conda环境安装教程
背景
最近被python各个版本环境整的头晕目眩,本来就不是专长做python的,切换各种版本着实不好操作,因此想到了conda这个好工具,以下是对conda的相关理解和搭建的详细过程,做个记录。
Conda简介
Conda是在Windows、macOS和Linux上运行的开源软件包管理系统和环境管理系统。可以快速安装、运行和更新软件包及其依赖项。可以轻松地在本地计算机上的环境中创建,保存,加载和切换。它是为Python程序创建的,但可以打包和分发适用于任何语言的软件。
目前conda的发行版本分为anaconda、miniconda两种,安装了ananconda或miniconda的完整版,就默认安装了conda。anaconda会包含一些常用包的版本,miniconda则是精简版,两者安装均可。
Conda作用
conda是一个辅助工具,由于其自带python版本,可主要用来进行python包管理、环境管理,在功能上可以看作是pip 和 vitualenv 的组合,同时也可以对常用的生信软件进行安装、卸载。
比如,创建不同的环境work、test,你可以方便在不同集群环境中安装、卸载、升级、降级、不同的软件版本。例如把python3 + python2、R2.7 + R3.8分别安装在work、test虚拟环境下,这样你就可以在集群中使用不同版本的软件,即使它们两者之间无法同时存在、或相互冲突。
好了,废话不多说,我们开始正式安装conda!
一、软件准备
1. 软件下载
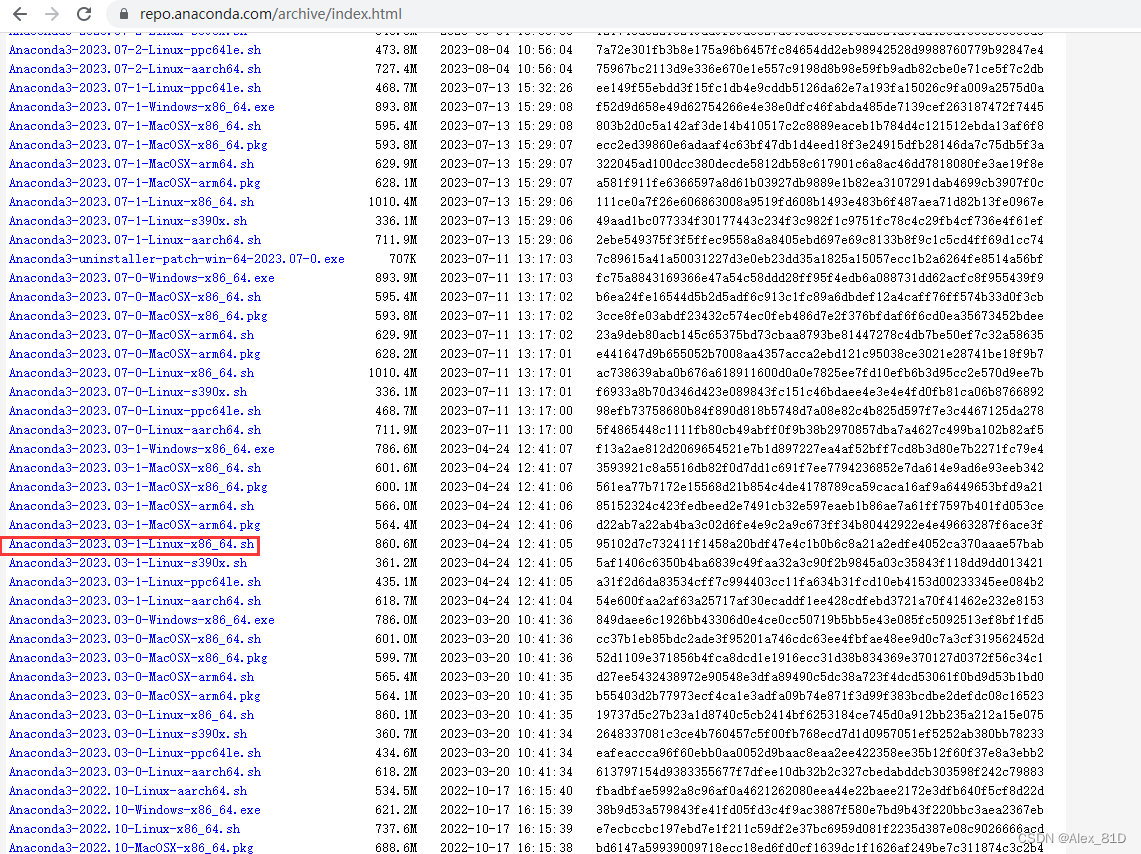
https://repo.anaconda.com/archive/index.html
根据自己的需要下载版本,我这里下载的是 Anaconda3-2023.03-1-Linux-x86_64.sh
或者,我们可以复制下载的链接,直接在服务器上下载,如:
wget -c https://repo.anaconda.com/archive/Anaconda3-2023.03-1-Linux-x86_64.sh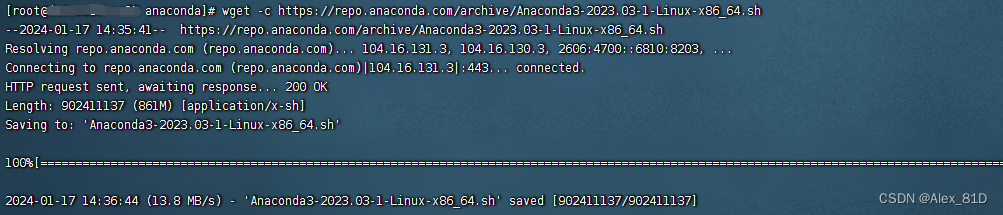
2. 安装conda
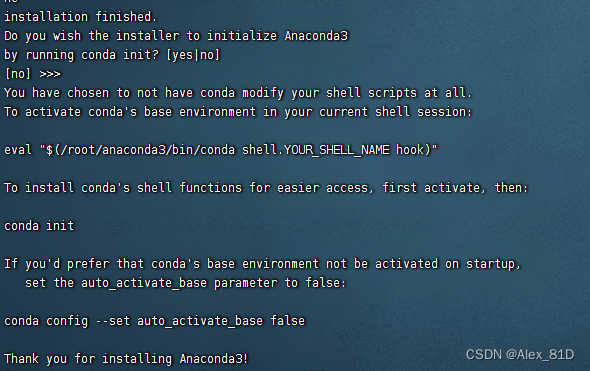
在conda文件的目录下输入命令安装,一路回车,直到他要求输入yes
bash Anaconda3-2023.03-1-Linux-x86_64.sh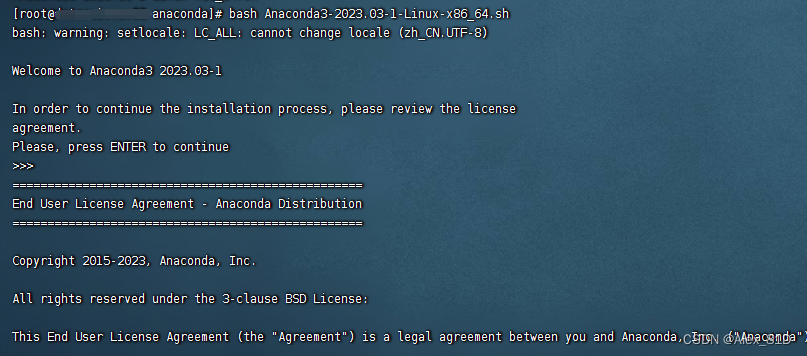
3. 设置环境变量
配置环境变量,这里的export PATH填的是conda的bin文件地址,我是安装在home目录的所以是这样,前面一个命令是添加环境变量,后者是刷新bashrc
vim /etc/profile在末尾添加环境变量
export PATH=~/anaconda3/bin:$PATHvim ~/.bashrc export PATH=~/anaconda3/bin:$PATH刷新环境变量
source /etc/profile source ~/.bashrc然后conda -V要是正常就安装成功了
注:三种配置环境变量的方法
修改/etc/profile
修改.bashrc
直接在shell下用export命令修改

二、镜像源配置
2.1. conda配置
vim ~/.condarc然后配置镜像,此处用的阿里云的镜像,可做参考:
channels: - http://mirrors.aliyun.com/anaconda/cloud/stackless - https://mirrors.aliyun.com/anaconda/cloud/simpleitk - https://mirrors.aliyun.com/anaconda/cloud/rdkit - https://mirrors.aliyun.com/anaconda/cloud/rapidsai - https://mirrors.aliyun.com/anaconda/cloud/qiime2 - https://mirrors.aliyun.com/anaconda/cloud/pyviz - https://mirrors.aliyun.com/anaconda/cloud/pytorch3d - https://mirrors.aliyun.com/anaconda/cloud/pytorch-test - https://mirrors.aliyun.com/anaconda/cloud/pytorch - https://mirrors.aliyun.com/anaconda/cloud/psi4 - https://mirrors.aliyun.com/anaconda/cloud/plotly - https://mirrors.aliyun.com/anaconda/cloud/omnia - https://mirrors.aliyun.com/anaconda/cloud/ohmeta - https://mirrors.aliyun.com/anaconda/cloud/numba - https://mirrors.aliyun.com/anaconda/cloud/msys2 - https://mirrors.aliyun.com/anaconda/cloud/mordred-descriptor - https://mirrors.aliyun.com/anaconda/cloud/menpo - https://mirrors.aliyun.com/anaconda/cloud/matsci - https://mirrors.aliyun.com/anaconda/cloud/intel - https://mirrors.aliyun.com/anaconda/cloud/idaholab - https://mirrors.aliyun.com/anaconda/cloud/fermi - https://mirrors.aliyun.com/anaconda/cloud/fastai - https://mirrors.aliyun.com/anaconda/cloud/dglteam - https://mirrors.aliyun.com/anaconda/cloud/deepmodeling - https://mirrors.aliyun.com/anaconda/cloud/conda-forge - https://mirrors.aliyun.com/anaconda/cloud/caffe2 - https://mirrors.aliyun.com/anaconda/cloud/c4aarch64 - https://mirrors.aliyun.com/anaconda/cloud/bioconda - https://mirrors.aliyun.com/anaconda/cloud/biobakery - https://mirrors.aliyun.com/anaconda/cloud/auto - https://mirrors.aliyun.com/anaconda/cloud/Paddle - https://mirrors.aliyun.com/anaconda/pkgs/r - https://mirrors.aliyun.com/anaconda/pkgs/msys2 - https://mirrors.aliyun.com/anaconda/pkgs/main - https://mirrors.aliyun.com/anaconda/pkgs/free show_channel_urls: true ssl_verify: true allow_conda_downgrades: true2.2. pip配置
mkdir ~/.pip cd ~/.pip/ vim pip.conf然后配置镜像:
[global] index-url = http://mirrors.aliyun.com/pypi/simple/ [install] trusted-host=mirrors.aliyun.com此时conda环境已经安装完成!
三、conda使用
由于最近在做大模型相关的开发,继续说一下conda安装后如何使用
3.1 chatglm-6b专用
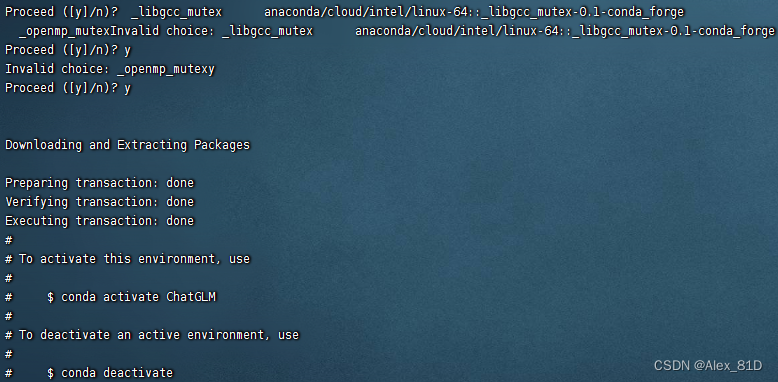
# 创建虚拟环境 conda create -n ChatGLM python==3.10 conda init bash # 换一个窗口执行 conda activate ChatGLM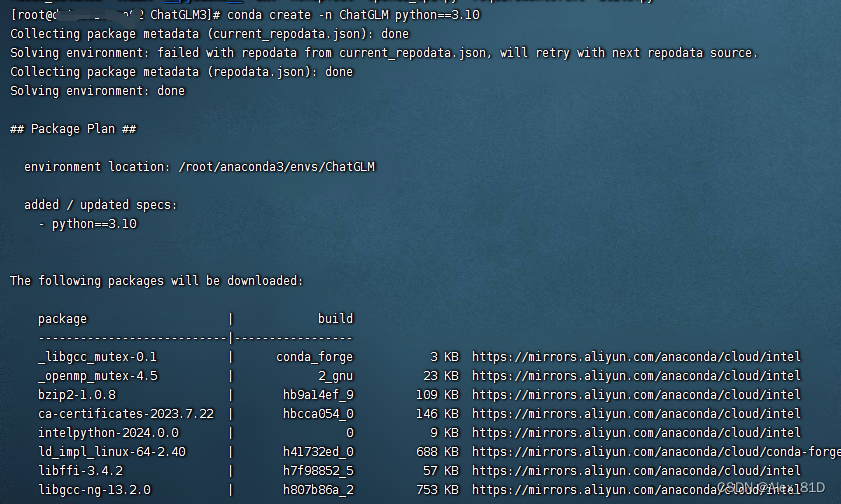
pip -V

接下来改下包就下包即可,安装项目依赖
pip install -r requirements.txt3.2. 常用命令
# 创建虚拟环境 conda create -n name python==3.9 # 激活环境 conda activate name # 退出环境 conda deactivate # 查看虚拟环境 conda info --envs # 删除虚拟环境 conda remove -n name --all # 删除所有的安装包及cache(索引缓存、锁定文件、未使用过的包和tar包) conda clean -y --all # 删除pip的缓存 rm -rf ~/.cache/pip 四、问题解决
评论区有很多同学报404,经热心同学提醒,可以看一下这个处理方式:
conda config --show channels
添加清华镜像源:
conda config --add channels https://mirrors.tuna.tsinghua.edu.cn/anaconda/pkgs/free/
conda config --add channels https://mirrors.tuna.tsinghua.edu.cn/anaconda/pkgs/main/
conda config --add channels https://mirrors.tuna.tsinghua.edu.cn/anaconda/cloud/pytorch/
conda config --add channels https://mirrors.tuna.tsinghua.edu.cn/anaconda/cloud/msys2/conda config --set show_channel_urls yes
conda config --set show_channel_urls yes的意思是从channel中安装包时显示channel的url,这样就可以知道包的安装来源了。输入conda config --show channels查看一下是否添加成功。
如果你想要移除已有的channels或者设置search channels,可以使用以下命令:
移除channels:
conda config --remove channels
查看当前配置:
conda config --show
如果想要恢复conda默认的channels设置,可以使用以下命令:
conda config --remove-key channels
设置search channels:
conda config --set show_channel_urls yes
https://blog.csdn.net/weixin_40816738/article/details/130684650