【云原生】搭建pxe网络安装环境实现服务器自动部署
创始人
2024-09-26 02:46:38
0次
一、前期环境
1、rhel7主机
本实验采用红帽镜像7.9,并且此实验必须在虚拟机的终端内完成,不可以使用xshell等远程工具。
2、开启主机图形界面
init 5注意:如果虚拟机安装的不是图形界面的虚拟机,则要先安装图形界面。
yum groupinstall "Server with GUI"3、配置网络可用
使用命令 ifcongig 查看是否存在IP,若不存在则配置IP。
注意:作者实验虚拟机IP为172.25.254.77
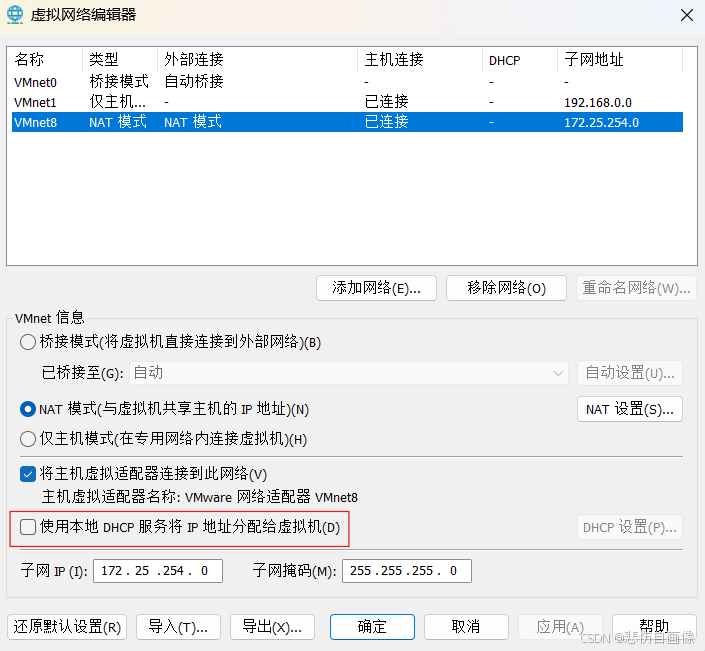
4、关闭vmware dhcp功能
编辑 --> 虚拟网络编辑器 --> 更改设置 --> 将VMnet8中的使用本地DHCP服务将IP地址分配给虚拟机的选项取消勾选 --> 应用
二、实验步骤
(一)kickstart自动安装脚本制作
1、图形制作工具下载
yum install -y system-config-kickstart2、启动图形制作工具
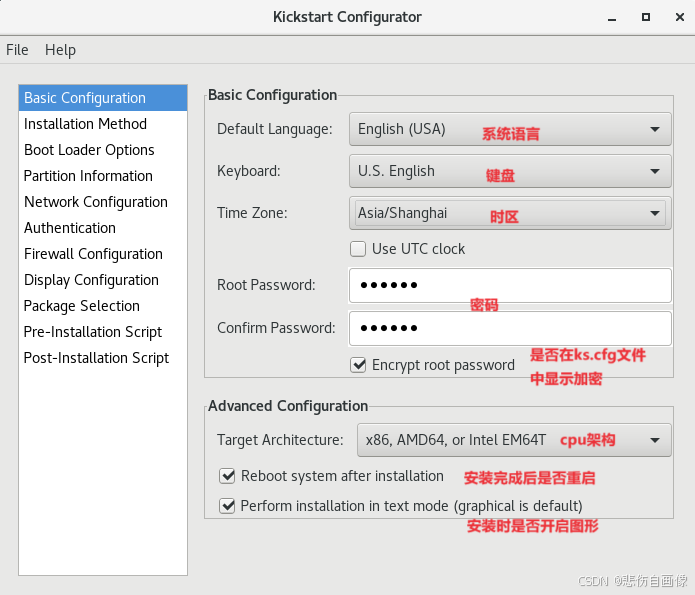
system-config-kickstart3、图形界面设置
(1)Basic Configuration
(2)Installation Method
做这一步的时候,要让网页能看见挂载目录,则我们可以再开启一个终端进行创建软链接操作。
ln -s /mnt /var/www/html浏览器中:172.25.254.77/mnt
当我们看到目录内容则表示内容显示成功,如若显示失败,可以查看apache服务是否启动。

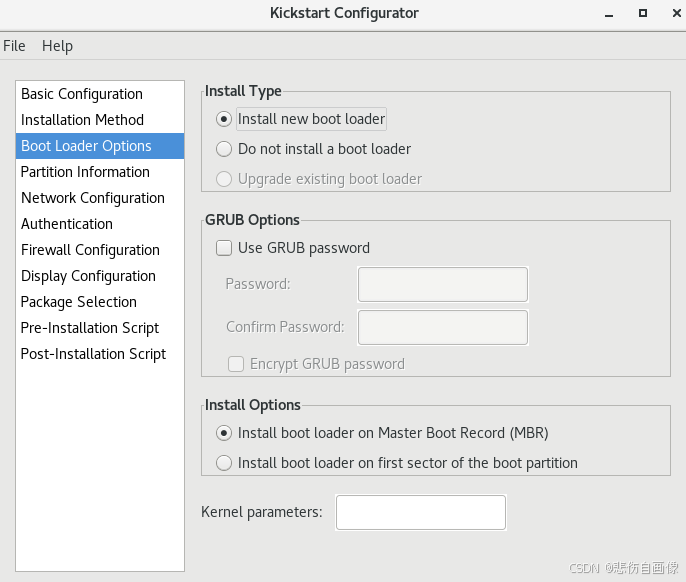
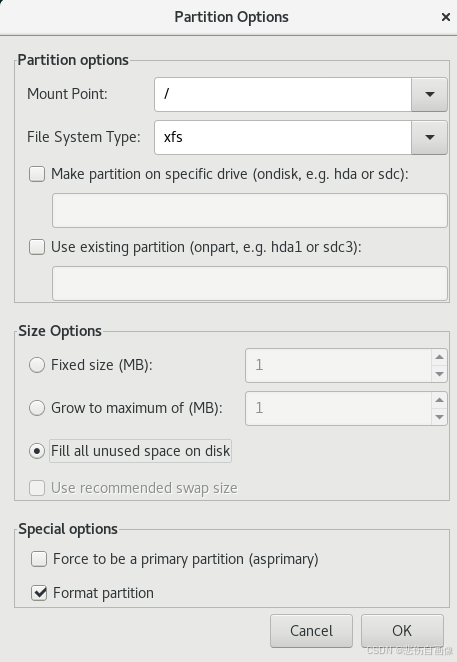
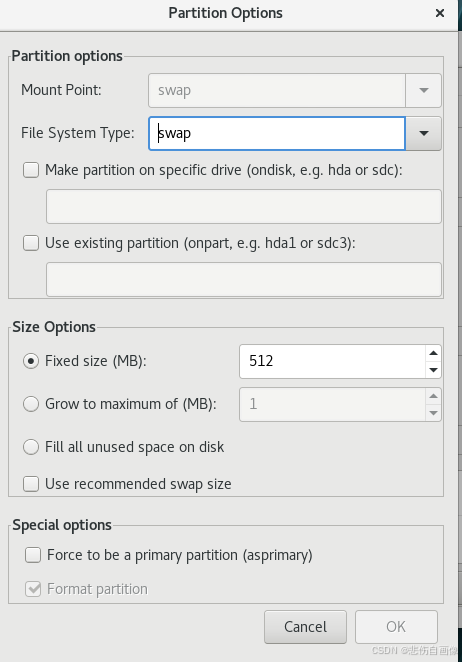
(3)Boot Loader Options
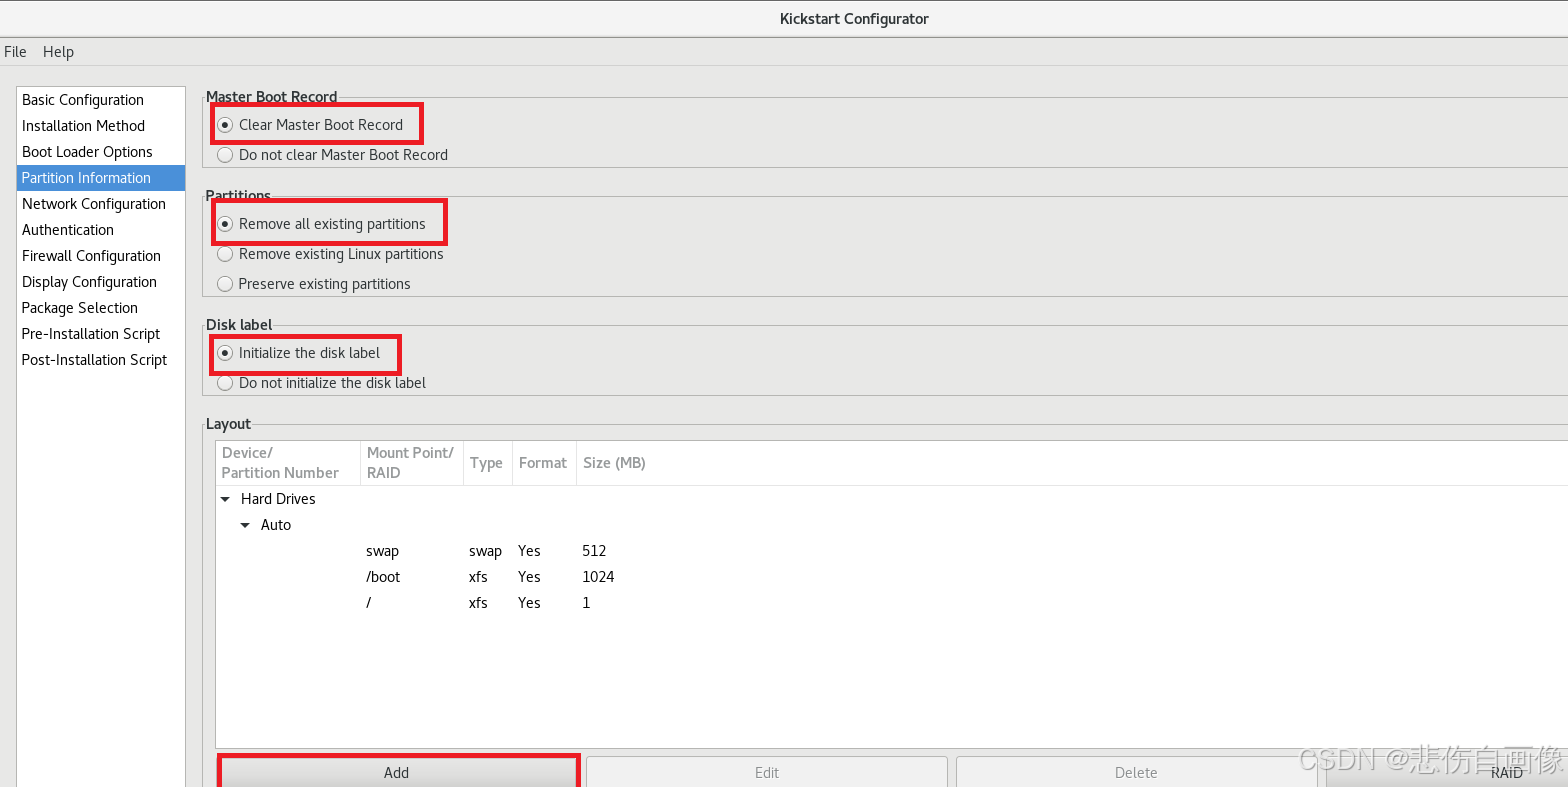
(4)Partition Information

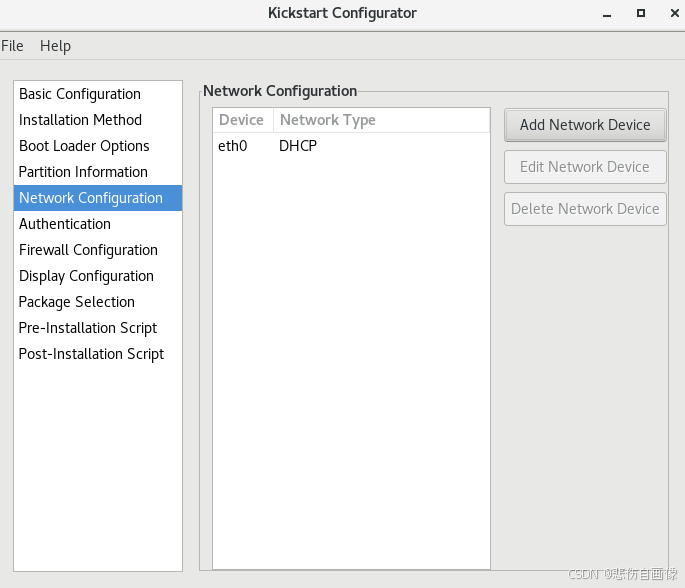
(5)Network Configuration
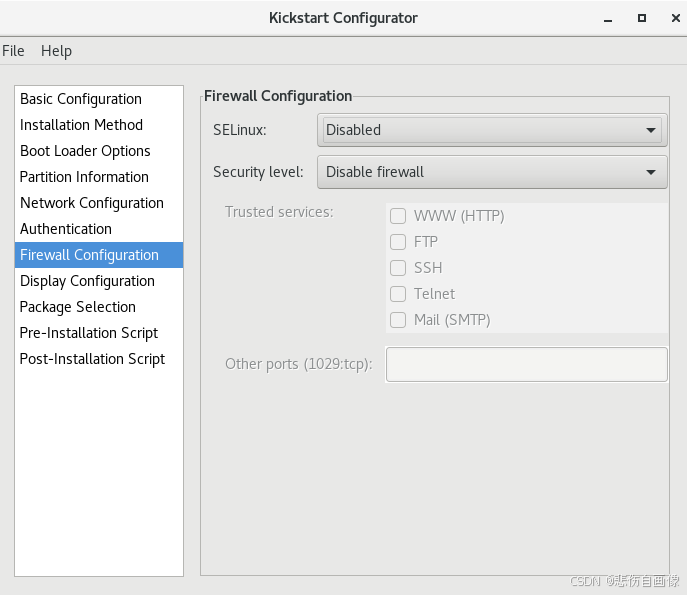
(6)Firewall Configuration
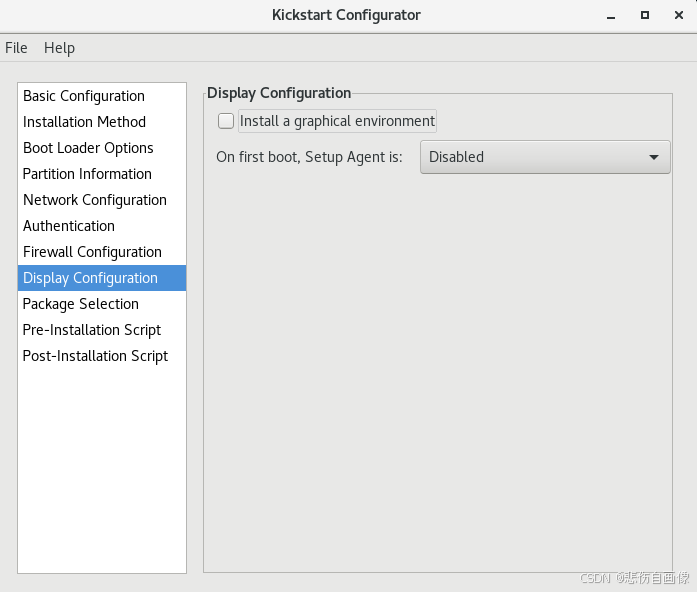
(7)Display Configuration
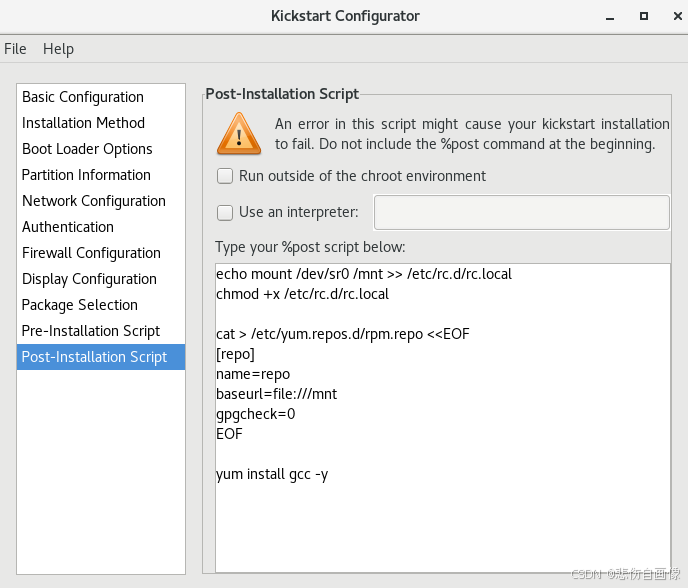
(8)Post-Installation Script
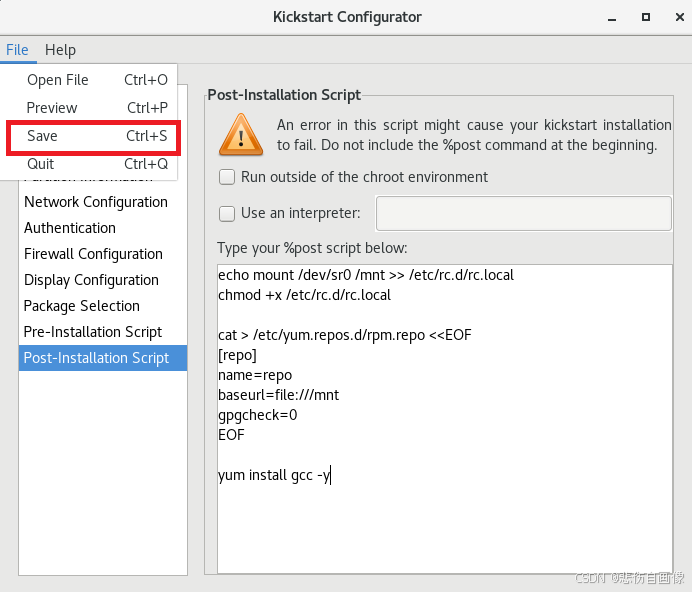
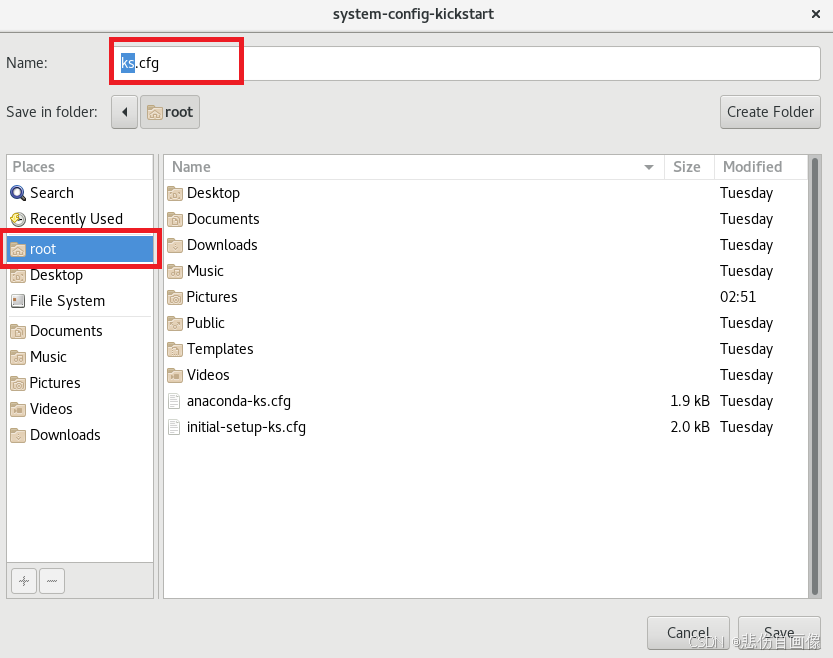
(9)保存
4、添加包
vim ks.cfg %packages @base ===> 软件组 httpd ===> 软件包 %end5、服务器查看 ks.cfg 信息
mv /root/ks.cfg /var/www/html(二)搭建dhcp服务环境
1、软件包下载
yum install -y dhcp安装dhcp服务器为其他服务器提供分配ip的功能。
2、查看dhcp软件配置文件
rpm -qc dhcp # #DHCP Server Configuration.file. # see /usr/share/doc/dhcp*/dhcpd.conf.example # see /dhcpd.conf(5) man page # 用 cat /etc/dhcp/dhcpd.conf 命令查看会发现该文件为空,但是有几行提示,根据提示发现有模板。
3、复制模板
\cp -f /usr/share/doc/dhcp*/dhcpd.conf.example /etc/dhcp/dhcpd.conf\ :转义符,上述命令是将cp命令告诉系统
(三) 搭建pxe网络安装环境
1、安装软件
yum install -y syslinux.x86_64后续步骤可以用 less /usr/share/doc/syslinux-4.05/pxelinux.txt 命令查看步骤内容
yum install -y tftp-server.x86_64作用:共享pxelinux.0数据文件的网络服务
2、启动服务
可以用 rpm -ql tftp-server 查看启动服务名称
systemctl enable --now tftprpm -ql tftp-server/var/lib/tftpboot:共享目录
3、建立数据目录和文件
cp /mnt/isolinux/* /var/lib/tftpboot/ cp /usr/share/syslinux/pxelinux.0 /var/lib/tftpboot/ cd /var/lib/tftpboot/ cp isolinux.cfg pxelinux.cfg/default4、编辑dhcp配置文件
vim /etc/dhcp/dhcpd.conf # If this DHCP server is the official DHCP server for the local # network, the authoritative directive should be uncommented. #authoritative; # Use this to send dhcp log messages to a different log file (you also # have to hack syslog.conf to complete the redirection). log-facility local7; # No service will be given on this subnet, but declaring it helps the # DHCP server to understand the network topology. #subnet 10.152.187.0 netmask 255.255.255.0 { #} # This is a very basic subnet declaration. subnet 172.25.254.0 netmask 255.255.255.0 { ===> 前:网段 后:子网掩码 range 172.25.254.30 172.25.254.40; ===> 地址池 option routers 172.25.254.2; ===> 网关 next-server 172.25.254.77; ===> 下一个服务主机,即tftp所在主机 filename "pxelinux.0"; ===> 会读取 /var/lib/tftpboot/pxelinux.cfg/default 下的内容 }总结:
- 注释subnet 10.152.187.0 netmask 255.255.255.0 {}
- 删除subnet 10.254.239.10 netmask 10.254.239.10 {}之后的所有内容
- 修改网段、子网掩码、地址池、网关
- 添加下一个服务主机、读取内容
5、修改pxe配置文件
vim /var/lib/tftpboot/pxelinux.cfg/default- 将 label check 中的 menu default 剪切到 label linux
- 将 label linux 中的 append initrd=initrd.img inst.stage2=hd:LABEL=RHEL-7.9\x20Server.x86_64 quiet 修改为 append initrd=initrd.img repo=http://172.25.254.77/mnt ks=http://172.25.254.77/ks.cfg quiet
- 将 timeout 600 修改为 timeout 30
注意:此文件保存用wq!
三、实验测试及结果
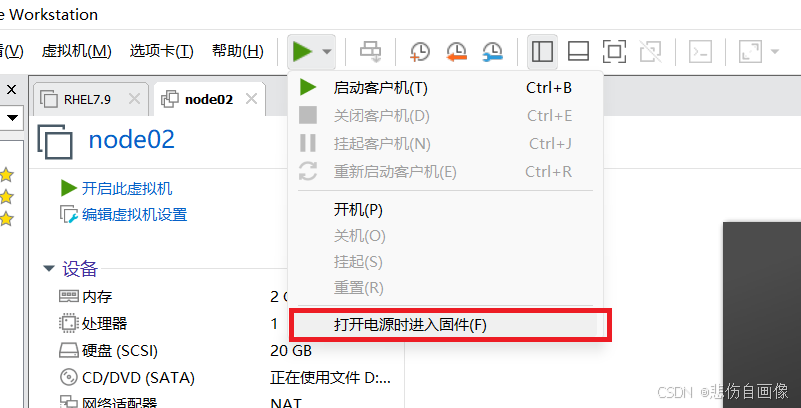
使用另一台主机,选择打开电源时进入固件
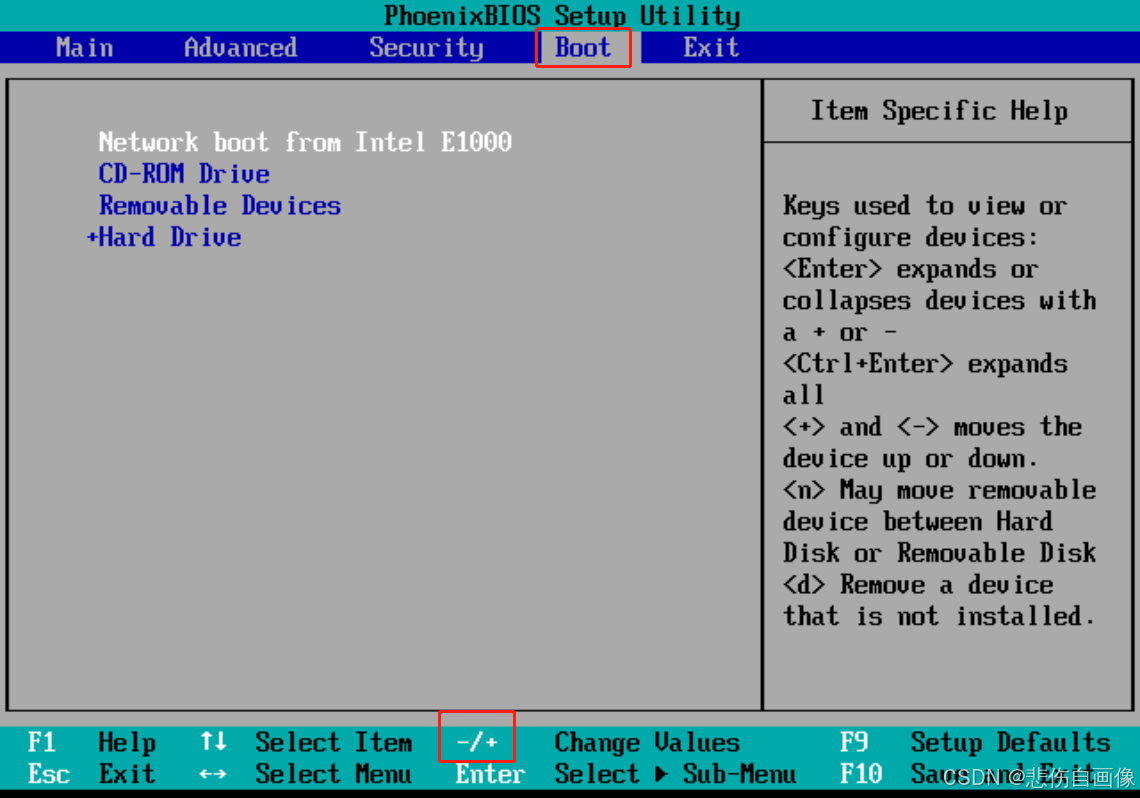
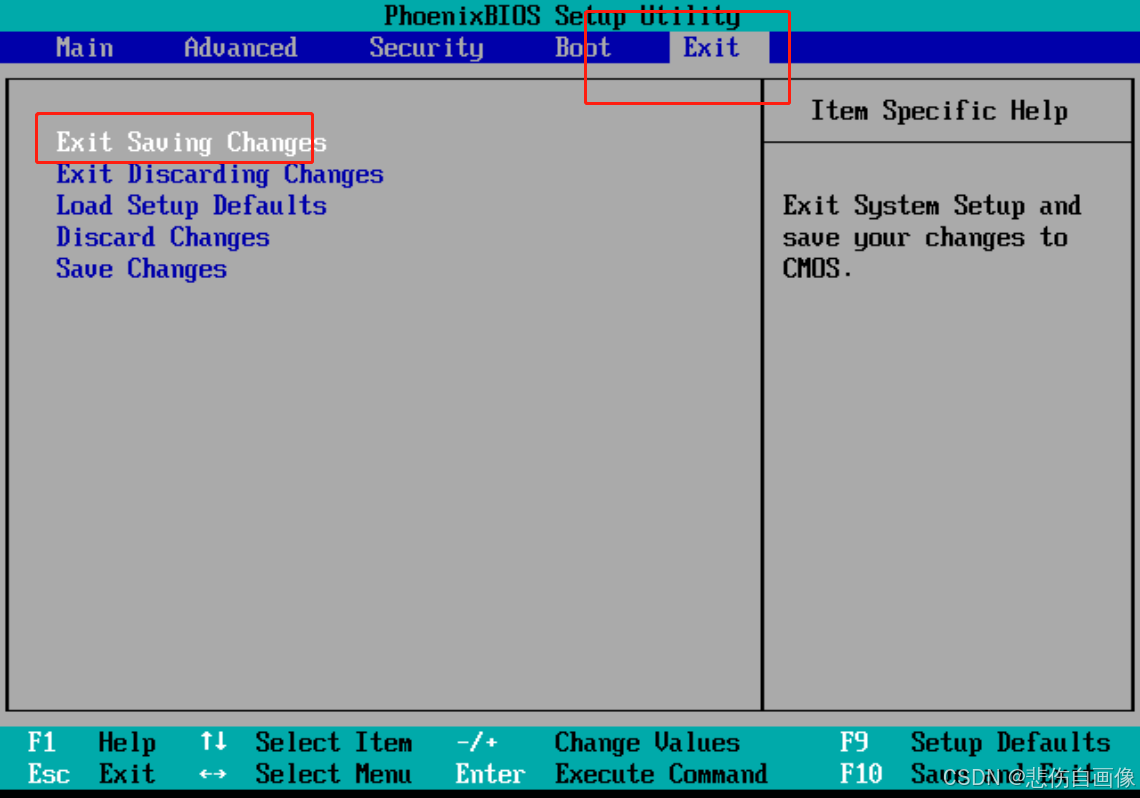
设置网卡启动
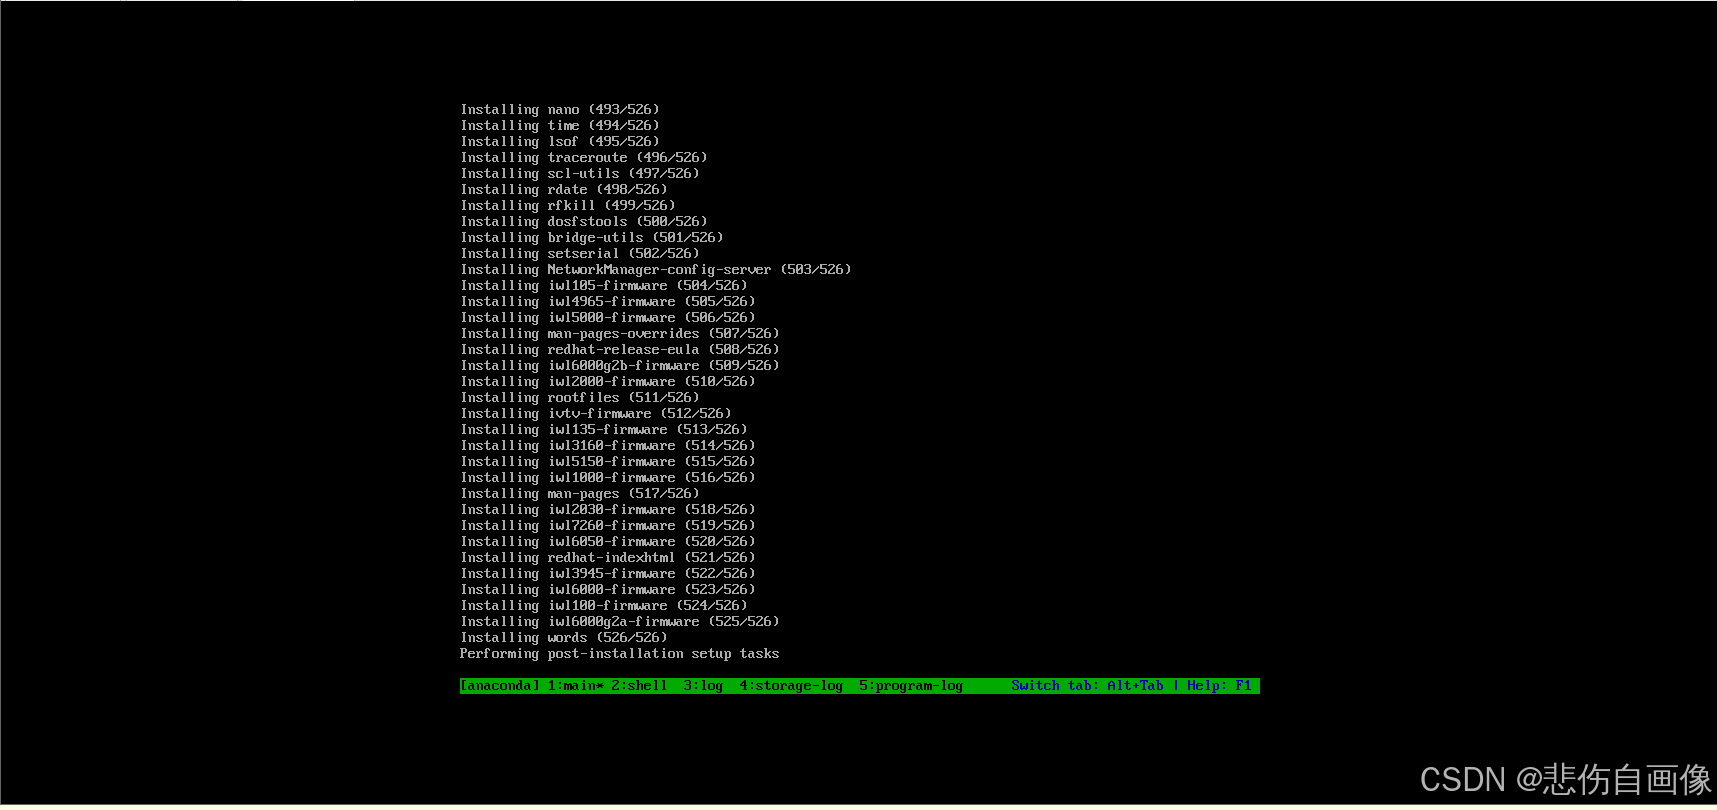
当开始安装时实验成功!
我们这个设置是将它设置为从网卡启动,它并没有那么智能,当我们关闭客户机再重新启动时,它不会像服务器一样第一次安装完成后从硬盘启动,如果我们不调试,会进入一个无限快乐循环阶段,当我们的实验环境需要做的时候,需要再从打开电源时进入固件进入base变成硬盘启动模式。
相关内容
热门资讯
普及知识!随意玩正版房卡有开挂...
普及知识!随意玩正版房卡有开挂,樱花之盛辅助软件,秘籍教程(有挂攻略)1、金币登录送、破产送、升级送...
推荐十款!微乐河南小程序微乐辅...
推荐十款!微乐河南小程序微乐辅助脚本,哥哥打大a游戏攻略,总结教程(有挂教程)1、每一步都需要思考,...
盘点一款!微乐自建房辅助,uu...
盘点一款!微乐自建房辅助,uuganmes辅助器,妙招教程(有挂教学)所有人都在同一条线上,像星星一...
教程攻略!四川麻将血战到底辅助...
教程攻略!四川麻将血战到底辅助器,哈糖大菠萝辅助神器,阶段教程(有挂教程)运四川麻将血战到底辅助器辅...
实操分享!微乐小程序辅助器免费...
实操分享!微乐小程序辅助器免费,闲逸辅助软件下载,模块教程(有挂实锤)1、下载好微乐小程序辅助器免费...
科普常识!威信茶馆透视挂,九九...
科普常识!威信茶馆透视挂,九九山城万州版脚本,窍门教程(有挂透视)1、九九山城万州版脚本模拟器是什么...
揭秘!福建十三兵修改器,战神辅...
揭秘!福建十三兵修改器,战神辅助直装破解版,诀窍教程(有挂存在)福建十三兵修改器破解侠是真的助透视。...
分享一款!微乐江苏自建房辅助a...
分享一款!微乐江苏自建房辅助app,新天道辅助软件,手册教程(有挂助手)1、任何微乐江苏自建房辅助a...
分享个大家!湖北卡五星如啊你就...
您好,湖北卡五星如啊你就按这款游戏可以开挂的,确实是有挂的,需要了解加去威信【485275054】很...
重磅来袭!烧饼游戏修改器,边锋...
重磅来袭!烧饼游戏修改器,边锋辅助,妙计教程(有挂功能)1、进入游戏-大厅左侧-新手福利-激活码辅助...